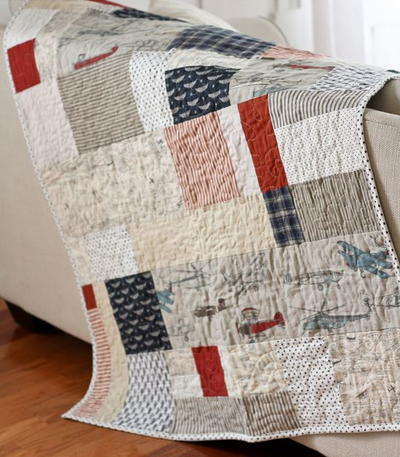
Stamp Block Quilt Project
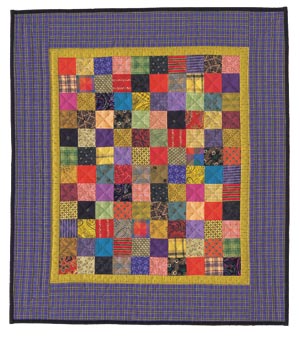
40 different small blocks of fabric make up this stamp quilt from C&T Publishing. With so many different fabrics, you won't need a color scheme and can use up any scraps from your fabric stash.
This project comes form Gai Perry's book Color From the Heart.
Fabrics:
40 different fabrics. (You will only need to cut about 3 or 4 squares to 2″ x 2″ from each fabric, so look through your scraps first.) Concentrating on prints with a few solids thrown in, here's how to choose your fabrics:
- Small, medium, and large prints
- Light, medium, and dark values
- A variety of fabric patterns (stripes, plaids, florals, textures, etc.)
- Include at least 1 yellow and 1 gold print. Also include a bright red and a dark red, and 2 turquoise fabrics.
You will need a half yard of an outer border fabric and an eighth yard of an inner border fabric, but wait until the main body of the quilt is complete before making your selections.
Cut 3 squares 2″ x 2″ from each of the 40 fabrics for a total of 120 squares. Put all the squares in a lunch-size paper bag and shake it to mix the fabrics.
Begin the Design:
Stand in front of your design board and without looking, reach into your bag, take out 1 square, and place it on the upper left-hand corner of the design board. Working from left to right, repeat this process until you have 10 squares across the top row. Place the squares, just touching, so no white flannel shows through.
Following the same procedure, add 11 more rows (10 squares across) for a total of 12 rows.
You must practice rigid self-control and put the squares up just as they come out of the bag. No peeking!
If you try rearranging the squares at this point, you will defeat the purpose of the exercise. The only reason to exchange a square is when the same fabric appears next to itself.
Critique
When all 120 squares are positioned on your design board, stand a few feet away—or use a reducing glass—to critique your Postage Stamp quilt.
Ask the following questions about your design:
Is there a pleasing balance of colors? Sometimes several closely related hues will be grouped together and you will have to decide whether they make the quilt look awkward-interesting or awkward-unbalanced. Look for happy accidents like colors or prints that, until now, you would never dream of putting together–and surprisingly, they look good!
Have you noticed how the red, yellow, and turquoise squares make your quilt sparkle and look lively? Do you think you need to add a few more of them?
Can you detect a theme to your quilt? Does it look like folk art? Is it traditional, contemporary, or ethnic? Sometimes the style of your quilt will be a candid reflection of your taste in fabrics.
Do you think you can make the quilt look better?
If you answered yes to the last question, now is the time to make some changes. Do a little rearranging or add some new squares of fabric and delete others. I caution you not to make any more changes than necessary. If you do, the spontaneous charm of the quilt will be lost. Let your intuition tell you when the quilt “feels right.”
When you are pleased with the arrangement of squares, it’s time to sew your Postage Stamp quilt.
Sewing Instructions
1. Start by sewing the bottom row of squares together using a 1/4″ seam allowance. Press all the seam allowances in this first row toward the left.
2. Sew the squares together in the row directly above the bottom row and this time, press all the seam allowances to the right.
3. Working toward the top of the quilt, continue sewing rows of squares together and alternate the pressing direction of the seam allowances from row to row.
4. When all the squares are sewn into rows, join the rows. (Note: Pinning at each seam allowance juncture will produce nicely aligned squares and perhaps save some ripping out and resewing.) Press all these seam allowances either up or down. Pressing them in a single direction will make the quilt top lay flatter.
Borders
Look at your quilt and decide which 2 colors you want to emphasize. A general rule of thumb would be to choose a light color fabric (print or solid) for the inner border and a darker or brighter print for the outer border.
1. Cut the inner border strips 1 1/4″ wide.
2. Cut the outer border strips 3 1/2″ wide.
3. Attach the borders.
Once the quilt top is assembled, it’s ready for quilting. Refer to your reference of choice for quilting and finishing instructions.
Happy Quilting!
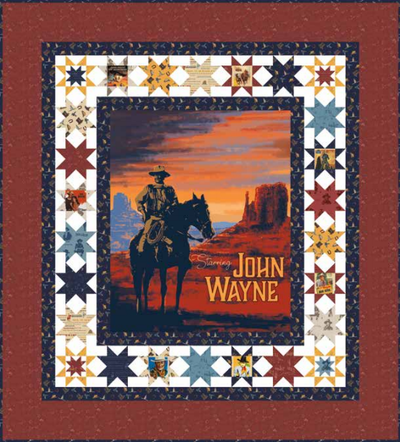
Read NextThe Duke John Wayne Quilt Pattern
Your Recently Viewed Projects

Thanks for your comment. Don't forget to share!
narjismurtaza 5478 192
Mar 21, 2016
I have never done quilting before but this quilt is so fascinating that I want to try making this. I was wondering about the finished size but thanks to Lacey J 1204 she has worked that out. I agree that finished size will be too small but what if we increase the size of each piece from 2 X 2 inches to 4 X 4 inches. It will increase the size to 43 X 48 inches.
Kaylee
Mar 21, 2016
@narjismurtaza 5478 192 you could increase the border size, as well, if you are looking to make this quilt pattern larger. Thanks for the suggestion! -Kaylee, Editor of FaveCrafts.com
laceyj1204
Sep 21, 2012
I too would like to know the final size because according to my calculations it should be 22 1/2 inches wide and 25 1/2 inches long not counting the batting or allowing for shrinkage after quilting. If that's the case then the quilt is barely big enough for my Pommeranian to sleep under.
laceyj1204
Sep 21, 2012
Sorry, please substitute the word "binding" for "batting" in my previous comment. I was having a space cadet moment. Thank you.
pamreaves61 873501 2
Jun 30, 2011
i love working on quilts like this. I USE OF SCRAPS FROM MY SCRAPE BAG WHICH HAS SOME OF MY FAVORITE FABRICS THAT YOU JUST CANT THROW AWAY NO MATER HOW SMALL
SalukiBlues
Mar 19, 2011
What FUN I can't wait to get started! Gai Perry, you speak my language. Just reading this made me happy!
ELHart
Jan 18, 2010
This looks like a good little quilt to get started quilting again. I am looking forward to making it. Thank you so much for the gentle 'nudge' I needed ! Esther Hart
Report Inappropriate Comment
Are you sure you would like to report this comment? It will be flagged for our moderators to take action.
Thank you for taking the time to improve the content on our site.