Polymer Clay Chocolates
Who doesn't love a sweet treat? Make Polymer Clay Chocolates from Candace Jedrowicz - this free craft tutorial is fun and guilt-free!
Materials:
- Empty chocolate box (start eating!)
- Aleene’s Original Tacky Glue
- Sponge brush
- Any metallic rubbing compound like Rub N Buff
- Brown and dark brown polymer clay
- Chocolate paper cups
- Pasta machine or rolling pin
- Tissue blade or craft knife
- Hot glue gun
- Red marking pen or red acrylic paint
- Variety of gems, earring parts, letter brads, etc.
- Wide wired ribbon
- Focal photo for the lid
- Candle and matches
- Paper towel and/or wet wipes
- Optional – Polymer Clay Chocolate Hump Molds for molding your chocolates available at the Cool2Craft Marketplace
Instructions:
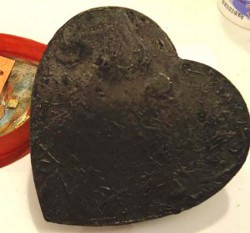
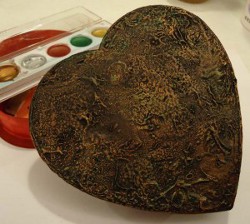
- My box had a bow on the front, so I removed it. Next, I transformed the box lid with the Aleene’s Burnt Brown Bag technique.
- After you use a paper towel or wet wipe to clean off the soot, it should look similar to this.
- I used copper and green metallic paste, skimming the surface and touching the highlights.
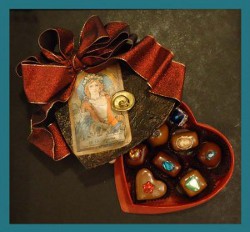
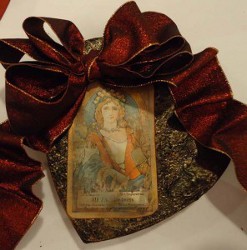
- I used a Tarot card – The Empress – as the focal point for the lid. I’m appreciating her archetypal symbolism. I “aged” the card with sandpaper and a copper stamp pad. As an artist, I aged myself the same way! This rich and sparkly ribbon was the perfect accent to the image. If you are creating a self portrait, use an image that resonates with you. It could be a photo of you, or something from a magazine, etc.
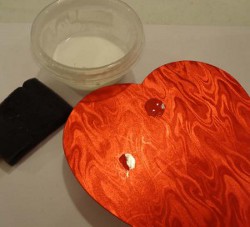
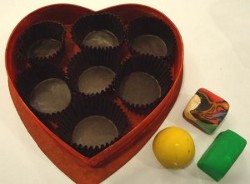
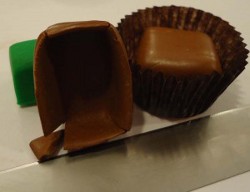
- Paint the box base with red acrylic or marker. Or finish it in whatever finish you like. I loved the velvety look of the marker! I used these polymer clay hump molds to get consistently shaped chocolate pieces. You can make your own or purchase mine at the Cool2Craft Marketplace. Put enough chocolate papers in to fill the box. That’s how many chocolate pieces you’ll need to make.
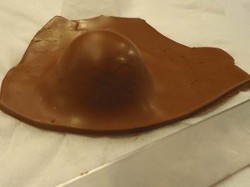
- Roll out a chunk of polymer clay large enough to cover the hump mold about 1/8″ thick. Put a tissue or piece of tissue paper over the hump mold (so it will release easily) and lay the rolled out clay over it. Gently stretch the clay down over the mold until it touches your work surface. Cut away the excess clay and remove it carefully. Hold the shape as you would hold a cracked robin’s egg – very carefully. Continue to trim the clay until it looks just right. The very bottom does not need to be perfect. Set the piece in a chocolate cup to test the look.
- The square and rectangle shapes will work best if you miter the corners. Use a tissue blade or craft knife to cut a small triangle from each corner. Put the new edges together and blend carefully.
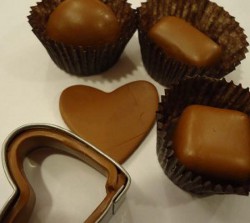
- I used a cookie cutter to create the heart shaped chocolate. You could use any shape at all. Cut the top and then cut a strip to wrap around the inside of the cutter to shape the chocolate walls. Remove the strip from the cutter and put the top on. Gently blend the top edges over the sides. Bake the clay according to the directions.
- Brush the chocolates with a satin finish sealer if desired.
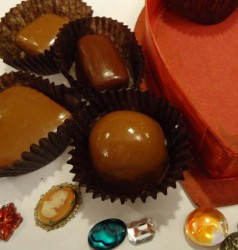
- Glue the chocolate shapes in their cups and move them around in the box until they look just right. Use the hot glue gun to secure them in place. I used the glue gun to secure the ribbon ends under the lid, as well.
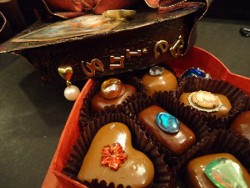
- Use every surface of the box that will be visible in the finished piece.
Read NextHow to Make Mokume Gane Polymer Clay