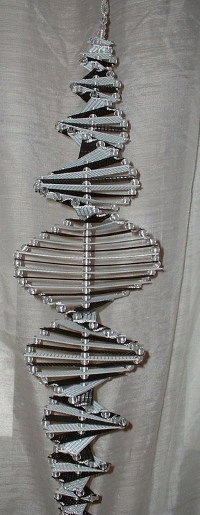
Garden Wind Spinner from Plastic Canvas
Dress up your garden by making this garden wind spinner from plastic canvas from Amy Lynn. Making wind spinners is fun, but hanging them in your garden will delight you daily! This wind spinner is in dark neutrals to match any garden.

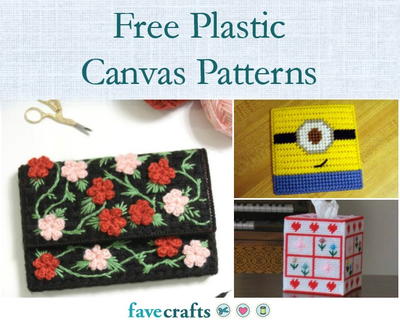
Find this craft and more plastic canvas projects in 25 Free Patterns for Plastic Canvas.
Materials:
- 1 pair of scissors
- 1 yarn needle
- 140 clear "pony beads"
- 85 black "pony beads" (or whatever color you prefer)
- 2 sheets of plastic canvas any color you wish
- 1 25 inch wire
- 1 silver metallic cord or whatever color you wish
Instructions:
- We will need to start with cutting the pieces. For this example we will be using white and black as the colors. Simply change those to whatever color you wish to create your wind spinner in.
- Black pieces: Cut out 2 5 square by 5 square pieces. Cut out 2 5 square by 7 square piece. Cut out 2 5 square by 9 square pieces. Cut out 2 5 square by 11 square pieces. Cut out 2 5 square by 13 square pieces. Cut out 2 5 square by 15 square pieces. Cut out 2 5 square by 17 square pieces. Cut out 2 5 square by 19 square pieces. And so on until you reach 41. Each strip is 2 holes larger than the one before it.
- White pieces: Cut out 2 5 square by 5 square pieces. Cut out 2 5 square by 7 square piece. Cut out 2 5 square by 9 square pieces. Cut out 2 5 square by 11 square pieces. Cut out 2 5 square by 13 square pieces. Cut out 2 5 square by 15 square pieces. Cut out 2 5 square by 17 square pieces. Cut out 2 5 square by 19 square pieces. And so on until you reach 41. Each strip is 2 holes larger than the one before it.
- Now make sure the length of the wire is perfectly straight. Bend until you can achieve it to the best of your ability. A hanger will work well.
- Form a small loop at one end of the wire, no bigger than a fingernail.
- I find it's best to lay out all the plastic canvas pieces, starting with the smallest pieces 5 by 5 square to the largest 5 by 41 squares. This way you can easily and quickly grab the pieces you need.
- String on the wire a clear bead, black bead and another clear.
- This is the hard part because you have to find the EXACT center of each of the pieces, other wise it will hang funny. TIP: You could use a marker and mark them out ahead of time if you wanted to save yourself some time while creating the spinner.
- String on the wire a 5 by 5 black plastic canvas strip and add a clear bead.
- String on the wire a 5 by 7 black plastic canvas strip and add a clear bead.
- Now all easy stuff starts, you will be adding a black strip 2 holes larger than the row before, and a clear bead, then add a white strip and another clear bead. Do you will be adding a 5 by 9 black and a 5 by 9 white with beads between.
- Continue adding these strips and beads until you have added the largest the 5 by 41 followed by a clear bead.
- Now you reverse what you just did working your way down to the smaller size strips.
- When you are adding the last 5 by 7 black and a bead the last black 5 by 5 black followed by a clear bead and a black bead and another clear bead, bend the end of the wire into another loop matching the top size of a finger nail and carefully cut the extra wire off. Check that the beads and plastic canvas are somewhat snug on the wire not too tight that you can't move it but enough that you can.
- Cut a length of cording about 42 inches long and tie a single overhand knot as close to the end of the cord and cut off the extra. Once again be sure it's tight and secure by tugging on it.
- Thread the other end of the cording through the yarn needle. Starting with the top piece of plastic canvas just as we did on the other side, thread cord from the top through the other open end corner of this top piece and out from underneath, simple and basic but its about to get slightly confusing. Starting with the top piece of black canvas thread the cord from the top through one corner of the top piece and out from underneath. Bring the cord over the end and to the top of the next corner. Slip the cord through the corner from the top and a bead and go through the corner of the next black strip. Continue in this manner adding clear beads and joining the black strips working all the way down to the bottom.
- When you reach the bottom, tie a knot.
- Go back to the top, cutting a piece of cording about 36 inches long. Attach the cording to the top most white strip on the same side you have just completed, and join the bottom strips exactly like you did the top only use the black beads.
- Repeat the above steps to finish the other side of your wind spinner. It will be harder to get the other side done then it was the first side, and tops you just finished.
- When you have completed both sides the top strips and the bottoms, its time to finish up the very bottom.
- Cut 2 pieces of cording, each about 18 inches long, and fold them both together to the bottom of the loop we created earlier. Mix it up a bit by adding the left over beads making each cord that's hanging a different size. Be sure to double knot each stand and cut off the extra. TIP: You can add a drop of super glue if you wish.
- Tie a loop to the top with the cording for hanging.
- Something I noticed odd is you will have to separate the chris crossing of the strips to make it lay correctly, other wise it will lay as one swirl. You can super glue it so it stays that way or push it past its limit to get it stuck to how it should appear.
Read Next29 Free Patterns for Plastic Canvas
Your Recently Viewed Projects

Thanks for your comment. Don't forget to share!
Marilyn B
Jun 06, 2017
Thank you for the detailed instructions for this wind spinner. I have never made anything like this in my life and I really would like to create this for my friend's garden as she has everything else for garden decor but not this! It looks kind of tricky, so I will ask another friend who is very crafty and artsy to help me create this. I cannot wait to see the finished creation completed! )
jayell5
Apr 03, 2013
Step 16 is very confusing. Do you pass the cord through all white pieces then the black? Is it just one corner of each piece on a spiral? Please clarify.
shirleypatterson 4 155549
Nov 19, 2013
could you please show me how to do the s garden wind spinner as I am totalty lost thanks
starry902 0373085
Jun 11, 2012
I made one of these years ago--thanks for the pattern!
tscarborough 90676 70
Jul 20, 2014
Is the 2 5, 2.5, 25 or is the count of the plastic canvas. Ex 2 5 square by 5 square pieces. Does this mean a 25 cnt plastic canvas cut a to 5 holes square? Or cut 25 pieces the size indicated? Until you reach 41? 41 pieces of canvas or 41 hole square?
Report Inappropriate Comment
Are you sure you would like to report this comment? It will be flagged for our moderators to take action.
Thank you for taking the time to improve the content on our site.