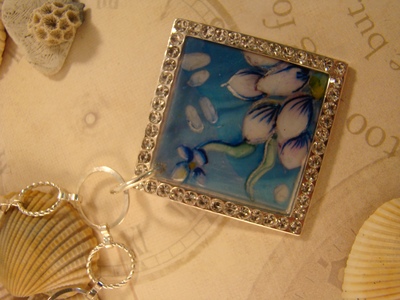
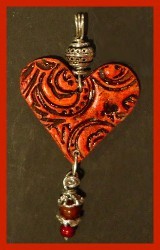
Decoupage Pendant Necklace
This decoupage pendant necklace from Irene Helms is gorgeous and easy to make. The best part about learning to make your own pendant is that you can personalize it however you want! Learn how from Irene Helms.

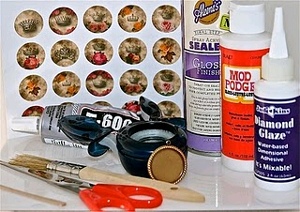
Materials:
- Image or photo
- Pendant frame
- E-6000 glue
- Mod Podge brush-on sealer
- Aleen's Acrylic Spray Sealer
- Glaze - I use Diamond Glaze
- Scissors and an Xacto knife - or a paper punch
- Toothpicks or wooden craft sticks
- Waxed paper
Instructions:
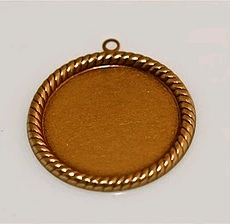
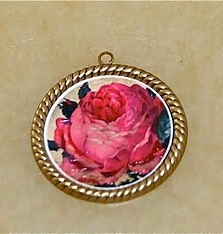
- First select your pendant shape and style - circle, oval, square, rectangle. Decide on either a simple frame or an ornate one with fancy edging. Since I like vintage style jewelry, one of my favorite places to purchase frames is VintageJewelrySupplies.com. For this project, I used an antiqued brass setting with rope edging which will accommodate a one inch circle shape.
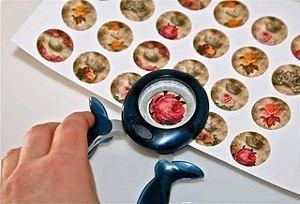
- Next, select your image to fit the frame. You can cut out images from wrapping paper, magazine photos, and greeting cards. Or you can purchase digital collage sheets with images already sized and shaped for common pendant frames. You can find a wide variety of pre-designed collage sheets from various sellers on both ArtFire and Etsy. For the pendant in this tutorial, I am using a digital image from a collage sheet that I purchased from Etsy seller DigitalPerfection.
- Prepare your image. If you are printing out a collage sheet or other image from your computer, first be sure to use the best quality settings for your printer. I find printing on matte photo paper rather than glossy works best. Next seal your image to prevent the ink from running and smearing during gluing and glazing later - I use Aleene's Spray Acrylic Sealer which can be purchased at craft stores such as Michael's - you can choose either a matte or glossy finish (both work fine.) I usually spray an entire collage sheet of images, let it dry at least 15 minutes, then repeat the process for a total of two applications.
- Cut out your image. If you are "free styling" (not using a pre-sized and shaped" collage sheet) then make a template of your shape by tracing the shape on a piece of paper - preferably thick cardstock type. Then cut out the shape leaving a circle opening (or whatever shape you're using) in the paper. Then place the template over your desired image, trace with a pencil and cut it out. Leave about 1/8 inch around the edge to trim later - this makes for easier handling. Use a craft knife or xacto knife to cut your image - be careful as they are quite sharp! A quicker easier method for cutting your image is to purchase a paper punch at a craft store such as Michael's. These come in standard one and two inch circles as well as ovals, squares and many other shapes. I recommend this method if you are going to be making a number of pendants. The cut out image will have cleaner finished edges than with using scissors.
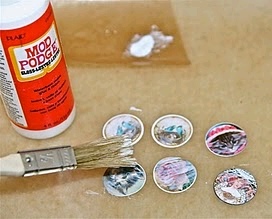
- Brush on a coat of Mod Podge to further seal your image. I usually lay my cut out images on some wax paper, then squirt a bit of the Mod Podge onto the wax paper. Use a small paint brush to apply the Mod Podge onto the image. Below I am preparing several images at one time. Let the Mod Podge dry about 15 minutes.
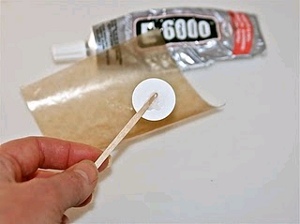
- Now glue your cut out image to the pendant frame. I use E-6000 glue (also found at craft stores such as Michael's.) Place a small amount of glue on the back of the image using a wooden craft stick or toothpick. Then press the image onto the frame. Use the toothpick or small wooden pointed craft stick to clean off excess around the edges. There is no harm if you do leave some around the edges since E-6000 dries clear and excess can be cut off later with your craft knife. E-6000 becomes tacky in 2 minutes and begins to set in 10 minutes - but takes 24 to 72 hours to fully cure. After drying, you can trim the edges of your paper if needed with your Xacto knife - if you used a paper punch, this step is usually unnecessary.
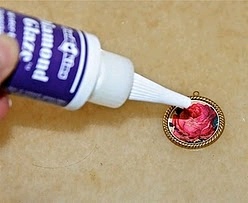
- Now it is time to apply glaze to seal and protect the image. Be sure to allow the glue from step 5 to dry sufficiently - I usually allow several hours (4 hours or longer.) Although not fully cured yet, this is enough time for proceeding. I use Diamond Glaze which can be purchased at various sites on-line - even Ebay. Applying the glaze is a bit tricky but not overwhelmingly so. The tricky part is to avoid bubbles. Place your pendant on a flat surface where it will be able to sit without being disturbed for at least 24 hours. I use a flat chopping board with waxed paper placed on top for easy clean up. Squeeze out a small dab of the glaze onto the waxed paper to expel any bubbles. Then without turning the bottle back upright and without completely releasing your "squeeze" on the bottle, immediately squeeze the glaze onto your image - I start from the center and work my way outward in a circular motion. I have found by trial and error that if I don't completely stop squeezing the bottle after placing a drop on to the wax paper, it prevents air from getting sucked back in and creating air bubbles. If air bubbles do develop, pop them with a needle or even your fingernail.
- Now let the glaze dry and cure. It will be sufficiently dry to carefully move after 24 hours, but takes 72 hours before fully curing. If not fully cured, you can leave smudges and indentations on your glaze with handling.
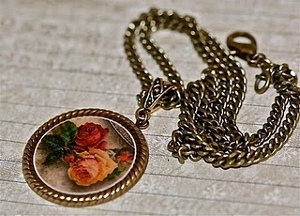
- Now you are ready to add a jump ring or bail and place your pendant on a chain or cord to proudly wear!
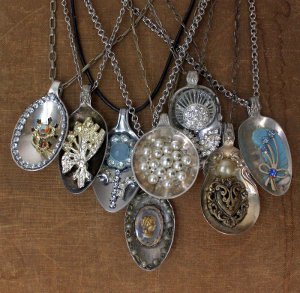
Read NextVintage Spoon Pendants
Your Recently Viewed Projects
Thanks for your comment. Don't forget to share!
Weberme
Feb 11, 2017
It has been many years since I have done any decoupage but I see it is making a come back. This is such a pretty necklace and it looks very vintage but I like that you can modernize this necklace if you like by choosing a picture that has anything you like on it and pick your own blank slate frame and chain. These will make wonderful gifts for Mother's Day, birthdays, Christmas or just because for young or old. Nice and easy tutorial for a pretty necklace.
mymble
Mar 01, 2011
Good instructions- let me add D Crystal Lacquer ebay or etsy and Inkssentials Glossy Accents Michael's both work well the Glossy Accents are not quite as hard a result as the Diamond Glaze and Crystal Lacquer Also ArtQuest's Perfect Paper Adhesive Michael's is a good glue for fixing the paper to the pendant base The tips about the air bubbles were good and I would add that I place a small plastic condiment cup face down over my pendants while they are drying to keep any dust or stray fuzz off them I also check them after about minutes- air bubbles have a mind of their own and will surface sometimes out of welll the air I pop them with a pin If you wait too long however more than say minutes tops you may leave a permanent dent in the surface while trying to pop an air bubble Basically its…Read More a good idea to stick around for the first minutes to watch for the dreaded air bubble
EnchantedNM
Feb 03, 2011
Thank you for giving this clear explanation of this great beginning project. It would be great if there was a list of alternative products that can be used. Alternative to Diamond glaze, decoupage medium, E6000, etc.
Member 15424
Jan 12, 2011
This is a neat pendant. Only I have never seen the pendant frames anywhere.
Report Inappropriate Comment
Are you sure you would like to report this comment? It will be flagged for our moderators to take action.
Thank you for taking the time to improve the content on our site.