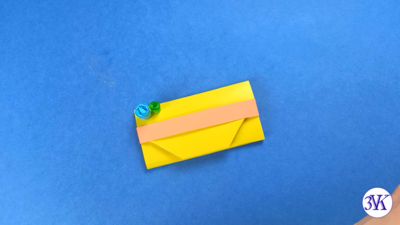
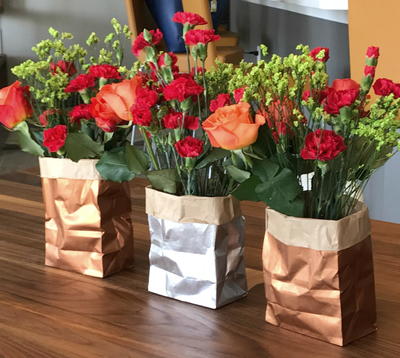
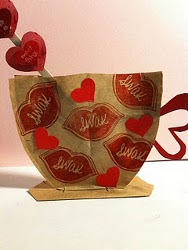
Brown Bag Tea Cup Valentine
This Brown Bag Tea Cup Valentine from Andrea Currie will warm your soul. You won't be able to get enough of this adorable paper craft idea. See this project and more in 12 Valentine's Day Ideas for Boyfriend!

Materials:
- Brown Paper lunch Bag
- Scissors
- Glue stick or glue runner (any glue that’s good on thin paper)
- A little bit of colored paper ( about 3 inches by 3 inches)
- Stapler
- Stamps and ink
- Stir stick or straw
- Any other light embellishments you want. I used a punch for some hearts and so on.
Instructions:
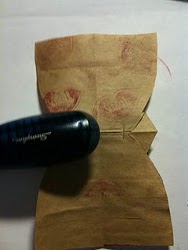
- Keeping your paper bag flat cut the bottom of the bag off.
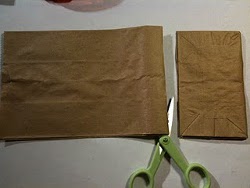
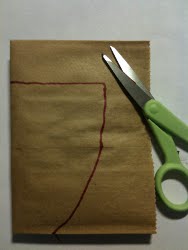
- Fold in half joining the open ends together. Draw a half tea cup shape leaving the fold as the middle of the tea cup. Then cut this shape out. Once complete you will unfold once to see your complete tea cup shape.
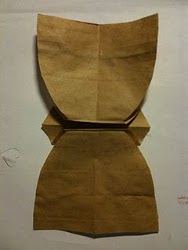
- Unfold the whole piece of paper (it’s like an accordion) so you have the peak of the paper in the middle.

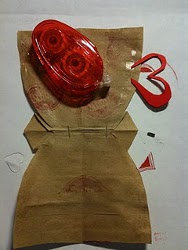
- Fold each tea cup bottom towards the center of the peak. They should be touching and perfectly mirroring each other.
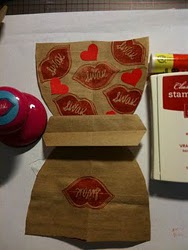
- Now decorate to your hearts content Just remember that the paper is lightweight and will hold up its’ form better with light weight embellishments such as stamps. I slapped on a few paper hearts for this example.
- Once you are finished embellishing you will need to flip the paper over to prepare for stapling. You will need only two staples on either side of the project. make sure to staple in the middle of the crease as evenly as you can. The staples serve as feet when you stand up the tea cups.
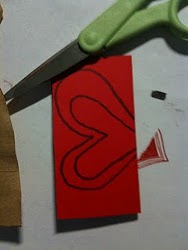
- You can make any sort of handle you want. I just folded over some scrap paper and cut out a heart leaving the bottom of the heart in line with the fold.
- Just put some glue up the sides of each tea cup shape. Stick the handle on before you join the shapes. When joining the shapes you are also going to want to work the paper around the staples which causes a little puckering. Do your best to join the shapes from base to top. It’s hard to get it perfectly aligned so don’t be surprised if you need to do a little trimming.
- Decorate a stir stick and add your favorite tea or Valentine’s Day message and wha la cute little tea cup!
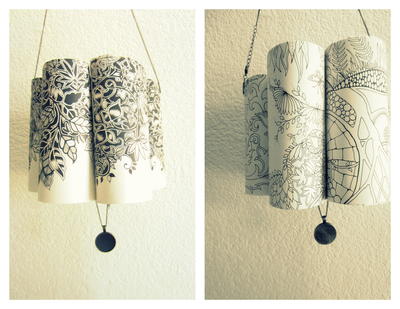
- Also if you are feeling like another round with even more umph I suggest you use your next paper bag cut out as a template for heavier paper like this one!
Read NextLittle Rolled Paper Lamp Lanterns


Thanks for your comment. Don't forget to share!
bustedinnc 0512678
Feb 09, 2017
What an adorable little "card". I love the rustic vibe of the paper bag, and the sturdiness of the card stock. I wonder if I can combine the 2? Has anyone made this before? Any suggestions? I'd like for the cup to stand, preferably without the aid of staples, and use it to hold some small trinket or goody.
foxfiremystic 2433 322
Feb 02, 2012
Thanks for the clever design and great instructions for this versatile teacup greeting. Just one side note: There is no such expression as "wha la". I'm sure you meant "voila" which is a commonly used French word for "ta-da!" or "See! There it is!"
Report Inappropriate Comment
Are you sure you would like to report this comment? It will be flagged for our moderators to take action.
Thank you for taking the time to improve the content on our site.