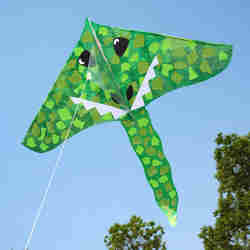
Firey Dragon Kite
Summertime is here which means it's the perfect time to get those kites out. These can be pricey at times, so why not make your own? Have a ball and fly away with this project from I Love to Create.
Materials:
- Aleene’s® Fast Grab™ Tacky Spray®
- Bamboo skewers or chopsticks
- Assorted tissue paper, cardstock paper
- Kite
- Scissors
- Paper towels
- Pushpins
- Pencil
- Scissors
- Brads – ¼” – colors to match
- Plastic tablecloth
Pattern 1
Pattern 2
Pattern 3
Steps:
- Cover work surface with plastic tablecloth.
- Place kite on work surface. Fold plastic center divider over to one side then cover plastic divider and entire side of kite it is laying on with paper towels.
- The design on kite needs to be covered with green tissue paper. Spray uncovered side with an even coat of Fast Grab™ Tacky Spray™ following label instructions. Place a sheet of tissue paper, with straight edge along center spine of kite, over sprayed surface and smooth with fingers. Tear smaller sections of tissue paper to fit remainder of side, making sure entire surface is covered.
- Remove paper towels from covered side, flip over plastic center section and cover plastic center and tissue paper side with paper towels. Repeat step to cover remaining side with tissue.
- Carefully peel kite from tablecloth then use scissors to trim excess tissue paper from around kite.
- Tear three different colors of green cardstock into small 2” irregular shapes then spray and place on top of kite. Trace and cut dragon face patterns onto color of paper indicated then cut out. Place several layers of newspaper on work surface. Place smaller cutouts on newspaper and hold in place with skewer to keep from flying away. Spray piece with adhesive then press in place.
- Cut tail sections from green cardstock. Spray along one edge and press onto other to create long tail.
- Spray and press small torn sections of green paper onto tail.
- Place tail where shown, overlapping about 2” underneath body of kite. Use pushpin to make hole through both layers then insert brad into hole, pressing tines apart to hold in place. Add three more – two on each side of spine.
Your Recently Viewed Projects

Thanks for your comment. Don't forget to share!
Hannah
May 02, 2017
I really do not know how to fly a kite, not even fond of playing with it. But maybe I can try making this with my daughter with a little help of my husband. This is a nice outdoor activity and my daughter will enjoy designing her own kite. I guess she'll make one of her favorite cartoon character, hello kitty!
Report Inappropriate Comment
Are you sure you would like to report this comment? It will be flagged for our moderators to take action.
Thank you for taking the time to improve the content on our site.