Seashore Sorter
Dress up your office or desk decor with this elegant nautical-themed sorter. Not only will you be better organized with this desk accessory, but also no one will ever know how easy it was to make. The beads, thread and tape make it fast and charming.
Materials:
- Paper Mache paper organizer (# 24871, Walnut Hollow)
- Blue acrylic paint
- Play sand
- Shells
- Diamond Beadlets
- Treasure Tape Sheet, 8x10
- Kreinik 1/16" Ribbon 5003
- Kreinik #32 Braid 033, 014HL, 684, 4639
- Kreinik #16 Braid 3214
- Kreinik #12 Braid 032, 094
Instructions:
-
Trace the front and sides of your organizer onto the white liner side of your tape. Cut the traced shapes out, leaving a small (1/8") space around your traced outline.
-
Paint the inside and outside of your organizer blue. You can use a lighter application of paint on the outside, as much of this area will be covered.
-
Once your organizer is completely dried, you can apply your tape. Peel back the corner of the white liner on your front tape piece and line it up on the organizer. Once it is in place, you can peel off the rest of the white liner and smooth down the entire piece of tape. Repeat this process for your two side pieces.
-
You are read to begin embellishing. Peel back the tape from your front panel. Arrange your shells along the bottom of the organizer.
-
Using one of the shades of thread, create a wave design across the front of the organizer. Using the other threads, continue embellishing above this line. Beneath it, we have created a loop design.
-
Once you have finished embellishing the front of your organizer with the threads, trim your edges and place it in a shallow pan. Pour a small amount of the play sand along the base of the organizer, around the shells. Tilt the organizer forward so that the excess sand does not cover more of the tape than you intended. Tap to remove the rest of the extra sand. Pour the sand out of your pan, and place your organizer back into it. This time, pour your Diamond Beadlets over the remaining exposed areas of tape. Tap to remove excess beadlets.
-
Repeat steps 4-6 for each side of your organizer. Once all three sides have been embellished and beaded, you are ready to organize!
Kreinik threads available through needlework stores or www.kreinik.com.
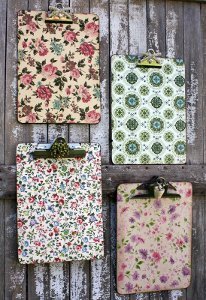
Read NextVintage-Inspired Clipboards