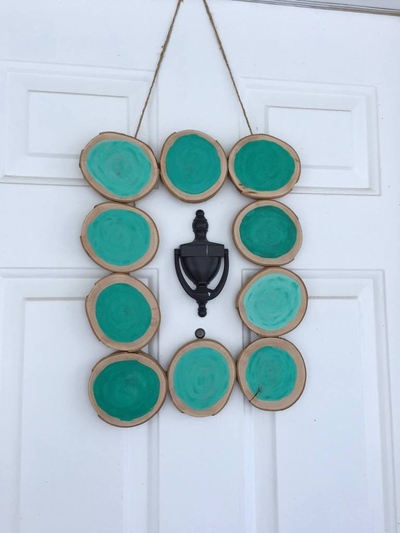
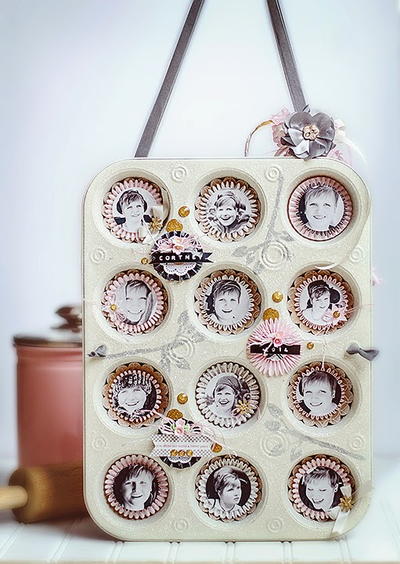
Retro Muffin Tin Frame
 Visit Michele at Thoughts of a Cardmaking Scrapbooker.
This frame looks like something your grandma would have appreciated. If you like the look of retro craft ideas, then you'll have so much fun making your own Retro Muffin Tin Frame. You can even use an old, rusted muffin tin. You can use glitter, paper and even paint to bring your piece to life. Be sure to add plenty of details to your frame so it really stands out from a sea of boring decorative items.
You can find this project, as well as many other fabulous blogger projects, in our new eBook, The Best Blogger Craft Ideas 2014: Decoupage, Sewing, Jewelry Making, and More free eBook. Download your own free copy today!

Materials:
- Muffin tin
- Krylon Spray Paint - cream
- Personal photos
- Spellbinders circle dies
- Dymo Label Maker
- Cricut Rosettes
- Martha Stewart glitter
- Mod Podge
- Foam brush
- Stencil
- Silver paint
- Sparkle Tape
- Kraft tags
- Silk Posies
- String
- Embossing folder
- Circle punches, flower punch
- Dimensional Foam circles
- Aleene's Tacky Glue
- Ribbon
Instructions:
- Spray paint muffin tin in cream. Use Darice stencil and silver paint to stencil branches/leaves on muffin tin.
- Cover muffin tin with Modge Podge in matte and sprinkle with Martha Stewart glitter.
- Cut 12 photos into circles using Spellbinder die. Cut circles using eBosser. Make rosettes using Cricut's rosette kit. Emboss kraft tags (by David Tutera) and embossing folder by Darice. Ink edges with white ink. Stack rosettes on embossed tags.
- Using various circle punches, punch circles into Darice's sparkle gold tape. Use Modge Podge's glossy accents on each circle to create a "faux" epoxy dot. Do the same with a few punched stars to use as accents. Once dry adhere to various pictures and the tin.
- Stack 3 dimensional foam circles 3 times in each muffin tin circle. Adhere rosette/pictures inside.
- Use bias tape to create a hanger for the tin. Thread through circles. Tie various ribbons to the top right side. Adhere a button to the grey silk flower from Simplicity. Adhere to the center of ribbons.
- use 3 rosettes for outside of muffin tin. Add posies and personal information using a Dymo Label Maker.
Read NextWoodpecker Climbing
Your Recently Viewed Projects
Thanks for your comment. Don't forget to share!
Hannah
Aug 24, 2017
This is cool and inventive. The person who thought of this project is very resourceful.
Catsitt
Feb 08, 2017
What a really cool idea, so inventive and pretty! It could nearly be done in a family tree style! It is a great gift idea as well, it amazes me what people can come up with and with simple household things you already have! I assume the muffin tray doesn't have to brand new and could be one you pick up on a thrift shop?
Weberme
Dec 12, 2016
Great way to recycle those old rusted tins you have laying around to make this retro muffin tin frame for a Mother's or Father's Day gift. Have an adult go copy some family photos for a parent or some pictures of the kids in the classroom for a teacher gift at end of the year and use in the tins and I am sure whoever you give this to will love it. The kids will love making this fun and easy project. Tie with a pretty ribbon and done.
Report Inappropriate Comment
Are you sure you would like to report this comment? It will be flagged for our moderators to take action.
Thank you for taking the time to improve the content on our site.