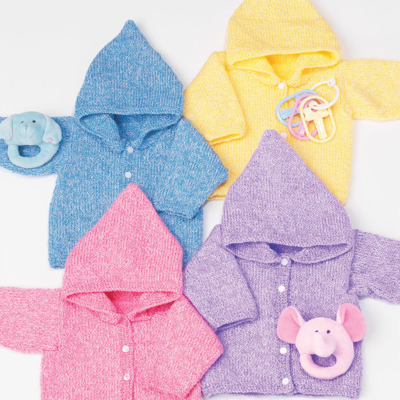
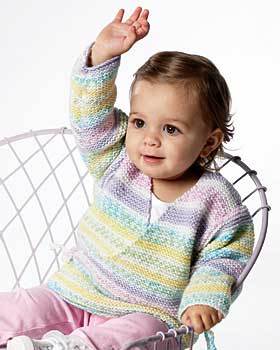
Baby Knit Kimono
This is a unique knit most babies don't have. Knit that little one a kimono full of color and design. This is an easy garter stitch any beginner can knit from Bernat Yarns.

Sizes: 6 (12-18-24) mos
To fit chest measurement: 17 (18-19-21) ins [43 (45.5-48-53.5) cm].
Finished chest: 21 (22-23-25) ins [53.5 (56-58.5-63.5) cm].
Materials:
- Bernat® Baby Jacquards (100 g / 3.5 oz)
- 2 (2-2-3) balls of #06317 (Easter Basket).
Size 4 mm (U.S. 6) knitting needles or size needed to obtain gauge.
Gauge
22½ sts and 44 rows = 4 ins [10 cm] in garter st.
Steps:
The instructions are written for smallest size. If changes are necessary for larger sizes the instructions will be written thus ( ).
RIGHT and LEFT FRONT (make alike).
Cast on 52 (55-58-63) sts.
Work in garter st (knit every row) for 2 ins [5 cm].
Shape front: Dec 1 st at beg of row on next and every following alt row to 35 (38-47-50) sts, then every following 4th row from previous dec to 31 (33-36-39) sts, ending with a RS row.
Shape armhole: Cast off 7 (8-9-10) sts beg of next row. 24 (25-27-29) sts.
Dec 1 st at front edge on every following 4th row from previous dec to 12 (12-14-15) sts.
Cont even until armhole measures 4¾ (5-5-5½) ins [12 (12.5-12.5-14) cm], ending with a RS row. Cast off.
BACK
Cast on 58 (61-64-69) sts.
Work in garter st (knit every row) until work from beg measures same length as Front before armhole shaping.
Shape armholes: Cast off 7 (8-9-10) sts beg next 2 rows. 44 (45-46-49) sts.
Cont even until Back measures same length as Front before shoulder. Cast off.
Place markers 2¼ (2¼-2½-2¾) ins [5.5 (5.5-6-7) cm] in from sides for shoulders.
SLEEVES
Cast on 33 (35-39-39) sts.
Work in garter st, inc 1 st each end of needle on 5th and every following 8th row to 51 (55-55-61) sts.
Cont even until sleeve from beg measures 8 (9-9½-10) ins [20.5 (23-24- 25.5) cm], ending with a RS row. Cast off.
Place markers along sides 1¼ (1½-1½-1¾) ins [3 (4-4-4.5) cm] down from cast off edge.
FINISHING: Pin garment pieces to measurements. Cover with a damp cloth, leaving cloth to dry.
Sew shoulder seams. Sew in sleeves, placing rows above markers along cast off sts of Fronts and Back to form square armholes.
Ties: (make 4). Cast on 25 sts. Cast off. Sew 2 ties at beg of front shaping on each front and 2 ties at side seams 2 ins [5 cm] up from cast on edge of body to match to front ties.
Read NextBaby Knit Kimono
Your Recently Viewed Projects
Thanks for your comment. Don't forget to share!
Lisa
Dec 19, 2021
The problems with this pattern start with the materials list and do not improve as you get through the pattern.
marketingtd 208759 1
Apr 02, 2015
Cont even until Back measures same length as Front before shoulder. I don't see anything referencing where the shoulder ends on the front pieces. On the fronts I continued even as instructed until measuring 4 3/4 inches from bottom of armhole. But I cannot figure out how long to make back. Can anyone please help?? Many thanks in advance. It's for an Easter gift
calicocandy1958 71 34976
Nov 16, 2013
I made this recently in a soft yellow and it turned out really nice. The sweater works up quickly.
vangary 4064299
Nov 24, 2012
RIGHT and LEFT FRONT (make alike). Cast on 52 (55-58-63) sts. Work in garter st (knit every row) for 2 ins [5 cm]. Straight away shaping of the neck. What about length of the cardigan. Need your help please. Thanks, Leena Shape front: Dec 1 st at beg of row on next and every following alt row to 35 (38-47-50) s
Lisa
Jul 13, 2014
that is correct-you will start the front open slope after your base rows. decreasing 1 stitch when the pattern directs down to the number of stitches designated will give you the downward slope necessary to create the sweater as shown. what you are calling neck shaping is not-it is the angular slope of the front of the sweater.
Justjenny
May 26, 2012
GrannyGoode, regarding the printing...what I do is copy the pattern and picture into Microsoft Word, and that way I get the whole pattern and I can save it into my knitting pattern folder to use again and again! hope this helps.
GrannyGoode
Jan 29, 2012
Wonderful pattern! Tried twice to print it out, only to receive pages 2 and 3 only. The first page was blank -- no picture, no beginning instructions. Checked my printer settings, all OK. So how can I print page 1, so as to make the pattern complete? Thank You!!
Member 4761022
Dec 28, 2011
Made this kimono..very easy but the yarn suggested does not stripe up exactly as the picture shown. In the picture the stripes are aligned across the front, etc. That does not happen when knitting. But the kimono looks nice anyway.
Report Inappropriate Comment
Are you sure you would like to report this comment? It will be flagged for our moderators to take action.
Thank you for taking the time to improve the content on our site.