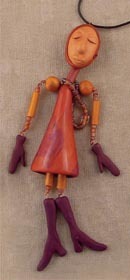
Dangle Art Doll Necklace
Create an original necklace charm from AMACO using polymer clay. This piece has an antique, otherworldy feel that is sure to delight everyone. Make one for yourself and give another as a gift to a friend.

Materials:
- Maureen Carlson's Designer Push Molds™ by AMACO®— Tribal
- FIMO® Soft Polymer Clay— Copper (27), Plum (63), Metallic White (052), Gold (11) and Black (9)
- E Beads (colors of your choice)
- Seed Beads (colors of your choice)
- Beading Thread
- Beading Needle
- ½" Wide Button (optional)
- 4 Eyepins, ½" Long
- 5 Eyepins, 1½" Long
- 1 Eyepin 2½" Long
- 1 Yard Leather Cord
- Needle Tool
- Round Nosed Pliers
- Flat Nosed Pliers
- Wire Cutters
- Scissors
- Oven
- Wet/Dry Sandpaper— Grits 220, 320, 400, 600
Instructions:
- Roll two 5/8" diameter balls from Gold FIMO® Soft. Flatten both balls slightly. Press one ball into a medium- sized face in the Tribal mold. Press firmly enough to make back of face slightly concave. Remove face from mold.
- Press face to the front of a needle tool. Press the other ball against the back of the needle, sandwiching the needle in between. Cover seam between the balls with strip of clay if desired. Lay face on paper covered baking sheet.
- From Gold FIMO® Soft polymer clay make four 3/4" long tube beads for arms and legs, two 1/3" round beads for shoulders and two 1/2" long closure beads for ends of leather cord.
- Make holes through each closure bead, making diameter of holes twice that of leather cord. Place beads on baking sheet.
- To make tassel body, marble together Gold, Copper, Purple and Metallic White polymer clay. Roll a 1½" ball. Form ball into a cone shape.
- To hollow out cone, insert knitting needle or wood dowel half way into large end of clay cone. Hold clay still and press down on tool while rolling it back and forth like a small rolling pin. Keep rotating and rolling until hole is large enough to hold tassel. Push tool all the way through top of clay cone to create hole for hanger. Flatten cone slightly.
- Using Black polymer clay, make mitten-shaped hands and shoe-shaped feet. To Make Hands: Roll clay into a ball, then shape into an egg shape. Flatten. Use blunt tool to press in thumb shape. Smooth edges. Insert bent eye pin.
- To Make Clay Shoes: Roll a clay ball, then roll it into a short rope. Bend rope. Flatten slightly, then use fingers to shape heel and toe. Trim to refine shape. Smooth cut edges with fingers. Insert bent eye pin.
- Bake all clay pieces on paper lined baking sheet for 30 minutes in preheated 265ºF oven.
- Sand tassel body with wet/dry sandpaper, using 320 grit, 400 grit and 600 grit. Buff on coarse fabric or cotton buffing wheel.
- Assemble by attaching each foot eyepin to a 1½" eyepin. Thread a gold tube bead onto each eyepin. Attach both leg eyepins to the 2½" eyepin. Thread 2½" eyepin through body and into neck beads, then through head. Make loop at top of head, trimming eyepin if necessary.
- Attach one arm to a 1½" eyepin, then thread that eyepin through a shoulder bead and 2 seed beeds. Snug the beads close to the eyepin end then wrap eyepin wire around the body wire at base of neck. Keep beads snug and wrap tightly. Then thread on two more seed beads and the second shoulder bead. Make a loop, keeping beads snug together and trim eyepin if necessary. Attach second arm to shoulder loop.
- Follow picture for assembling rest of pieces. The little beaded necklace around doll's neck is strung on beading thread, then is attached to the back of the neck. Tie knot securely. Clip ends, then glue.
- To finish necklace, string doll onto cording. String one closure bead onto each end of cord. String opposite ends of cording through each bead so that cording forms a loop. Knot ends of cord. If beads fit tightly, they will keep cord in place. Enjoy!
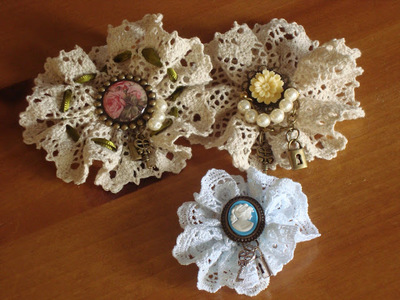
Read NextVintage Lace Brooches
Your Recently Viewed Projects
Thanks for your comment. Don't forget to share!
tkkitty11
Apr 01, 2012
In steps 1 and 3 the sizes of the balls to be made has been left out! Otherwise, very cute necklace.
editorKS
Apr 02, 2012
@tkkitty11, Thank you for bringing this to our attention! The instructions have now been updated with the measurements. We apologize for the confusion. Happy crafting! --Editors of FaveCrafts
Report Inappropriate Comment
Are you sure you would like to report this comment? It will be flagged for our moderators to take action.
Thank you for taking the time to improve the content on our site.