Chalkboard Calendar
This Chalkboard Calendar is a great way to keep track of everyone's comings and goings. Put this large calendar in a central location so everyone can see it and remember important dates and appointments. This is also a great project for an office or study group.

You can find this project, as well as many others, in our free downloadable eBook, Fuse Creativity System Project Guide: Fun Party Themes, Ideas for Handmade Cards, and More Paper Crafts from Fiskars!

Materials:
- Fuse Creativity System(R) Starter Set
- Medium Design Set 100790 - Square
- Round ’n Round Squeeze Punch (Extra-Large)
- Circle Lever Punch (XX-Large)
- Baby Clear Stamps (8"x8")
- Stamp Block Set
- Make a Wish Clear Stamps (8"x8")
- Birthday Bash Clear Stamps (3"x6")
- Teresa Collins Recipe Simple Stick™ Stamps (8" x 8")
- Beadboard paneling
- Chalk or chalk pen
- Chalkboard paint
- File
- Primer
- Strong permanent adhesive
- Wide foam brush
- Wood veneer - Creative Imaginations (four 12" x 12" sheets to create a total of 36 tiles)
Instructions:
-
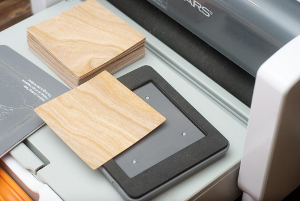
This is a really easy project to make using the Fiskars Fuse Creativity System(R)! I used thick wood veneer paper made by Creative Imaginations, and it was easily cut by the Fuse with no chipping, splitting, or splintering.

-
Next, the wood tiles need to be primed.

-
After priming, the tiles are painted with two coats of chalkboard paint. I found that brushing them with a foam brush gave them a smoother finish than rolling them with a foam roller.
-
The base of the calendar is made from a section cut from a sheet of beadboard paneling. The edges can get chipped when being cut, but some passes over them with a file will smooth them out and give them a more naturally worn look.
-
When the paint on the wood tiles is dry and the board edges have been smoothed out, the tiles can be adhered to the board using a strong permanent adhesive. I used wood glue to adhere my tiles. The grooves in the paneling are a great help in lining up the tiles vertically. Take care to check the edges and corners frequently as they are drying to assure they adhere to the board, as the veneer has a tendency to curl.

-
The days of the week can be made by layering punched shapes and adhering large letter stickers or chipboard letters to the center.
-
And finally, here's a fun trick to try when your new calendar is ready to use: color the surface of a stamp with a chalk pen and stamp the tiles. It will give you the look of hand drawn images and beautifully hand-written sentiments!

Read NextPom Pom DIY Rug