Lovely Iris DIY Birthday Card
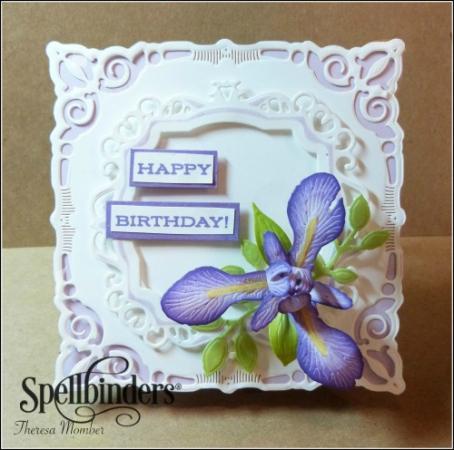
There's no need to buy a generic birthday card when you can make a Lovely Iris DIY Birthday Card. The pretty purple color and cool design make this one of the best birthday card ideas you'll ever lay eyes on. This card is three-dimensional and really pops. The unique look and unexpected design make this a truly memorable craft project. When you're brainstorming ideas for homemade birthday cards, consider this project. The intricate design of the iris makes it a true standout. While this card is perfect for spring, it will surely make a statement any time of year.
Primary TechniquePaper Crafts

SeasonSpring
Materials:
Spellbinders Products:
- Adorning Squares
- Labels Thirty-Four
- Decorative Labels Thirty-Four
- Create An Iris
- Sprigs
- Grand Calibur Junior Magnetic Placement Mat
Other Supplies:
- IMAGINE Crafts/Tsukineko Memento Dye Ink Lulu Lavendar
- IMAGINE Crafts/Tsukineko Memento Dye Ink Grape Jelly
- IMAGINE Crafts/Tsukineko Jumbo Sponge Daubers
- Beacon Adhesive – 3 in 1 Advanced Craft
- SCRAPBOOK ADHESIVES BY 3L™ - 3D Foam
- Xyron - Mega Runner Adhesive
- Scor-Pal - Scor
- Faber-Castell Big White Pen
- Cardstock (white, green, lavender, purple)
- Copic Marker (Y35)
Instructions:
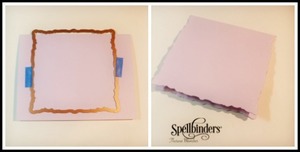
- Trim lavender cardstock to 8 ½² by 5 ½² and score at 4 ¼². Fold along score line. Place folded cardstock ¼² in from edge of Adorning Squares #7 (with #1 being the smallest die template). Secure die template in place with low tack tape and cut, using Grand Calibur® machine. Remove from die template and you now have a shaped card base.
- Place adorning squares #7 nested with #6 on Magnetic Spacer Plate. Cut and emboss from white cardstock. Adhere die cut to card base.
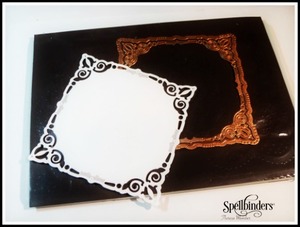
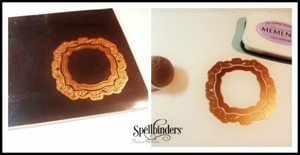
- Nest Decorative Labels Thirty-four #3 with Labels Thirty-four #3 and cut/emboss from white cardstock. With the die cut still in the die template, stencil with Lavender ink, using inked applicator tool. Adhere die cut frame to card base using adhesive foam squares.
- Cut and emboss Sprigs #2 from green cardstock.
- Cut and emboss Create An Iris petals from lavender cardstock and cut/emboss calyx & leaves from green cardstock.
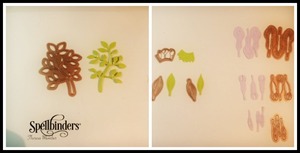
- Use an inked applicator tool to apply green ink to edges of leaves and purple ink to edges of petals.
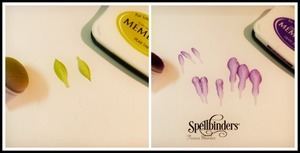
- Color centers of the largest petals, by first applying opaque white pigment ink, then yellow on top of the white.

- Use craft glue to adhere the large and medium petals together at bases. Form calyx into a cone shape and adhere closed.
- Insert base of first petal pair into calyx and adhere. Add the other two pairs, allowing a small amount of space between each pair.
- Secure the three smallest petal in the calyx, placing between each of the large petals. Gently flair out the petals to shape flower.
- Adhere the leaves to the outside of the calyx.
- Stamp sentiment on white cardstock, trim into two pieces , layer with purple cardstock and adhere to card. Attach iris flower to card using thin adhesive foam square. Then snip pieces from the Sprigs die cut and adhere to card.
Read Next64 Handmade Cards for Every Occasion
Your Recently Viewed Projects

Thanks for your comment. Don't forget to share!
Report Inappropriate Comment
Are you sure you would like to report this comment? It will be flagged for our moderators to take action.
Thank you for taking the time to improve the content on our site.