How to Make a Card with a Sketch
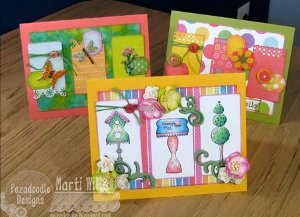
Learn How to Make a Card with a Sketch with this easy to follow tutorial from Marti Wills. Handmade greeting cards are great to send for any occasion, and with this helpful suggestion, creating greeting card designs has never been easier.
Materials:
Card 1:
- Card Sketch from Page Maps or other sketch site (http://pagemaps.com/may12maps.htm)
- Papers according to your sketch (patterns and solids)
- Adhesive
- Coordinating Ink
- Foam blending tool
- Border punch
- Nestibility die
- Embroidery floss
- Small button
- Embellishments - Gummi stickers from Basic Grey are used in the sample
Card 2:
- Card Sketch from Card 1
- Papers according to your sketch (patterns and solids)
- Adhesive
- Coordinating Ink
- Foam blending tool
- Border punch
- Nestibility die
- Embroidery floss
- Small button
- Glossy Cardstock
- Alcohol Ink and Blending Solution
- Felt pad for the Blending Tool
- Grungeboard or chipboard shapes for embellishments
- Stickles Glitter Glue
Card 3:
- Card Sketch from Card 1
- Papers according to your sketch (patterns and solids)
- Adhesive
- Coordinating Ink
- Foam blending tool
- Decorative scissors or decorative rotary cutter
- Embroidery floss
- Small button
- Stamped images
- Colored pencils or coloring medium of choice
- Flower embellishments
- Die cut flourishes
Videos:
Instructions:
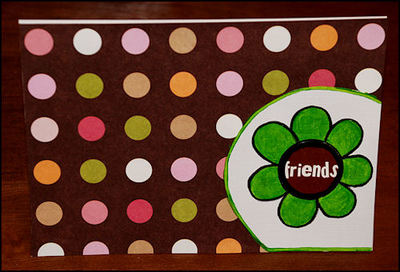
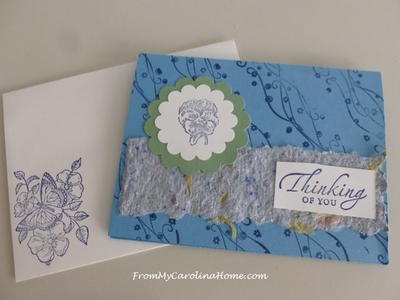
Card 1:
-
Look closely at your sketch. Notice how many layers or panels it has, how many are solid, how many are patterned, how many and what type of embellishments, paper edges.
-
Choose your papers - I recommend choosing patterned paper first and then picking remaining patterns and solid colors from there. If you have a set of embellishments you have really been wanting to use then start there and choose your papers accordingly. If you are primarily interested in making cards I recommend buying 6" x 6" paper pads - you will have less waste and you will have a full set of perfectly matched papers to choose from!
-
DON'T GLUE ANYTHING UNTIL THE VERY END!!!
-
Cut and layout the largest papers according to the sketch onto your card base.
-
If there is anything additional to do to your layers do it now - in the video I cut three of them with a border punch. One layer also has a thread wrapped around it and a button.
-
Ink the edges of ALL of your papers!
-
Lay out your embellishments now.
- Glue everything in place paying attention to how they are layered over/under each other in the sketch.
Card 2:
-
Look closely at your sketch. Notice how many layers or panels it has, how many are solid, how many are patterned, how many and what type of embellishments, paper edges.
-
Choose your papers - I recommend choosing patterned paper first and then picking remaining patterns and solid colors from there. If you have a set of embellishments you have really been wanting to use then start there and choose your papers accordingly. If you are primarily interested in making cards I recommend buying 6" x 6" paper pads - you will have less waste and you will have a full set of perfectly matched papers to choose from!
-
DON'T GLUE ANYTHING UNTIL THE VERY END!!!
-
Cover your grungeboard pieces with Stickles and set aside to dry.
-
We are going to use alcohol ink and glossy cardstock to make our own background paper for the largest panel. Place a felt pad on your blending tool. Use 2-3 analogous (similar) colors and pearl mixative - squeeze the inks onto the felt in SEPARATE small puddle. Add 2 drops of pearl mixative. DAB your tool up and down all over the glossy cardstock until it is covered in color. Add a few drops of Blending Solution to the felt pad and dab the glossy cardstock again to encourage the inks to blend and spread.
-
If there is anything additional to do to your layers do it now - in the video I cut three of them with a border punch. One layer also has a thread wrapped around it and a button.
-
Ink the edges of ALL of your papers!
-
Lay out your embellishments now.
-
Glue everything in place paying attention to how they are layered over/under each other in the sketch.
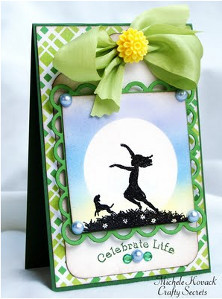
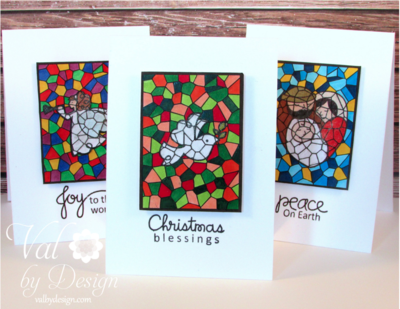
Card 3:
-
Look closely at your sketch. Notice how many layers or panels it has, how many are solid, how many are patterned, how many and what type of embellishments, paper edges.
-
Choose your papers - I recommend choosing patterned paper first and then picking remaining patterns and solid colors from there. If you are primarily interested in making cards I recommend buying 6" x 6" paper pads - you will have less waste and you will have a full set of perfectly matched papers to choose from! Choose some stamps to use on the three main panels.
-
DON'T GLUE ANYTHING UNTIL THE VERY END!!!
-
Stamp and color your images - mine are done using colored pencils.
-
Cut three flourishes to use in place of the mini nestibility shapes we had used previously. (or use precut ones.)
-
If there is anything additional to do to your layers do it now - in the video I cut my three stamped panels with a decorative edged rotary blade as a border punch would have been too big. A border punch will work with smaller images. One layer also has a thread wrapped around it and a button.
-
Ink the edges of ALL of your papers!
-
Lay out your embellishments now.
- Glue everything in place paying attention to how they are layered over/under each other in the sketch.
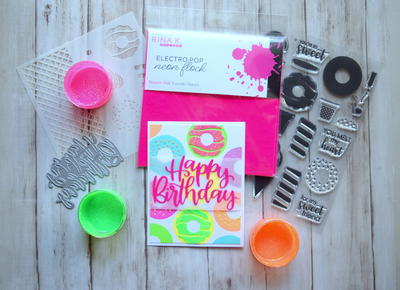
Read NextNeon Happy Birthday Card