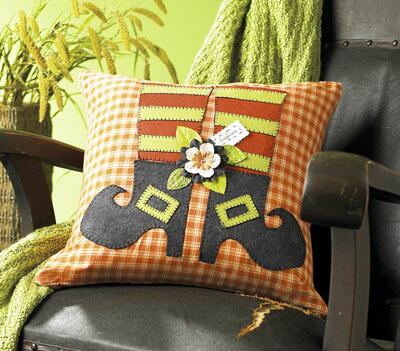
Witch Legs Pillow
This easy-to-make pillow features a pair of striped stocking legs in curled witch boots, just like the Wicked Witch in The Wizard of Oz. Make this witch pillow for Halloween or for a touch of magic anytime.

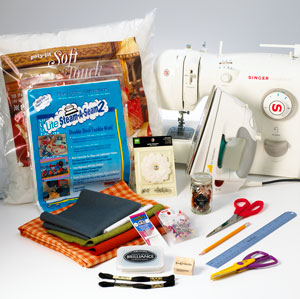
Materials:
- 18" x 18" pillow form*
- One yd. homespun orange checked fabric
- 1/8 yd. (scrap) natural muslin
- Wool felt*: 1/4 each copper, green, gray
- Iron on fusible web*
- Black embroidery floss*
- Embroidery needle
- Light colored cardstock
- “Happy Halloween” rubber stamp*
- Black pigment ink pad*
- Silk flowers*
- Velvet leaves*
- Jewelled brad*
- Hand sewing needle, iron & board, pencil or chalk marker, ruler, scallop-edge scissors, scissors, sewing machine & matching thread, straight pins
- Pattern
*The following products were used for this project: DMC embroidery floss Fairfield Processing Corp. pillow form Making Memories Jumbo Blossoms & Daisy Spotlight brad Natural Nonwovens wool felt Penny Black, Inc. rubber stamp Prima Marketing Fabric Fancies & Velvet Leaves The Warm Company Lite Steam a Seam2 Tsukineko Brilliance Pigment ink pad.
Finished size: 18" Pillow
Notes:
- Print full-sized patterns here. Link to pattern page.
- Usea 1/2" seam allowances unless otherwise instructed.
- See photos for details and placement.
Steps:
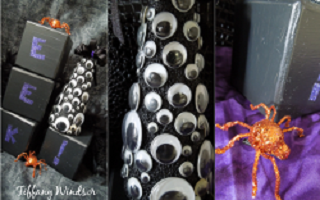
- Cut & fuse pieces. Cut two 19" x 19" squares from orange fabric. Press and pin as needed. Transfer patterns to cardstock and cut out (See Box A in Steps Photo, at right). Follow manufacturer's directions to fuse webbing to wool felt and muslin. Pin cardstock patterns to fused wool felt and cut out (See Box B in Steps Photo, at right). Cut legs from copper, stripes, and buckle from green, and boots from gray felt. Note: for boot, leg, and stripe, flip pattern over to create both left and right leg pieces. Fuse patterns in place on one of the fabric squares as shown.
- Stitch pattern edges. Thread embroidery needle with three strands of black floss. Blanket stitch around edges of patterns. Start with knotted thread from back to front of fabric, then working on top of fabric until re-threading (See Box C in Steps Photo, at right).
- Add sentiment. To add sentiment, use pigment ink pad and rubber stamp on fused muslin fabric. Heat set ink with iron (See Box D in Steps Photo, at right). Cut out with scallop-edge scissors and fuse into place on pillow as shown. Thread embroidery needle and sew a running stitch around edges of muslin.
- Embellish. Layer flowers together and insert brad through center. Place leaves on pillow as shown and stitch in place. Place layered flowers over leaves and stitch in place.
- Finish. Place right sides of fabric squares together. Use sewing machine to sew seams together on three sides. Clip corners and turn right side out. Insert pillow form. Use hand sewing needle and sewing thread to whip stitch opening closed.

Read NextCrochet Halloween Motif Garland
Your Recently Viewed Projects
Thanks for your comment. Don't forget to share!
beighleyv
Sep 03, 2011
I used regular fabric instead of wool felt, and it came out great. I don't like that they don't at least give you a guideline about how wide to make the stripes for the legs.
Report Inappropriate Comment
Are you sure you would like to report this comment? It will be flagged for our moderators to take action.
Thank you for taking the time to improve the content on our site.