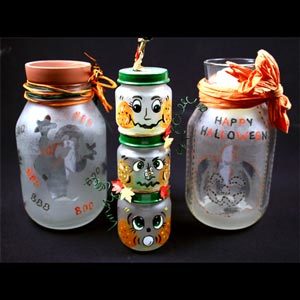
Tea Light Jars Ghost and Pumpkin
Light up the room with some tea lights this Halloween. Decorate your jars with stencils and acrylics. These are easy homemade Halloween crafts from Etchworld Armour that you can display during your gathering. These homemade Halloween crafts will surely lighten everyone's faces. Easy Halloween crafts are great for chilly or rainy October days. Create these Tea Light Jars and watch your cute little Ghost and Pumpkin glow right before your eyes.

Materials:
- Halloween stencils (from a mylar stencil or stencil book-about 4-5” in size) Mayonnaise Jar
- Etch Bath, 15-0150 Armour Etch Cream, 70-9001 Sand Etch or Sandblaster of choice
- Contact Vinyl
- Small Flower Pots (to fit top of jar)
- Black Gel Effects and 86-4404 Copper Pearl Gel Effects or Orange and black outdoor paint pens or acrylic glass paints
- 24" piece of orange and black raffia, paper twist or ribbon of choice
- Small votive candles
- Sponge (the larger the holes in the sponge the more rustic-use a sponge brush for fairly smooth, sea sponge or kitchen sponge for rustic)
- Pencil or marker that will write on the vinyl masking
- Craft knife
- Liner paintbrush
- Masking tape
- Re-positional spray adhesive
- Plastic container (slightly larger than jar-for Etch Bath method)
- Stones or sand (For Etch Bath method)
- Plastic plate & spoon (for Etch Cream method)
- Several sheets of plain paper
- Popsicle stick, old credit card or letter opener
- Thick old towel (optional)
- Scissors
- Glue remover (I use Acetone nail polish remover!)
Instructions:
- Remove all traces of glue from jar label with glue remover. Wash the jar thoroughly in hot, soapy water, rinse and let dry.
- Trace ghost and pumpkin designs from a mylar stencil or stencil pattern book onto a piece of paper.
- Spray a light coating of re-positional adhesive on the back of the paper and then stick down to the face of a piece of contact vinyl. Make 3 ghosts and one pumpkin.
- Peel off backing of contact vinyl and place the 3 ghosts staggered around the jar, smoothing out air bubbles as you go. For the pumpkin jar, place stencil near the bottom so you can write “Happy Halloween” over the top of pumpkin later.
- Cut along stencil lines on paper with craft knife, cutting thru contact vinyl as well. (note-cut internal features such as eyes and nose first).
- Carefully remove excess paper and vinyl leaving image of the ghost and pumpkin on glass.
- Lay strips of masking tape around rest of pumpkin jar, dividing covered and non-covered stripes as evenly as possible.
- Lay a piece of paper over design and rub down the pieces with the popsicle stick, old credit card or letter opener, making sure all pieces are secured to the glass.
Etch Bath method
- Follow directions on Etch Bath bottle or go to “Instruction manuals & instructions. Fill jar with stones or sand. Dip jar in Etch Bath for about 10 minutes. Rinse and remove vinyl stencil pieces, rinse again.
Etch Cream method
- Spoon some Etch Cream on a plastic plate with the plastic spoon. Dip the DRY sponge in the Etch Cream and randomly pat all over jar until entirely covered for about 5-8 minutes. Rinse and remove vinyl stencil pieces, rinse again.
Sand Etch or Sandblast method
- Follow directions from Sand Etch book or go to “Instruction manuals & instructions
Pumpkin Jar
- Write or paint with a liner brush "HAPPY HALLOWEEN" over top of pumpkin, starting in black, and alternating with orange.
- Paint "stitches" around frosted part of pumpkin facial features in black and the outside edge of the pumpkin in orange. Paint "stitches" down either edge of frosted stripes alternating in orange and black pairs.
Ghost Jar
- Randomly write "BOO" in squiggly letters as shown in different directions all around ghost jar, alternating colors as shown.
- Tie rafia or ribbon around jar neck to hide jar threads for lid, insert clay pot and candle in top.

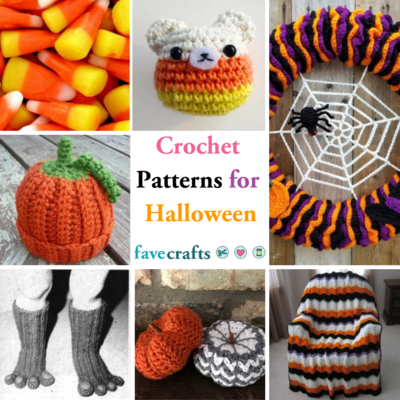
With our collection of more Halloween craft ideas, you will find a great Halloween craft project for every day of October.