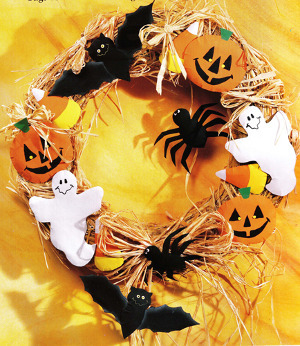
Brown Bag Halloween Wreath
Recycle a brown bag to create the shapes for this fun Halloween wreath designed by Heidi Borchers of Inspired at Home. A bit of paint, raffia and a straw wreath make this a quick, easy and inexpensive Halloween craft. For another Halloween wreath idea, check out the Halloween Crochet Wreath. This quick and easy Halloween craft is a welcoming, festive sight on the door. Your visitors will love how this Halloween wreath craft looks (and the witches and goblins will love it, too).

Materials:
- Aleene’s Original Tacky Glue
- Brown grocery bags
- 3” square cardboard (or plastic) squeegee
- Acrylic paint: black, orange, white, yellow, green
- Paintbrushes – 1/2” flat, 1/2” flat, fine-tip
- Natural raffia
- Scissors
- 12” diameter straw wreath
- Halloween Patterns
Instructions:
- For each shape, cut 2 pieces of brown bag, ½” larger all around than pattern. With edges aligned, glue bag layers together, using squeegee to apply glue. Transfer desired pattern to layered bag and cut out. Shape cutout as desired to give dimension. Let dry.
- Referring to photo for colors and details, paint each shape, letting dry between colors. To paint dots for eyes, dip wooden end of brush into desired color of paint and dot paint on design.
- Cut several 11” lengths of raffia. Handling all lengths as 1, tie into bow. Repeat to make 8 bows. Cut several 60” lengths of raffia. Handling all lengths as 1, tie into bow. Wrap wreath with remaining raffia as desired. Glue large bow at bottom of wreath. Glue 1 bat to streamers of large bow. Cut 1 (10”) length of raffia. Glue spider shape to 1 end of raffia length. Tie free end of raffia to wreath at top so that spider hangs inside wreath. Glue remaining painted shapes and small bows to wreath where desired. Let dry.
Notes:
- I love working with brown bag to create all sorts of shapes for my crafting projects. It’s plentiful and inexpensive and a great way to recycle. After you cut out your shapes, as the glue is starting to dry, just gently shape the pieces to give them some dimension. The glue softens the brown bag just enough to make it bendable while still holding the layers together while you give it some shape.

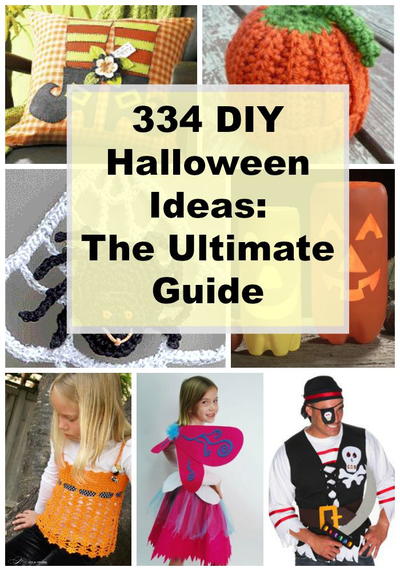
Here is the ultimate Halloween guide, with 287 DIY Halloween ideas for costumes, decorations, accessories, props and much more.
Your Recently Viewed Projects
Thanks for your comment. Don't forget to share!
Cinnia1
Oct 19, 2011
I have also used craft wire along with the glue between paper bag layers. It makes it so much easier to shape your project.
Tammylsp
Oct 14, 2010
Me and my 8 year old son had so much fun making this project. It was fast, easy and inexpensive. Thanks so much.
Report Inappropriate Comment
Are you sure you would like to report this comment? It will be flagged for our moderators to take action.
Thank you for taking the time to improve the content on our site.