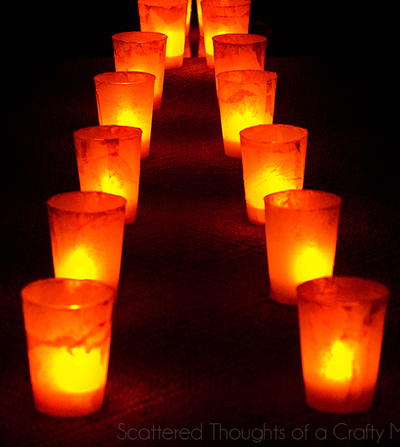
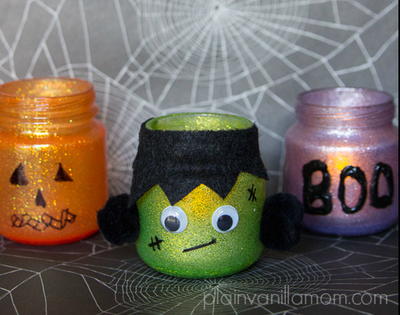
Bright and Bold Halloween Table Decorations
Create this spooky and fun tablescape for your next Halloween party. Using fashion dyes and neons you can have this tablescape full of spiders, favor cups, glasses, bugs, a web tablecloth and more! Find this project and many more fabric dye projects in the free eBook for fabric dye inspiration and instruction, Fun with Fabric Dye.

Materials:
-
Tulip One-Step Fashion Dyes
- Purple
- Aleene's Instant Decoupage Sealer & Finish
- Tulip Fashion Art Resist
-
Tulip 3D Fashion Paint
- 65000 White
- 65018 Purple
- 65038 Black
- 65174 Natural Glow
- 65175 Yellow Glow
- 65176 Orange Glow
- 65177 Green Glow
- Aleene's FunCraft Foam Glue
- Aleene's Fast Grab Tacky Glue
- Chenille stems: neon green, neon yellow, purple, orange
- Pencil
- Spray water bottle
- Plastic trash bags
- Masking tape, low tack
- White fabric, 1 yard all cotton
- Cardboard
- Wire cutters
- Tissue paper: orange, purple
- Glass fish bowl
- Plastic utensils
- Iron
- Straws
- Hole punch
- Small water bottles
- Craft foam, white
- Paintbrush, 1/2” wide flat
- Scissors
- Plastic drinking cups
- Plastic bugs
- Candy, assorted Halloween
Materials:
Spider Bowl
-
Wash and dry fish bowl. Cut a 6” piece of craft foam.
-
Tear or cut purple tissue paper into 3” pieces. Use brush to apply Instant Decoupage onto a small area of fishbowl. Tap brush onto a piece of tissue and press onto decoupage. Brush more Instant Decoupage over top. Tap onto another piece of tissue, overlapping first piece. Decoupage on several layers. Continue with entire bowl.
-
Decoupage tissue onto foam square. Let dry.
-
Trace spider head on reverse side of foam square. Carefully cut out.
-
Pencil on eyes, nose and mouth. Start flow of 3D paint on a paper towel using an even pressure on bottle for a smooth line. Purple: outline edge around head. Green Glow: eyes and teeth. White Slick: mouth, inner eyes, highlights in eyes and nose. Yellow Glow: nose. Orange Glow: eyes. Let dry.
-
Wrap end of two purple chenille stems together to form one long piece. Place around lip of fishbowl, trimming ends to overlap about 2”. Remove and set aside.
-
To create legs, wrap ends of 8 neon green stems around purple chenille stem. Wrap purple around lip, adjusting legs referring to photo for placement. Add a dot of Fast Grab Tacky Glue under each wrap. Hold legs in place with a piece of tape until dry.
-
Bend legs about half way down then 1” from each end. For each leg, cut a 3” orange stem and swirl. Use Fast Grab Tacky Glue to attach at end of each leg.
-
Squeeze a 2” circle of FunCraft Foam Glue to back of head. Let dry until clear. Press in place where desired on bowl.
- Fill with candy. The bowl cannot be immersed in water but can be wiped with a damp cloth, if needed.
Foam Eyes
-
Trace eye pattern onto white foam using pencil. Carefully cut out with scissors.
-
Add a loop of tape to back. Press onto cardboard to hold in place while painting. Start flow of 3D paint on a paper towel using an even pressure on bottle for a smooth line.
-
Referring to photo for color, fill in areas of eyes. Let dry.
-
Add a thick line of FunCraft Foam Glue to center back. Let dry until clear.
- Press onto candy sticks, favor cups and drinking glasses.
Favor Cups
-
Wash and dry water bottles. Use scissors to carefully cut off bottom third of each bottle and even top edge.
-
Cut or tear orange tissue into 2” pieces. Use brush to apply decoupage onto a section of cup. Tap brush onto piece of tissue. Place on decoupage, brushing more Instant Decoupage over top. Continue overlapping tissue until center cup is covered with several layers of tissue. Set aside to dry. Trim excess paper from top edge.
-
Detail with 3D paint. Dye and spider designs can be lightly drawn on with a pencil if needed. Referring to photo for reference, fill in areas with paint. Let dry.
-
To form handle, punch two holes opposite each other on upper edge of cup. Thread a chenille stem from inside to outside and swirl end to hold in place.
- Fill with candy.
Glasses, Straws, Plastic Utensils and Bugs
-
Paint different size sets of eyes on glasses and utensils referring to photo for color and placement using 3D paint. Let dry.
- Paint a set of foam eyes for each glass. Let dry. Add a thick line of FunCraft Foam Glue to back. Let dry. Press in place on glasses. Add Glow paint to sections of plastic bugs. Let dry. Add FunCraft Foam Glue to back. Let dry. Press onto straw where desired.
Web Tablecloth
-
Prewash fabric to remove sizing; do not use fabric softener.
-
Cover work surface with plastic trash bag.
-
Iron fabric smooth then lay on work surface.
-
Snip very tip of resist bottle. Start flow on paper towel.
-
The web design will be drawn on fabric with resist, following pattern. Resist must penetrate fibers of fabric so dye will not seep through. Hold bottle almost perpendicular to fabric. Squeeze out an even line rubbing into fabric with tip of bottle. Start at center of web, drawing out legs, adding connectors last. Let dry.
-
Dampen fabric with spray bottle of water.
-
Wearing gloves from box, fill Purple dye bottle with water. Shake until dye is thoroughly mixed.
-
Slightly crumple fabric following package instructions. Squeeze dye over fabric twisting and turning until covered. When bottle is 2/3 gone, fill with water and continue squeezing on fabric. Squeeze fabric together to help dye blend.
-
Cover with plastic trash bag. Let set 4–8 hours. Fill washer with full load of hot water and a small amount of laundry soap. Wash. Dry in dryer or line dry. The hot water should remove resist, if not, repeat wash step.
- Iron smooth. Cut edge, forming web shape.
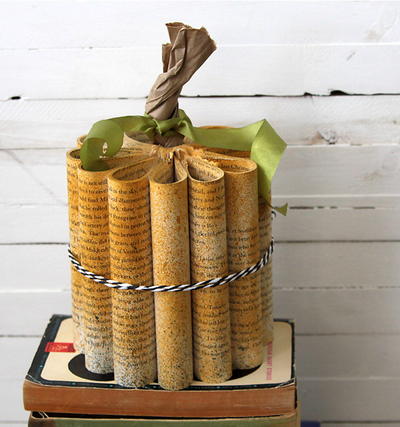
For another centerpiece or decoration check out the broomstick witch!
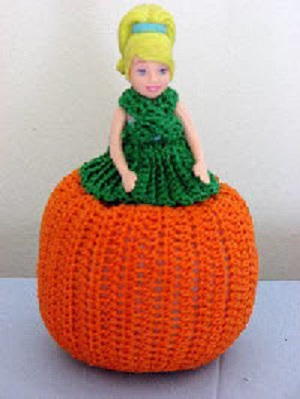
Read NextCute Polly Pumpkin
Your Recently Viewed Projects

Thanks for your comment. Don't forget to share!
Report Inappropriate Comment
Are you sure you would like to report this comment? It will be flagged for our moderators to take action.
Thank you for taking the time to improve the content on our site.