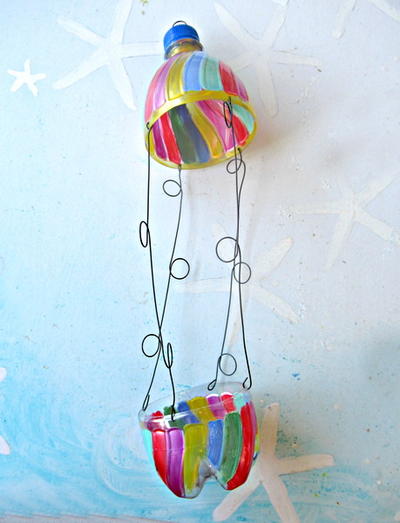
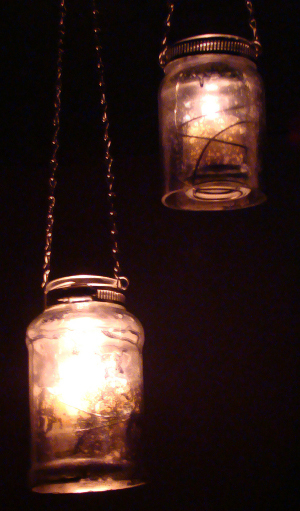
Spaghetti Jar Luminaries
Once dinner is over, clean out that glass jar and create your own lovely crafts with Mason jars. These Spaghetti Jar Luminaries are great for outdoor parties, and you don't need much more than a glass jar and some wire. Hang these Mason jar lights from a tree to help set the perfect mood for your next dinner party, garden party, or outdoor summertime celebration. These lanterns will help set the mood and welcome guests. Best of all, they're easy to make, so you won't spend a ton of time putting them together. Mason jars really are a crafter's best friend, so be sure to use them for this project and see why.

Materials:
- Generation Green™(g2) Bottle Cutter
- 2 Discarded Jars (pickle or spaghetti sauce will do fine)
- Krylon® Looking Glass™ Spray Paint
- Sharpie® Marker
- Spray Bottle of Water (set on fine mist)
- Masking Tape
- Paper Towels
- 2 - 2 3/4” Stainless Steel Pipe Clamps (this size will work for most jars, you may have to go up or down a size for larger or smaller containers)
- 4 - 7mm Jump Rings
- 36” - 16 Gauge Jack Chain, Cut into 1 12” and 1 24” Sections
- 72” - 14 Gauge Tinned Copper Wire, Cut into 2 - 36” Sections
- 2 - “S” Hooks
- 2 - Votive Holders
- 2 - Votives
- Flathead Screwdriver (to tighten clamp)
- OPTIONAL:
- Brown Glaze
- Votive Candle or Tea Light
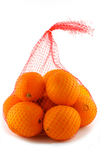
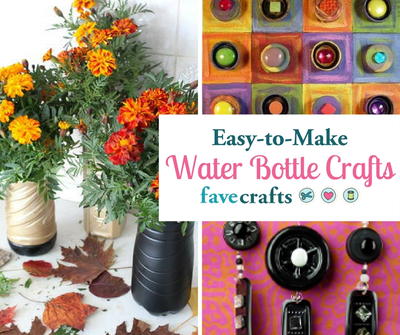
Why stop with Mason jars? Save the mesh produce bags and use them for a ton of genius craft projects. You'll find a ton of inspiration in 14 Creative Uses for Mesh Produce Bags. We asked our readers what they would make, and the ideas may surprise you!
Instructions:
Read and carefully following the instructions contained within the Generation Green (g2)™ bottle cutter manual.
- Cover the work area with craft or newspaper.
- For our luminaries we used a spaghetti sauce and a pickle jar. You can choose to use any jar you desire. Measure up from the bottom of each 1” and mark with a Sharpie®.
- Using the bottle cutter, follow the instructions for scoring and separating glass jars. Separate jar where indicated.
- Smooth the rough edges as instructed in the bottle cutter manual.
- Clean your bottle inside and out with a window cleaner or for a more natural cleaner use a mixture of 1 cup of water to 2 tablespoons of vinegar. Dry glass surface.
- Mask off the area around the outside of each jar with newspaper and masking tape. This will prevent any over-spray from getting on the outside of the bottle.
- Finely mist the inside of each jar with water. Less is more, as you do not want the water to drip.
- Shake a can of Krylon® “Looking Glass” paint for 2 minutes.
- Spray a very light coat of paint on the inside of the glass. Keep the coat very light. If the paint starts to run, roll the jar and let it dry upside down for about 3 minutes.
- When dry, spray extra light coats if necessary until you get your desired look. Dry the jars upside down on a rack. For 2 minutes between coats.
- Take a damp paper towel and scrunch it up. Carefully put it inside the glass jar and press carefully against the paint. For a crackled look, press the paper towel and twist slightly which will break up the paint. A combination of patting and twisting will give you a more vintage look. OPTION: For an even more vintage mercury glass look, apply a dark brown glaze on the inside of the glass when the silver is all the way dry. Blot it lightly and gently with a damp sponge or foam brush.
- Thread two 7mm jump rings through the slots of a flexible pipe clamp, making sure the rings are positioned opposite each other.
- Open a link at one end of the jack chain and attach it to the one jump ring, pinch link closed. Do the same with the opposite end of the chain.
- Place the clamp over the mouth of the jar and tighten the screw on the flexible pipe clamp tightening the clamp around the jar.
- To create the votive holder, find the center of a 36” section the tinned cooper wire. Twist the wire in the center to form a loop a bit smaller then the base of the glass votive holder. Make one twist to hold wire together and bend both wires at a 90 degree angle.


- Begin wrapping one end of the wire around the glass votive leaving about 2.5” untwisted. Do the same for the second wire but twist in the opposite direction. Make a slight bend in the wire so it faces up.


- Using needle nose pliers, bend the ends to form a hook at each end.

- Place the votive inside the wire cage and insert inside the jar so the hooks slip onto the lip of the top of the jar.
- Repeat steps 12-17 for the second jar.
- Place small votive or tea light inside each votive holder and hang with an “s” hook for a bit of holiday glamour.

Looking for more Mason jar craft ideas? Check out our eBook, 20 Crafts with Mason Jars: Wedding Ideas, Centerpieces, Decor, and More. These projects will inspire you to go green and get creative at the same time.


Thanks for your comment. Don't forget to share!
melissasea22
Jul 08, 2016
I have used old house paint I never have cut my jars because the top openings of most sauce jars are big enough, and I usually use those cheap thin wire hangers you buy at walmart or dollar stores (or I will crochet a hanger or macrame one from hemp, cotton kitchen twine, or for a festive look, I will use the dollar store plastic twine found near the automotive sections) If anyone needs more ideas? Go looking in the nearby wooded or park areas for inspiration too!
mulberrygalprinces s
Mar 23, 2016
I couldn't afford all the extras so I just crocheted a hanging basket, small, in a simple single crochet stitch and put the mason jar in it. Then I put candles in the bottom and after punching holes in the lid, screwed it on and that's it. I painted with regular markers and sprayed it with polyurethane . Outside only! Another trick are strings of cordless lights from the dollar store to put inside.. Before a party I turn them on. Easy peasy.
Member 2929378
Feb 22, 2015
This project will be perfect for adding charm and sparkle to the porch of my 100-year old house. I'm going to try it with old mason jars to give a vintage vibe.
bobbylonardo 50143 99
Nov 30, 2013
The description says you don't need much more than a jar and some wire, yet the materials list has 17 items! Interesting . . . .
Report Inappropriate Comment
Are you sure you would like to report this comment? It will be flagged for our moderators to take action.
Thank you for taking the time to improve the content on our site.
![Pill Bottle Crafts: Reuse Pill Bottles [15 Ideas]](http://irepo.primecp.com/2017/06/334076/PILL-BOTTLE-CRAFTS-Header_Category-CategoryPageDefault_ID-2274135.jpg?v=2274135)