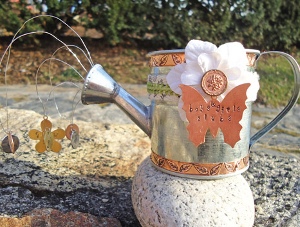
Vintage Watering Can
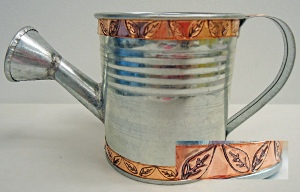
You can create a vintage watering can using metal stamping and some altered art techniques. This watering can from Theresa Cifali would be a cute garden decoration or a gift to a garden enthusiast!
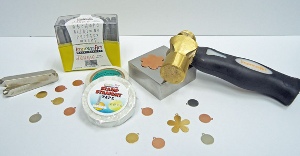
Materials:
- ImpressArt Metal Alphabet Stamps, Jeanie
- ImpressArt Design Stamps: Leaf Left (Large), Leaf Right (Large), Lady Bug, Butterfly, Butterfly Swirl, Vine
- ImpressArt Metal Stamping Hammer
- ImpressArt Steel Stamping Block
- ImpressArt Stamp Straight Tape
- ImpressArt Metal Stamping Blanks, large butterfly, small circles, flower
- Acrylic Paint, black
- Q-tips
- Permanent ink pad, black
- Wire, 24 guage
- Needle nose pliers
- Wire cutters
- Decorative brad
- Metal adhesive tape
- Twill ribbon, 1/2", natural
- Decorative ribbon, 1/8", moss
- Paper flowers, white or natural
- Hot glue gun, extra glue sticks
- Scissors
- Paper towels
Stamping tips:
- Always stamp on a strong, stable surface. NEVER stamp on a glass table!
- Make sure you always use the ImpressArt Metal Stamping Block when stamping.
- When using any of the metal stamps, make sure the ImpressArt logo is facing you. This will ensure that it is oriented properly.
- Hold the stamp at the bottom of the shaft so that your fingers touch the steel block. This will hold the stamp stable.
- Practice on scrap metal (or other surfaces) before working on your project to get the feel for the amount of force you need to use with the hammer. For example, stamping into a thin metal will not require you to hit as hard as stamping into a thicker piece of metal.
Instructions:
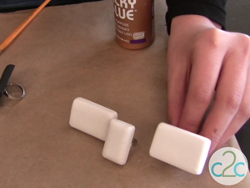
- Gather all of your materials.
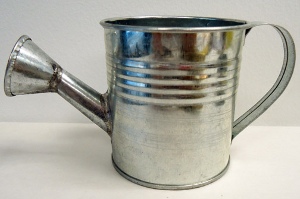
- Prepare your mini tin watering can by removing all labels.
- Cut 2 pieces of metal adhesive tape long enough to wrap around the circumference of the tin watering can plus a little bit extra. Place the metal adhesive tape onto the ImpressArt Steel Stamping Block.

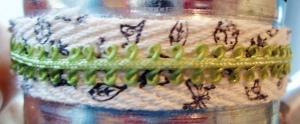
- Dip the Left Leaf stamp into the black pigment ink. Position the leaf onto the metal tape and tap very lightly with the ImpressArt Metal Stamping Hammer. It is important to be very gentle otherwise the stamp with cut completely through the tape. Next, dip the Right Leaf into the black pigment ink and stamp into the metal tape. Repeat this process, alternating the leaves across both pieces of metal tape. It will look like this:
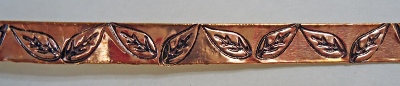
- Peel the backing off of the tape. Adhere one piece around the top of the tin watering can and the other around the bottom of the watering can. Trim off any excess.
- Cut a piece of twill ribbon the length of the circumference of the tin watering can plus a little extra.
- Use all the ImpressArt Design stamps to create a random "printed" pattern along the entire length of the ribbon, by dipping the stamps into permanent black ink and tapping lightly with the hammer. Be sure to use the ImpressArt Steel Stamping Block under the ribbon! Just to note, while you can just press the stamps into the twill ribbon, you will get a much crisper image if you use the ImpressArt Metal Stamping Hammer.
- Glue the twill ribbon around the upper part of the tin watering can with your hot glue. Trim off any excess. Make sure that the seam connects at what will be the front of the can. We will hide that later!
- Layer the thin moss ribbon in the center of the twill, again being sure the seam meets at the front. Adhere with hot glue. Set aside.
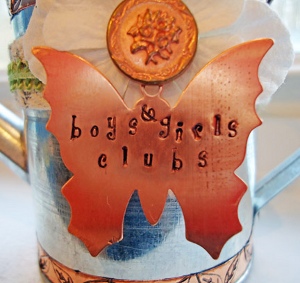
- Lay the butterfly charm onto the ImpressArt Steel Stamping Block. If you want your word or saying to be straight, stick a piece of ImpressArt Stamp Straight Tape where you are going to stamp your letters. If you want a more whimsical look, you can use the tape to simply hold the small charm in place on the steel block.
- Stamp your word or phrase. Remember, the ImpressArt logo on the shaft of the stamp should be facing you. You will also want to make sure you are using enough force when you stamp, so practice on another piece of metal first if it is your first time stamping.
- Dip one end of a Q-tip into black acrylic paint. Cover your stamped image with acrylic paint. Wipe off immediately with paper towel.
- Cut a small piece of wire. Wrap one end around the loop at the top of the metal butterfly. Leave the other end sticking up.
- Insert the brad through two of the paper flowers and spread the back pieces to hold everything together.
- Take the metal butterfly and wrap the remainder of wire around the brad. The wire should be behind the head of the brad, but in front of the flowers. Trim off any excess wire.
- Use your hot glue gun to attach this assembled element to the front of the tin watering can. It should be placed over the seems of the ribbons, so that they are hidden.
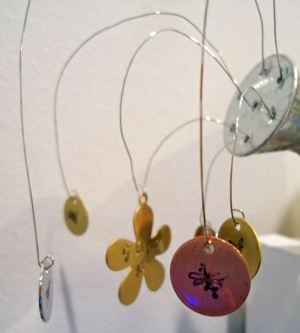
- On the small round ImpressArt Metal Blanks, use the ImpressArt Design Stamps and stamp one image on both the front and back of each blank. There should be 6 small round stamps in all. Highlight each image with the acrylic paint in the same manner as before.
- Stamp the word "flowers" onto the flower shaped metal blank. Again, highlight the word with the acrylic paint.
- Cut 7 pieces of wire about 9" in length each. Attach one end of each wire around the hole of each metal charm. Use your needle nose pliers to assist with this task.
- Insert the opposite end of each wire, one in each hole at the end of the tin watering can's spout. The larger flower stamp's wire goes through the center hole.
- Push each wire all the way through the spout until they come out inside of the watering can. Use your needle nose pliers to coil and twist these ends of teh wire together. Then, from the charm side at the top, outside of the spout…gently pull the wires back through so that the wires on the inside of the can go back up into the spout.
- For extra stability, insert some hot glue into each hole of the spout. Let that glue cool.
- Finally, arrange the wires to that the arc and are spaced out evenly.
Read NextCraft Outside: 84 DIY Garden Ideas