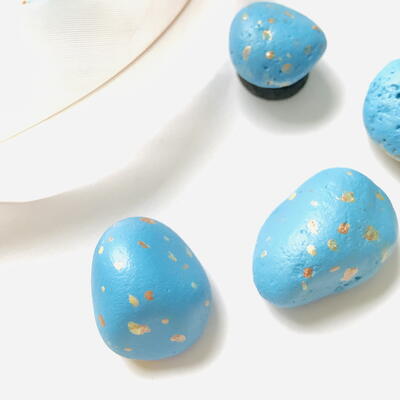
Simple DIY Seed Bombs
Start your garden right with these fun and easy seed bombs! Your garden will be blooming in no time.

Kids will love helping you make these Simple DIY Seed Bombs. Great for giving as gifts for a wedding, baby shower, or Mother's Day, these DIY seed bombs are perfect for teaching your kids about growing plants and caring for the Earth.
They'll also love getting creative in the kitchen with you, and they'll want to create these colorful seed bombs in every color of the rainbow. Spend a rainy afternoon inside, crafting with your kids and making these seed bombs that will be ready to plant in no time!

Materials List
- Seeds of your choice. We used mostly wildflowers but also added some extra seeds. Note: Larger seeds don’t always stay in your seed bomb easily so use smaller seeds if possible. We used some sunflower, nasturtium and sweet pea seeds that were pretty big, and we had to work hard to keep them in the seed bomb.
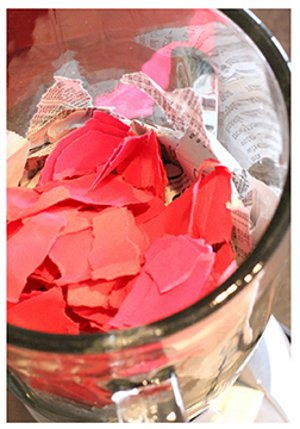
- Colored paper, torn into pieces (2-3 pages). I used 3 pages of paper — red, orange and pink.
- Newspaper, torn into pieces (2-3 pages).
- Blender
- Silicone mold. If you don't have a mold, you can also just form into balls with your hands.
- 2 cups of water
- Mixing bowls
- Strainer
Instructions
-
After you’ve torn up all your paper, put the pieces into the blender.
-
Add 2 cups of water to blender and blend everything until pulverized.
-
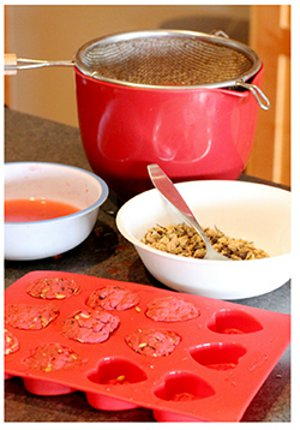
Place a strainer over a small bowl and pour the entire contents from the blender into the strainer. Allow to sit for about 5 minutes so the water can drain out of the pulp.
-
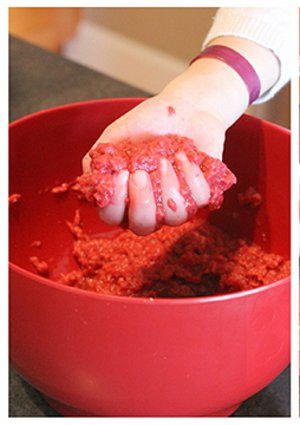
Scoop a handful of paper pulp out of the strainer and add a small spoonful of seeds to your pulp.
-
Gently mix up the pulp and seeds and squeeze out any excess water over a bowl until the seed bomb is fairly compact.
-
Press the mixture into a mold, squeezing out any excess water and draining it from the mold. Continue until you’ve used up all the pulp.
-
Finally, using a paper towel, press down on each seed bomb to soak up any left over moisture in the seed bomb – we want to remove as much water as possible to prevent the seeds from germinating.
-
Allow seed bombs to dry for 24-48 hours and then gently remove from mold.
Why You'll Love This Gardening Craft
Here are the top 3 reasons to make these Simple DIY Seed Bombs:
1. Educational Value: This craft project is a fun and interactive way to teach kids about gardening and the importance of caring for the Earth. Kids will love getting their hands dirty while making the seed bombs, and they'll be excited to see the plants grow once they are planted. It's a great opportunity to have meaningful conversations about the environment and sustainability.
2. Creative Fun: Making these colorful seed bombs is a fantastic way to let kids express their creativity. They can choose different colors and shapes to personalize their seed bombs, making each one unique. Kids will love getting creative in the kitchen with you, mixing different ingredients to create the perfect seed bombs. It's a great bonding experience that will result in beautiful, handmade gifts.
3. Perfect Gift Idea: These DIY seed bombs make wonderful gifts for all occasions. Whether you're attending a wedding, baby shower, or Mother's Day celebration, giving someone a bag of homemade seed bombs is a thoughtful and eco-friendly gesture. The recipient can plant the seed bombs in their garden and watch as the flowers bloom, reminding them of the special gift they received. It's a gift that keeps on giving and spreading joy.
Read NextKnee Pad For Gardening
Your Recently Viewed Projects

Thanks for your comment. Don't forget to share!
Marilyn B
May 24, 2017
Seed bombs! Love this idea! Great for gift giving, especially as a housewarming gift! I am wondering if you could speed up the drying process using a hair dryer set to low or even place in an oven that is turned off, but pre-warmed slightly. Anyone try this? I love the colorful mess of the bomb as well! A fun useful and pretty project any gardener or even non gardener would like! Thanks for sharing!
The Designing Peng uin
Nov 18, 2016
wonderful craft to make with the girls -- they can make these seed bombs as Easter or Mothers' Day gifts or as a fund raiser for some special event the school needs money to achieve. Love it
mmeeks94
Aug 09, 2016
Now this is my kind of gardening! All you have to do is throw these balls into your garden and let the earth do all the work! It's so great for the environment and a fun craft too!
aketch
Apr 21, 2016
What an interesting craft, I have never seen this! It would certainly be a fun projects to make with your kids or students. It would make a wonderful and customized gift for all my gardening friends. It is a much nicer presentation than paper seed packets or pill bottles, which some of my friends use to carry and exchange seeds.
chrisk
Mar 14, 2016
This sounds like a fun project for Spring break and Easter and with luck you may have flowers by Mother's Day.
Report Inappropriate Comment
Are you sure you would like to report this comment? It will be flagged for our moderators to take action.
Thank you for taking the time to improve the content on our site.