French Countryside DIY Planter

Bring the French Countryside into your garden with the French Countryside DIY Planter. This would be a great project if you're looking for garden ideas or even for general home decor. DIY garden ideas are perfect for gardeners who want a little extra beauty in their garden. The tutorial will show you how to stencil the lovely fleur de lis on your planter with the basic supplies for painting crafts. Your garden will look just a bit brighter with these DIY planters.
Primary TechniquePainting

For more great home decor craft projects from Stencil Ease®, check out 13 DIY Home Decor Ideas.
Materials:
- Stencil Ease® Fleur de Lis, 2” Stencil
- Stencil Ease® Repositionable Adhesive Spray
- Ikea® SKURAR Plant Pot, off-white
- Rusto-Leum Painter's touch® Ultra Cover 2X Satin Summer Squash
- Deco Art® Metallic Emperor’s Gold
- Shurtape Technologies LLC Frog Tape®
- Stencil Ease® 5/8” Stencil Brush, White Bristle
- Small Artist Brush
- Paper Towels
- Paper or Plastic Plate
- In a well ventilated outdoor space, spray the Ikea® SKURAR Plant Pot with the Summer Squash Rust-Oleum Painter's touch® Ultra Cover 2X Satin.
- Let dry Overnight.
- Spray the back of the Stencil Ease® Fleur de Lis Stencil very lightly with the Stencil Ease® Repositionable Adhesive Spray and let the adhesive dry.
- Position the stencil design on the center of the of the pot and press down to make sure it is sticking to the table –use Frog Tape® as well to be sure it is secure since it is a curved surface.
- Pour some of the Deco Art® Metallic Emporer’s Gold onto the plate.
- Load one end of your Stencil Ease® 5/8” Stencil Brush with the Emperor’s Gold paint then swirl the brush onto your paper towel until it seems like all of the paint is removed. This creates a dry brush and leaves the perfect amount of paint on your bristles. Using a dry brush prevents paint from seeping under the cut-outs of the stencil. This part of the process is essential if you would like clean/ crisp lines when you lift your stencil.
- Either stipple (lightly tapping over the stencil cut-outs) or swirl the paint onto the pot.
- Remove the stencil.
- Draw accent lines with your small artist brush.
- Allow the pot to dry completely overnight.
Find even more chic and trendy craft project ideas to adore in our collection of crafty DIY ideas that we think you should make ASAP. The ideas in 53 DIY Crafts Everyone Should Try are all pretty, easy, fabulous, and unique.
For more information about Stencil Ease® or to purchase Stencil Ease® products, please visit www.stencilease.com.
Why You'll Love This Gardening Craft
1. Adding a Touch of Elegance: The French Countryside DIY Planter will instantly elevate the look of your garden with its beautiful fleur de lis design. This classic symbol of French sophistication will bring a touch of elegance to your outdoor space, making it truly stand out.
2. Personalized and Unique Decor: By creating your own DIY planter with this tutorial, you can customize it to match your personal style and preferences. You can choose your own color scheme, add embellishments, or even incorporate other design elements to make it truly unique to your taste.
3. Budget-Friendly and Fun: This project is not only budget-friendly, but it's also a fun and creative way to spend your time. With just basic painting supplies and a simple terracotta planter, you can create a stunning piece of decor that will add charm to your garden or home. It's a great way to unwind and express your creativity while adding a pop of color to your surroundings.
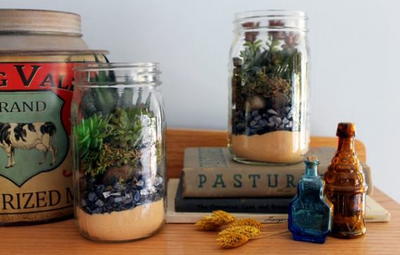
Read NextTerrarium in a Mason Jar Gift Idea
Your Recently Viewed Projects

Thanks for your comment. Don't forget to share!
The Designing Peng uin
Mar 27, 2016
Love the look of this planter - all the chic expensive look of a vintage French piece for a fraction of the cost
Report Inappropriate Comment
Are you sure you would like to report this comment? It will be flagged for our moderators to take action.
Thank you for taking the time to improve the content on our site.