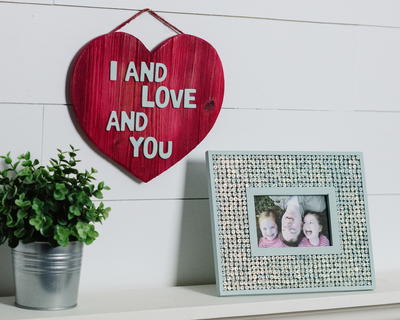
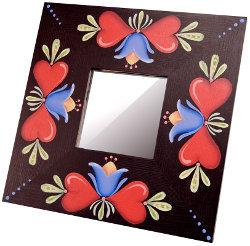
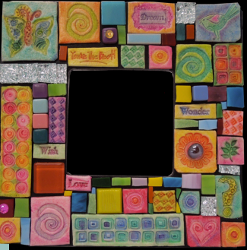
Mosaic Bread Dough Frame
Make your own Bread Dough and use it to form mosaic tiles. When it comes to DIY home decor, frame craft ideas help you think outside the box. Make a Mosaic Bread Dough Frame from Heidi Borchers for a friend and include a meaningful photograph inside.
Materials:
- Aleene’s Original Tacky Glue (in the Gold bottle)
- Aleene’s Spray Acrylic Sealer – Matte Finish
- White bread (crust removed)
- Acrylic paint – white
- Cold cream – we prefer Ponds Cold Cream
- Shower-to-Shower Body Powder
- Plastic cup
- Measuring spoon – tablespoon
- Craft sticks
- Plastic rolling pin – approximately 9″ wide (these rolling pins are available for use with polymer clay or you can create one from cut pvc pipe)
- Blue masking tape
- Zip top bags
- Craft chalk
- Rubber stamps (bold designs work the best)
- Wood frame (or surface of your choice)
Instructions:
-
Tear 1 piece of bread (crust removed) into small pieces into plastic cup. Add 1 tablespoon of Aleene’s Original Tacky Glue and a dab of cold cream to the cup. Add about 10 drops of acrylic paint. Mix with craft stick until a dough ball starts to form.
-
Rub hands with cold cream. Once a ball forms, remove from cup and place into hand. The dough will still be very sticky and messy at this point. Begin to knead the dough until it changes into a smooth ball. This should take about 5 minutes of kneading until the stickiness is gone and your hands are clean and you have a smooth ball of dough. If the dough is still sticky, add another dab of cold cream.
-
Place dough into zip top bag to store. Repeat to mix desired amount of dough balls. (I used four slices for the pieces on this frame.)
-
Tape piece of wax paper to work surface. The next step will be to create a raised surface that you will roll on in order to create a specific thickness of dough.You will be using stacked craft sticks to raise the rolling pin off the work surface.
-
Measure and mark two lines approximately 7″ apart on wax paper. Lay craft sticks on lines. Stack craft sticks two high. Tape in place on wax paper. This will be the raised surface that you use to roll the dough.
-
Remove dough balls from zip bag. Knead to re-condition. Gently press into a thick pancake. Sprinkle wax paper with powder. Place dough onto wax paper between craft sticks.
-
Rub powder onto rolling pin. Place rolling pin across raised craft stick surface and begin to roll dough. Roll until dough is consistent thickness.
-
Sprinkle powder onto rubber stamp. Brush away excess powder with brush. Press stamp into dough.
-
Cut around stamped design with knife or scissors.
-
Set stamped cut design on wax paper to dry overnight. Turn over and let dry overnight again. You want to be certain that the dough air drys completely before moving on to next step.
-
Rub stencil brush into craft chalk to pick up color. Rub brush onto desired area of stamped design. Gently blow away excess chalk dust. To clean brush, rub off excess chalk onto paper towel. Repeat to pick up additional colors and apply to stamped designs.
- When all pieces are colored with chalk and you have blown away the excess chalk dust, spray with Aleene’s Sealer Matte Finish. Let pieces dry completely and then glue onto frame or desired surface.
For a comprehensive video tutorial of this project, check out Aleene's Bread and Glue Mosaic Tiled Frame.
Read NextCottage Slat Picture Frame