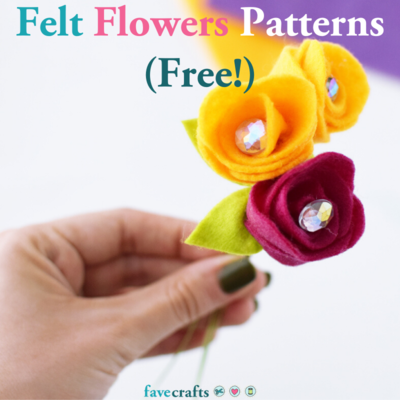
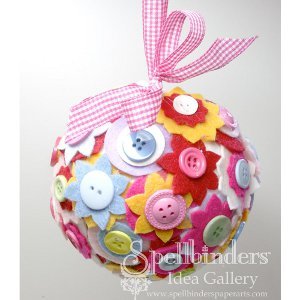
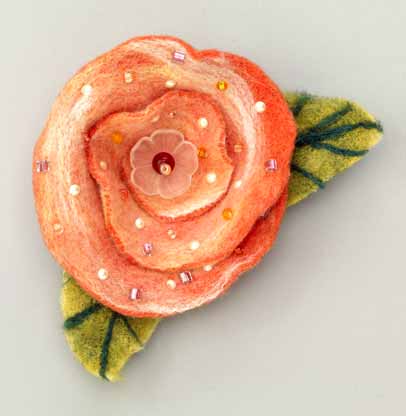
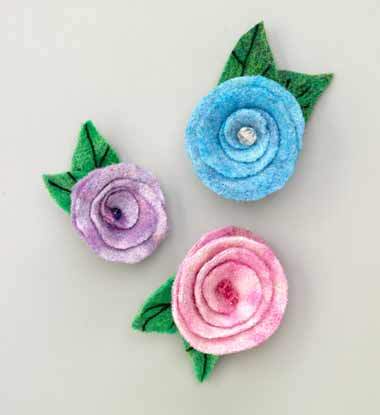
Felt Rose
One of the best things about making faux flowers to add to your world is that you can create bright blooms that you never have to worry about watering. Roses wilt, but felt is forever. Scroll down to learn how to make a felt flower with the wool roving method and Baby’s Lock’s embellisher to create an unforgettable design. Make one rose craft idea to add to a favorite blazer or winter coat or go crazy by making a whole bouquet. No matter the number, you are sure to make an impact.
Adding DIY brooch patterns and flower embellishments to simple sewing projects like a tote bag allow you to really up your game without too much effort. Plus, it is a smart and sneaky way to cover up flaws in the project or a stubborn stain that just won’t scrub out! The felting instructions are easy to follow. Make one today!

Find even more how to make flowers tutorialsand more our pretty collection of 35 Homemade Mother's Day Flowers.
Materials:
- Baby Lock Embellisher
- Baby Lock Dissolve-Away Mesh stabilizer*
- Wool roving - several different hues of the same color, from light to dark for the rose
- Wool roving - several different shades of green for the leaves
- Fibrous strands of yarn, in shades to match your rose (optional)
- YLI Pearl Crown Rayon for leaf accents
- A bead for the center of the rose to hold it together
- Construction thread to match color of rose
- Construction thread to match leaf color
- A small plastic cup
- Spray starch.
- A sprayer with water
- Long pins
- Small piece of green felt
- One 1 1/4” steel jewelry pin clasp (available in most craft stores)
* Stabilizer used for this project needs to be a the fibrous type, not a see-through clear wrap type
Instructions:
Creating the Felting:
- Cut two pieces of the water soluble stabilizer approximately 9” x 5” for the rose.
- Cut two pieces of water soluble stabilizer approximately 6” x 4” for the leaves.
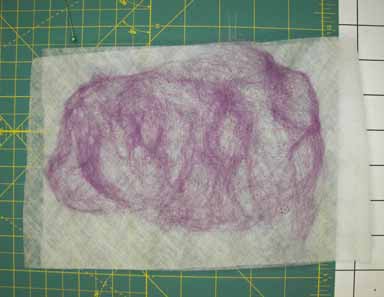
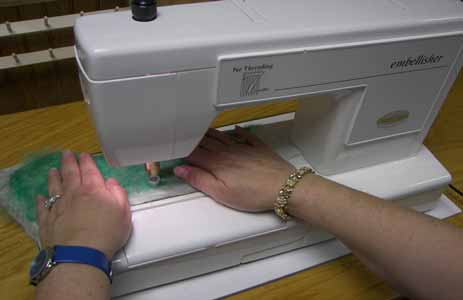
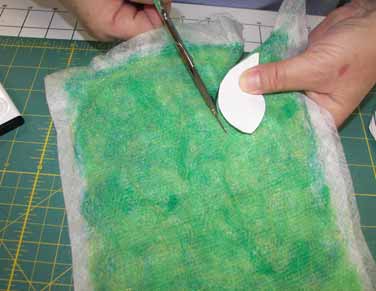
- Lay the two pieces of rose stabilizer on a flat surface, close to your Embellisher. Take the darkest piece of roving and separate the fibers. Lay them out on the stabilizer, as shown in picture below.
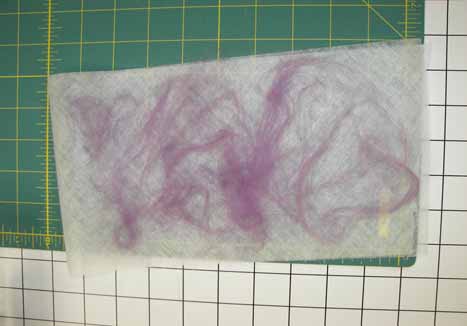
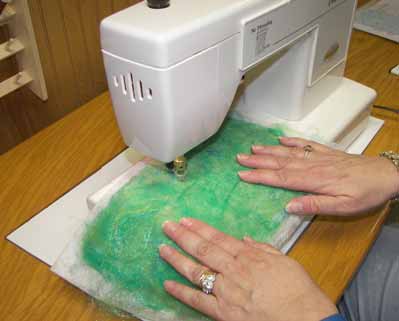
- To create the felting for the flower, you will be repeatedly creating thin layers of felt using your dark roving placed onto each side your 9” x 5” piece of water soluble stabilizer. Repeat the layering process on each side until you cannot see the stabilizer when you hold the felting to the light. If you wish to add a little texture to your rose, take some yarn and felt it in between the layers of roving. You probably will end up with seven layers of felting on each side of the stabilizer. Make sure you felt every piece, so the roving is secure.
Creating the Leaves:
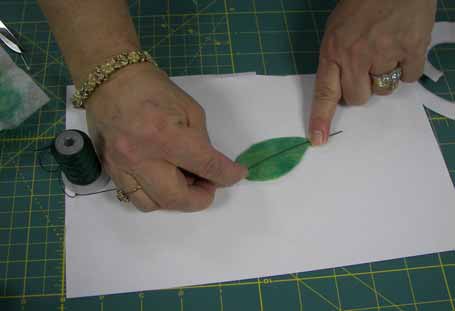
- Take a piece of paper and draw a leaf on it. Use this as your template. Cut out two leaves from the green felted stabilizer.
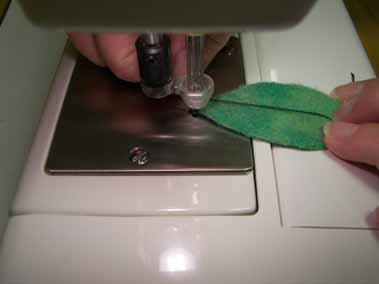
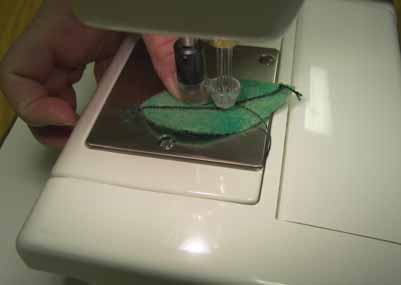
- Cut a piece of pearl crown rayon about 2 inches longer than your leaf. Place down the center of the leaf and felt it. Repeat this process for the veins in the leaf. Trim any extra away.
Creating the Rose:
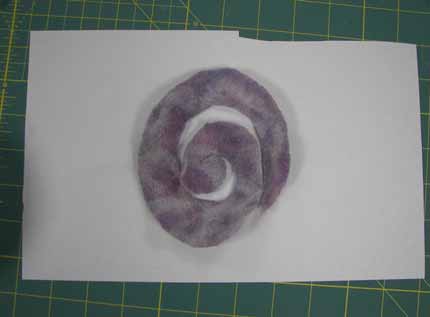
- Take a piece of paper and draw a circle on it, approximately the size of a small bowl (4-5 inch diameter). Lay this piece of paper on top of the rose stabilizer. Cut out a circle. After the circle is cut, start at the outer edges and cut a spiral.
- Take the leaves and rose spiral and place them on a towel. With your water spritzer, thoroughly spray both the rose and the leaves. Let them dry overnight.
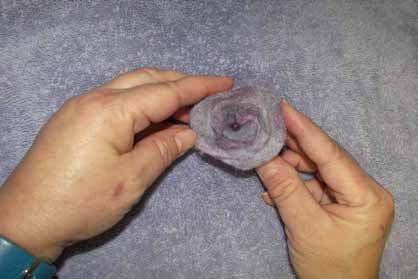
- After the rose spiral has dried, coil it starting at the center and working out to the edges. Hold the rose in place with long pins.
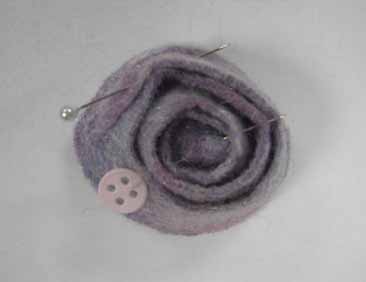
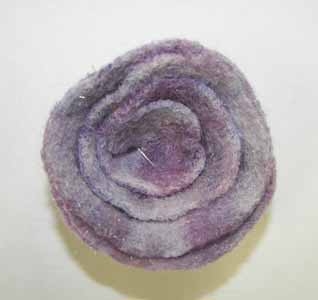
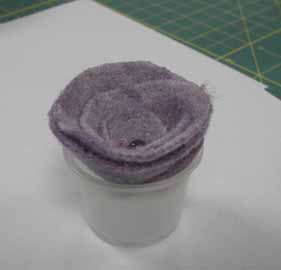
- Stitch the rose bottom together, gently pulling the opening closed. Secure thread. Attach bead to center of rose. Put rose in the plastic cup, center of rose facing up.
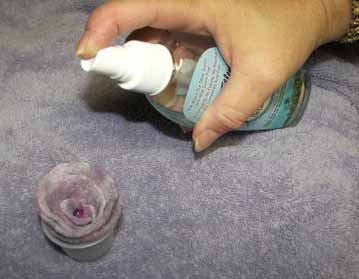
- Take your spray starch and spray rose. After rose is wet, gently shape petals. Leave rose to dry overnight in the plastic cup.
Putting it all together:
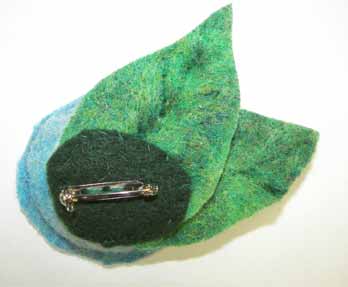
- Take leaves and stitch to back of rose, covering up the rose stitching. Next, cut a piece of felt to cover the back of the rose. Sew the clasp to the felt and then sew the felt to the back of the rose.
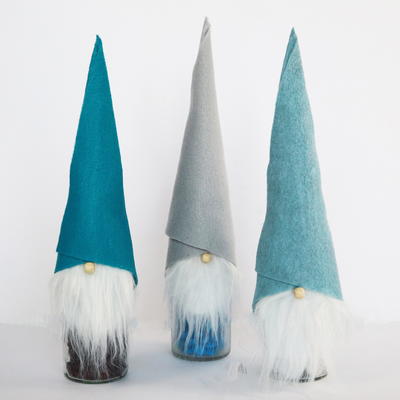
Read NextWinter Candy Jar Gnome Bottles
Your Recently Viewed Projects


Thanks for your comment. Don't forget to share!
bjm1
Oct 22, 2011
I find these very pretty, but I do have to say: I feel most folks wouldn't begin to appreciate the work and steps involved, nor I believe cost. To the untrained eye, they may seem no different than a simple felt rose. No insult intended, absolutely not... merely an honest viewpoint from someone who DOES appreciate the work and effort gone into these cuties.
1Sandijean1
Apr 06, 2010
What a sweet gift topper! Also good for putting on a little girls blanket.
KMP50
Feb 21, 2010
This is nice, but why do the directions always have a specific name breand attached? Can't these projects be done with generic materials?
LilBitKnits
Nov 27, 2013
Name brands are often stated in a pattern for one or both of the following reasons: 1) The pattern was provided by the name brand company, 2) The name brand product is the one tested and proven to work properly in the making of this pattern. If you choose to use generic or substitute materials, your finished product may or may not come out with the same result. I'm not saying it would fail, just that the pattern was tested using the brand name product. It is similar to substituting ingredients in a 'recipe', you may like it even better 'your way' and that is what creativity is all about!
Report Inappropriate Comment
Are you sure you would like to report this comment? It will be flagged for our moderators to take action.
Thank you for taking the time to improve the content on our site.