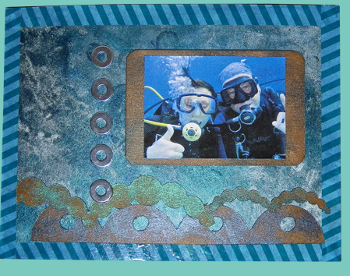
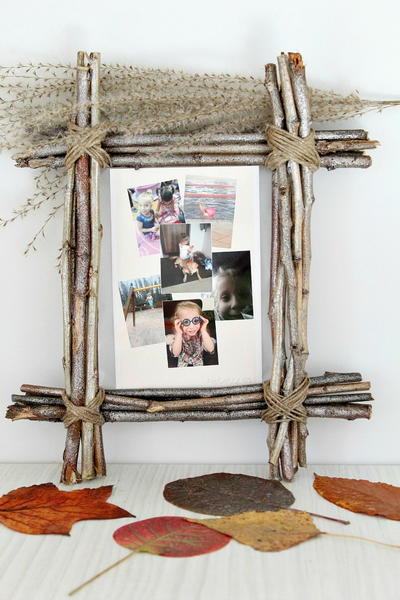
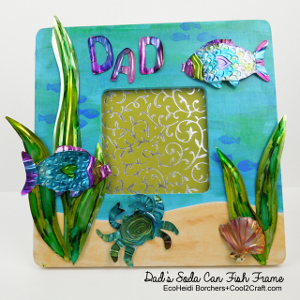
Father's Day Scrapbook Board
Capture precious moments with a simple and fun Father's Day Scrapbook Board. This is a cute piece that dad can place on his desk of dresser. Scrapbook craft ideas can be manly - all you have to do is add neutral colors and gender-neutral patterns.

Materials:
- White heavy illustration board – cut to 5”x7”
- Perfect Pearls powders in desired colors
- Perfect Pearls Mists in desired colors
- Perfect Medium pad
- Perfect Medium pen
- Paintbrush
- Craft glue
- Tape runner
- Cosmetic sponge wedge
- Themed rubber stamps
- Themed die-cut paper borders
- Solid cardstock in desired colors
- Paper trimmer
- Scissors
- Washi tape
- Metal charms
- Photographs
Instructions:
-
Lightly spray one side of the board with Perfect Pearls mist, then sprinkle Perfect Pearls powder in a complementary color on top.
-
Use a clear or pale mist to retain the color of the powder, or experiment with blending a mist color with a different powder color.
-
Use a clear or pale mist to retain the color of the powder, or experiment with blending a mist color with a different powder color.
-
Use cosmetic sponge to swirl and rub the color into the board, then pounce the sponge across the top to create additional texture while the surface is still damp. Allow to dry.
-
Repeat for the other side of the board.
-
Decide on your photo and theme first, then choose Perfect Pearls colors and texture effects to match.
-
Decide on your photo and theme first, then choose Perfect Pearls colors and texture effects to match.
-
Wrap all four sides of the board with washi tape.
-
Distress and/or color the die-cut paper borders by rubbing a little Perfect Medium on the surface (or drawing lines with the Perfect Medium pen) and then brushing Perfect Pearls powder across the top.
-
Glue each border along the bottom edge of each side of the board; allow to dry.
-
Stamp an image(s) with Perfect Medium into position on one side of the board to surround the photo. Immediately brush Perfect Pearls powder over the top of the stamped area, then brush away excess powder. Repeat for the other side of the board.
-
Trim and mat your photo with 1-2 layers of solid cardstock; adhere with tape runner into position on the board; repeat for other side.
- Embellish each layout by gluing metal charm(s) into desired position.
Read Next101+ Father's Day Crafts for Adults