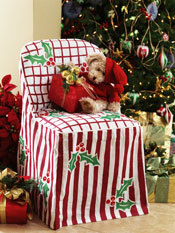
Christmas Chair Cover
This chair cover from Jacquard Products fits over a typical metal folding chair. The canvas cover can be found through catalog companies or in fabric and craft stores. Also available are covers to go over certain styles of dining chairs. In doing this project, I found that you could stop painting at various points for several different versions of the pattern. If you are doing a whole set of chair covers, you might consider this for a variety of coordinating patterns.

Materials:
- Canvas chair cover
- Jacquard Lumiere: #572 Pearlescent Emerald and #566 Metallic Russet
- Jacquard Textile Paint: #106 True Red
- 3/4” masking tape
- 1 1/2” masking tape
- Paint brush
- Sponge brush
- Auto fade pen
- Empty jar for mixing color
- Cardstock or manila folder to cut stencil from
- Large trash bag
Steps:
- Iron the chair cover and place on chair. To protect the chair put a large trash bag over the chair underneath the cover.
- Cut the leaves out of the cardstock or manila folder. Use an auto fade pen to trace around the leaves placing your pattern all over the chair.
- Using the Lumiere Pearlescent Emerald for the holly leaves and the Textile Colors True Red for the berries, paint in your design.
- You can leave the chair just like this by jumping to step 14 and setting the paint, or go on to step 5.
- With the 1 1/2" wide masking tape, lay down vertical stripes on the chair seat and seat back leaving about 1/4" between the tape lines. Don't worry about making it absolutely perfect. Irregularities will give it some character.
- In the empty jar, pour the remaining True Red and the full bottle of Lumiere Metallic Russet. Stir well. This will be the color you use for all of the stripes on the chair.
- With a sponge brush, paint the red paint mixture along the tape lines. Be sure to leave about a 1/4" space between your stripe and the holly and not paint over the holly.
- When the paint is dry, pull off the masking tape.
- You can leave the chair just like this by jumping to step 14 and setting the paint, or go on to step 10.
- With the 3/4" masking tape, lay out vertical stripes around the rest of the chair. This will take a little time. Leave about 3/4" to 1" between the tape lines.
- Paint the stripes as before. Let dry and remove tape. You can leave the chair just like this by jumping to step 14 and setting the paint, or go on to step 12.
- For the checks on seat and seat back, again use the 1 1/2" masking tape to make stripes about 1/4" wide. You will have to be a little creative where the seat and the back come together. Start laying the tape from the front of the seat to the back and on the seat back, from the top down. If you follow the cut fabric pattern of the chair it will be a little easier.
- Paint the stripes as before. Let dry and remove tape.
- After painting is completed, heatset the chair cover as directed on the bottle or by putting in a clothes dryer on high for 35 to 45 minutes.
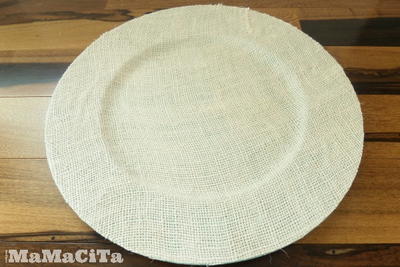
Read NextDIY Burlap Charger Plate
Your Recently Viewed Projects
Thanks for your comment. Don't forget to share!
Marilyn B
Nov 16, 2017
Hi Pokerwidow.... That is so cool you will be making these for gifts! It mentions above where you can get the chair covers in the Jacquard link, but you can find these covers at many home stores or craft stores, or if you are crafty and sew, you could fashion one from a painters drop cloth from the hardware or fabric store. The paints are available at any art, craft, fabric or hobby store or even online. Make sure they are fabric paints and washable too. Hope you gifts turn out just great! )
Marilyn B
Nov 15, 2017
I never would have thought of doing this project, but it does look quite lovely! If you are artsy and gifts with free form art, I could see painting in the holly leaves free hand and even use different shadings of green by lightening with white. And darkening with darker green or brown,to creat dimension in the leaves and ding the same with the berries making them rounded in appearance. Pretty and practical project idea!
Pokerwidow1968 417 8326
Nov 16, 2017
I really like this and would like to make them for Christmas gifts.Could you please tell me where you got the supplies?
Report Inappropriate Comment
Are you sure you would like to report this comment? It will be flagged for our moderators to take action.
Thank you for taking the time to improve the content on our site.