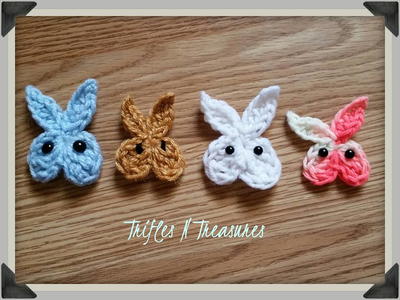
Somebunny Special Card
Use these Easter card ideas to make a Sombunny Special Card for somebody (or somebunny) special. Mix crochet, watercolor, and more with this card project from Cindi Bisson.

Materials:
- Rit Liquid Dyes: Petal Pink, Apple Green, Taupe
- Crafter’s Pick Batik-EZ Resist Medium
- Watercolor Paper, 90 lb. 9” x 12” Daler-Rowney
- Graphic 45 “Once Upon A Springtime” Collection Scrapbook Papers
- The Angel Company “Happy Easter” & “You’re Somebunny Special” Stamps
- Blumenthal Lansing Pearlescent Buttons
- Hearts In Touch Becky Chabot Small flourish rubber stamp
- Sizzix Big Shot Embosser and Texturz Texture Plate and
- Embroidery Floss, light blue
- Ivory Crochet Trim, 6” piece
- Pink Inkpad
- Scalloped Edge Rectangle Craft Punch (Marvy Uchida)
- Elmer’s Craft Bond Dot Runner & Foam Mounting Tape
- X-Acto Paper Trimmer & metal ruler
- Water, measuring cup, small mixing bowls, teaspoon, 2 paintbrushes (large & small), paper towels, latex gloves, paper towels, microwave oven
Instructions:
- Wearing latex gloves, measure and mix ½ teaspoon of Petal Pink dye and 3 drops of Taupe dye with ½ cup very hot water in small bowl. Tip: Use a small paintbrush to get drops of dye from bottle.
- Immerse two pieces of 3” ivory crochet trim in dye. Let set approximately 10 minutes. Remove from dye, rinse under cool running water. Place on paper towels and microwave on High approximately 2 minutes until dry.
- Measure and mix ½ teaspoon of Apple Green dye and 4 drops of Taupe dye with ½ cup very hot water in small bowl.
- Immerse buttons and let set approximately 10 minutes. Remove from dye, rinse off excess dye in cool water and let dry. Set dye aside for later use.
- Cut one piece of watercolor paper 4 ¼” x 6 ½”. Cut one piece 4”x 6”.
- Apply Batik-EZ to small flourish stamp and stamp onto larger piece of dry watercolor paper. Repeat until all over pattern is achieved. Let dry.
- Reheat bowl of Apple Green and Taupe dye in microwave approximately 1 minute.
- Use paintbrush to apply Apple Green & Taupe dye over the entire surface of both pieces of watercolor paper.
- Place dyed paper on paper towels and microwave on High 1 - 2 minutes. Gently rinse stamped paper under running water and rub with fingers to remove any excess dried dye or Batik EZ from stamped piece. Microwave again approximately 1 minute to dry.
- Brush Apple Green and Taupe dye to reverse side of smaller piece of watercolor paper. Place on paper towels and heat in microwave approximately 2 minutes until dry.
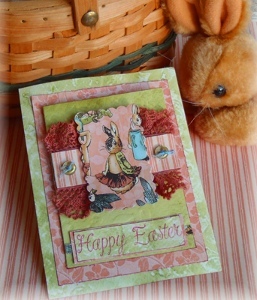
- Following manufacturer’s directions, use Texturz Texture Plate and Sizzix Big Shot to dry emboss 4”x 6” piece of dyed paper. Fold in half to create 3” x 4” card.
- Ink edges of card with pink inkpad.
- From a coordinating print of paper from the “Once Upon a Springtime” collection, cut 4 ¾” x 3 ½” mat. Ink edges with pink inkpad. Mount folded card to center of patterned paper using Elmer’s Craft Bond Dot Runner.
- Cut larger piece of stamped dyed paper to 4” x 5 ½”. Ink edges with pink inkpad. Mount card mounted onto patterned paper onto center of dyed stamped paper.
- On scrap piece of stamped dyed paper, stamp “Happy Easter” with pink ink. Trim around verse and ink edges with pink inkpad. Layer onto coordinating piece of patterned paper and cut mat slightly larger than verse piece. Cut small strip from a second coordinating patterned paper and mount beneath verse pieces. Mount to bottom front of card as shown.
- Cut 1” x 3” piece of a third coordinating patterned paper. Mount strip of dyed crochet trim above and below strip.
- Punch rabbit image from patterned paper using scalloped edge rectangle punch. Mount to center of dyed trim piece using foam tape for added depth.
- Use blue embroidery floss to stitch dyed buttons on either side of rabbit image.
- Mount finished focal image to card above verse using foam mounting tape for added depth.
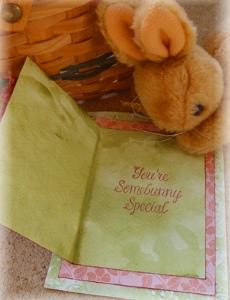
- Ink “You’re Somebunny Special” stamp with pink inkpad and stamp on inside back of green card.
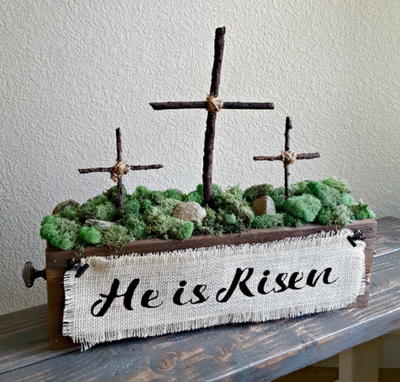
Read NextDecorated Wooden Crosses (4 Ways)
Your Recently Viewed Projects
Thanks for your comment. Don't forget to share!
Report Inappropriate Comment
Are you sure you would like to report this comment? It will be flagged for our moderators to take action.
Thank you for taking the time to improve the content on our site.