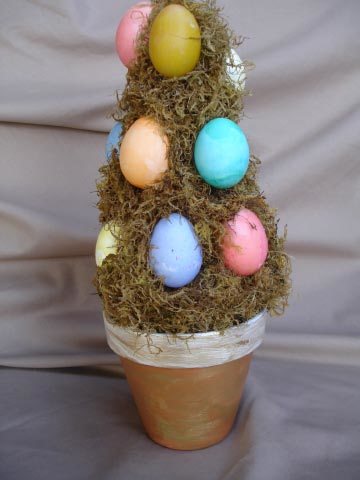
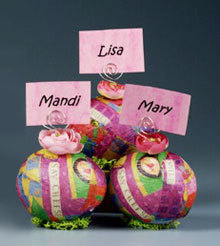
Easter Egg Moss Topiary
Decorate a moss topiary with naturally dyed Easter eggs. This quick and easy topiary designed by Terri O makes a wonderful Easter centerpiece.

Materials:
- Terra cotta pot & Styrofoam cone (test to make sure the foam fits inside the pot and is not too big or too small)
- Acrylic paint
- Brushes
- Floral pins
- Moss
- Dyed eggs
- Glue gun (low heat setting)
Tips for Dyed Eggs
Learn how to naturally dye eggs here. There are many different recipes on line based on what colors you are after. I used things like spinach, beets and turmeric to get some of the colors. Have fun with this and try new things. Dye your eggs first then blow them out.
Instructions:
- Paint your pot and let dry. Add some rocks or something heavy to the bottom so it won’t tip over.
- Insert the cone into the pot about one inch deep and glue.
- Cut up your moss into 2 inch squares.
- Starting from the bottom secure the squares of moss onto the cone with floral pins. Leave a quarter size hole for the egg. Work one section at a time making sure you have enough eggs and they are spaced the way you like them.
- You will have a tendency to get one side heavier then the other so carefully plot your design.
- Glue the eggs into the empty spaces with a glue gun. Fill in any holes with moss.
Read NextEaster Bunny Milk Jug Basket