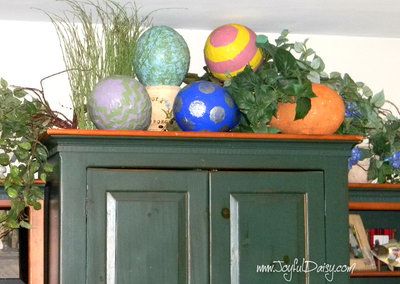
Jumbo Easter Egg Kids Craft Idea

These aren't your average Easter eggs. Your whole family will love this Jumbo Easter Egg Kids Craft Idea and will want to make them every single year. Easter ideas for kids should be unique and fun, and this project certainly fits the bill. The coolest and most unexpected aspect of this project is that you use blown-up balloons to form the eggs. Use paper mache to create a one-of-kind look and be sure to include plenty of paint and glitter. You can use this Easter craft to decorate your space and bring a hint of spring to your decor. Make a bunch and have the kids decorate a few - it's a great way to show off creativity during this special season.
Primary TechniquePainting

SeasonSpring
Materials:
- Large balloons
- Glue (for 5 jumbo eggs we went through 5 small bottles of Elmer’s glue)
- Newspapers
- Paint
- OPTIONAL-glitter, why not?
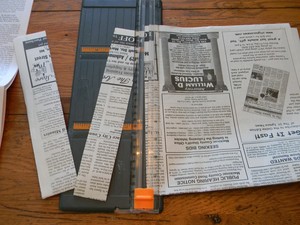
- Paper trimmer- saves a lot of cutting time
- Cut lots of strips of newspapers 1-2″ wide. You can see how the paper trimmer works great for this project! We cut 1-2 pages at a time that were folded and then just opened them up and tore in half.
Instructions:
- Blow up your balloons. I actually like the eggs better when we didn’t blow them up to their full potential because as you will see with the yellow striped egg, it kind of lost it’s egg shape:)
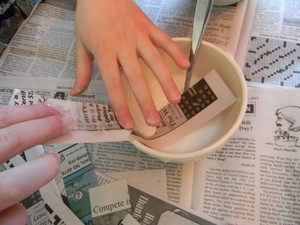
- Mix one bottle of glue with 1/3 cup warm water. Then dip each strip in the glue and rub any excess glue on the side of your bowl.
- Bowls work great to hold the balloons while you apply paper mache.
- Just a note…my daughter preferred to rub the balloon with glue and then lay a dry newspaper strip on the wet glue and then rubbed glue on the newspaper.
- Just start covering your balloons with one layer of glue and newspapers.
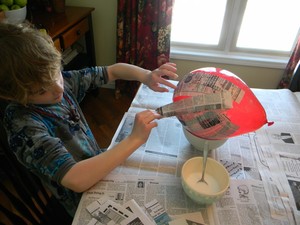
- Try to keep newspaper strips as smooth as possible.
- We let each layer dry over night.
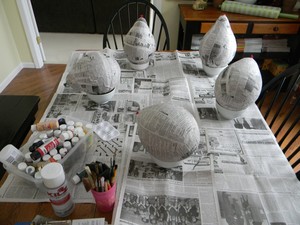
- We applied 3 coats of paper mache letting each coat dry overnight.
- We used foam and regular brushes to apply craft paint to our jumbo paper mache eggs, however, you could use spray paint. I pulled out my Kilz spray paint primer but it was too cold in the garage to spray the eggs. It worked out fine without the primer, however, if you are looking for perfect eggs :) you won’t want to miss this step because you can see the newspaper print through two layers of the yellow and orange eggs.
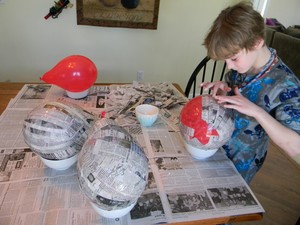
- We let the dots dry about 15 minutes before flipping it over to complete.
- I liked squeezing the paint on the egg and then using my foam brush to apply.
- Next we painted an egg light blue and then Reece dabbed on some green speckles.
- We also decide to make a striped egg.
- Once all the eggs were painted and completely dry, I decided to add some water base varnish to make them a little bit shinier.
Read NextEaster Egg Mobile
Your Recently Viewed Projects
Thanks for your comment. Don't forget to share!
Marilyn B
Mar 08, 2017
Paper mache is so much fun! Messy, yes, but somehow there is such satisfaction when you are done! I think adding a final coat of varnish really sets it off! For an extra touch once done, take some old nail polish and paint on dots and wavy lines. Especially cool if you have pearl or glitter polish! Great idea and instructions!
Report Inappropriate Comment
Are you sure you would like to report this comment? It will be flagged for our moderators to take action.
Thank you for taking the time to improve the content on our site.