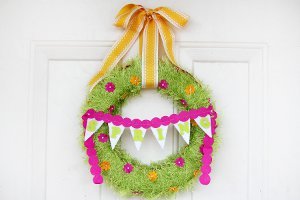
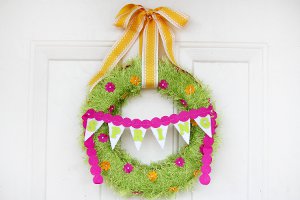
Spring Cheer Wreath
Looking to make a springtime wreath? You can't go wrong with the Spring Cheer Wreath from Shaunte Wadley for Consumer Crafts! It's a great way to welcome the April showers and May flowers.
Materials:
- 12″ Foam Wreath Form
- 1-2 Skeins of Green Fringy Yarn
- Felties Rickrack Trim (Circles)
- Felties Rickrack Trim (Flowers)
- Felt Sheet (White)
- Felties Alphabet Stickers (Lime Green)
- White Pearl Corsage Pins
- Double Stick Tape (optional)
- 1 yard ribbon (to hang wreath)
- Scissors
- Sewing Machine (optional)
Instructions:
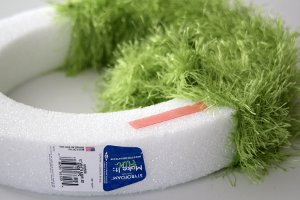
- Begin by wrapping your wreath with the green fringy yarn. I used double stick tape to hold the fibers in place but as I worked the wreath, I realized that step was unnecessary. Those fibers aren’t going anywhere, especially on the foam wreath surface. They “dig in” to the foam. (You will want to remove that wreath sticker, too.
- Keep winding the yarn around the wreath, through the center. Weave it as tight as you would like.
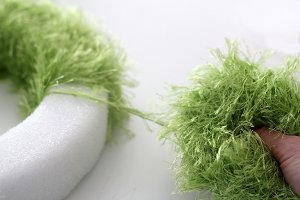
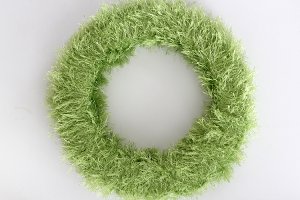
- It was easiest to hold the whole ball of yarn in my hand. If it gets tangled, you can always cut the yarn, untangle it, and re-tie it onto the yarn already wrapped onto the wreath. The fringe texture makes this a very forgiving project. When the wreath is wrapped, fill in any gaps with more yarn until the entire wreath is covered. It looks like new Spring grass!
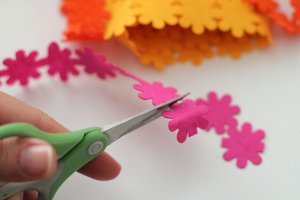
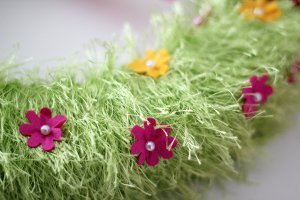
- Then take the Feltie flower border, and cut apart the individual flowers.
- Attach the flowers to the wreath using a pearl-head stick pin as the flower center:
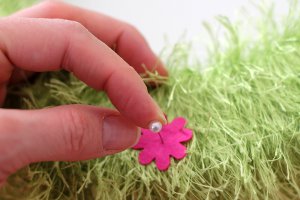
- Keep adding the flowers to the wreath as desired.
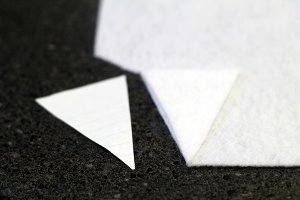
- Now let’s make the “Spring” banner! I first made a template out of scrap paper for the triangle pennant pieces. My measurements were 2″ wide by 2.5″ long. I just eye-balled it. I wanted to make sure the pennants would be large enough for my felt letters. Cut six pennants from white felt.
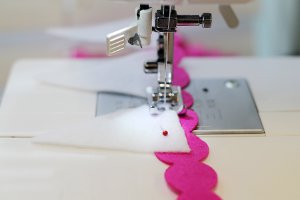
- When the pennants are cut, lay the triangles in the center of the Feltie Circle Border, and pin pennants into place.
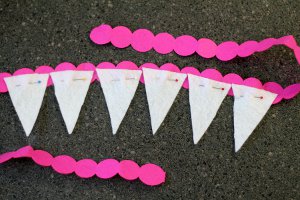
- Machine stitch the pennants to the Feltie circle border. Or, you could also use an adhesive and skip the sewing part.
- When banner is complete, flip it over, and adhere the Feltie alphabet letters. Instead of “Spring” you could personalize the wreath with your last name! Attach banner to wreath using pins. Fold the Feltie circle border over at the banner ends, so the tails of the banner will hang downward.

- Here is the finished banner:
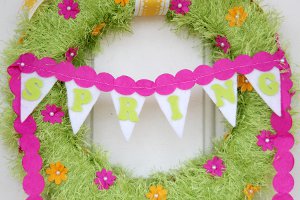
- Tie a bow to the top of the finished wreath to hang it on the door.

Read NextFaux Flower Cupcake Liner Wreath