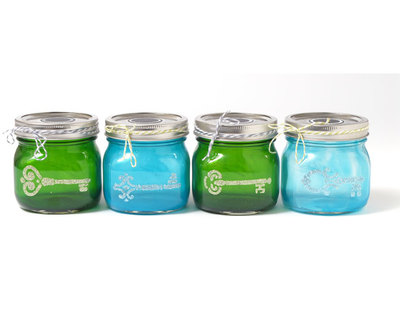
Colorful Mini Mason Jars

Organize your small craft supplies like buttons and beads with these Colorful Mini Mason Jars. This Mason jar craft also utilizes chalkboard paint on the lids for labeling what you put in the jar, which you can eventually erase and change when you replace the supplies. You can make an adorable project out of organizing your craft room and it is really simple. If you're stuck in a rut and cannot find any inspiration, these decorative yet functional storage containers may help get your creative juices flowing.
Primary TechniquePainting

Materials:
- Mod Podge ® Spouncer Applicators Set, 4 pc.
- Mod Podge ® Rocks! Peel & Stick Stencils - Skeleton Keys
- Mod Podge ® Gloss, 8 oz.
- Mod Podge ® Sheer Color - Green, 4 oz., Aqua, 4 oz.
- Glitter – colors of your choice
- Chalkboard stickers – small round
- Baker’s twine – colors of your choice
- Scissors
- Paintbrush
- 4 pint size Mason jars
Instructions:
- Start by washing your Mason jars with mild soap to clean them, and then let dry.
- Use the Mod Podge Sheer Colors to coat the insides of the jars. To do this, place about two tablespoons of the Sheer Color of your choice into a jar and roll around to coat. This can take several minutes. If you find that you need to add more, add one tablespoon at a time and continue rolling the jar around until the entire inside is coated. Tip: shaking the jar over a trash bin can help remove excess Mod Podge and also help coat the inside.
- Repeat this process with the remaining jars.
- Place the jars face down on a paper towel for several hours to let the excess Mod Podge drain out. When the jars have completely drained, turn them right side up to let the jars dry completely – this will take overnight.
- Choose your design to place on the fronts of the mason jars. I put a different key on the front of each jar. Carefully peel the Skeleton Key stencil from the backer sheet and smooth down flat on the surface, making sure to center your design.
- Use the spouncer to add Mod Podge to the stencil. Use a medium layer of Mod Podge and work quickly, since Mod Podge dries quickly. Completely cover the area you would like the design in.
- Peel up the stencil and pour the glitter on top right away. Tip: pour the glitter onto the jar over a piece of paper so that you can pour the excess back into the original container.
- Repeat with all the jars, then let dry. Remove excess glitter using the paintbrush (lightly brush it away).
- Replace the lids on your jars and cut baker’s twine to wrap around each lid. Tie in a bow.
- Place a chalkboard circle on top of each jar in the center so that you can write the contents on the lid.
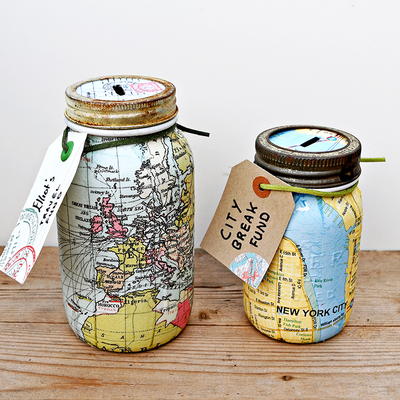
Read NextRepurposed Map Mason Jar Banks
Your Recently Viewed Projects
Thanks for your comment. Don't forget to share!
The Designing Peng uin
Dec 07, 2016
another way to recycle jars - and more appealing than some of the ideas I have seen. This is useful and easy to do, a double bonus - could use it with the many baby food jars I use to store beads and findings - then label the jars in case the items don't show through (I label the clear jars now )
mulberrygalprinces s
Sep 28, 2016
Very nice idea and one I will try. I took baby food jars, rinsed, painted and then took a small 24" X 36" light weight book case and nailed it to the wall above my craft table. I put a nail thru the baby food jar, from the inside and nailed them from the bottom of the shelf boards. So when you screwed the jars on, they were hanging from the shelf above. That way I doubled the shelf space. I painted the jars so that they looked pretty and neat.
Report Inappropriate Comment
Are you sure you would like to report this comment? It will be flagged for our moderators to take action.
Thank you for taking the time to improve the content on our site.