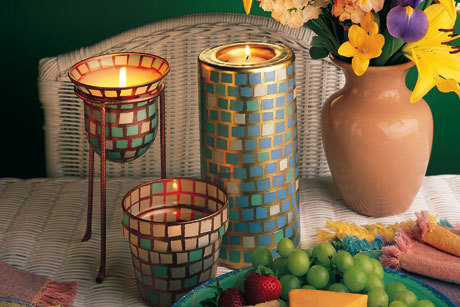
Pearly Garden Party Candles
These candle votives have the appearance of mosaics but are FAR easier to create. Unique paint and contact paper help transform these plain glass votives from Krylon.

Materials:
- Krylon Make It Pearl! Pearlescent Paint - Sheer Pearl (#1207)
- Krylon Indoor/Outdoor (combination of any 3 colors)
- Krylon Leafing Pen (any color)
- Clear glass candleholder
- Clear Contact paper
- Scissors
Instructions:
-
Wash and dry candleholders thoroughly. Set aside.
-
Cut 3 sheets of Contact paper, approximately 10" square. (Depending on size of candleholders, this may vary.)
-
Place all 3 sheets paper side down and anchor corners to prevent curling. Spray each piece of Contact paper with a different color of Indoor/Outdoor paint. Let dry. Spray lightly with Make it Pearl. Let dry completely.
-
Turn painted sheets over. There is a 1/2" grid pattern on the paper side of the Contact paper. Cut the sheets into 1/2" strips.
-
For each candleholder use 3 colors of painted paper. Remove backing from several strips of each color to reveal the sticky side. Anchor an edge of each strip onto work surface, leaving the rest of the strip hanging down. (Hint: this step will make your mosaic work go faster.)
-
Snip several 1/2" squares from one color and place near top edge of candleholder, spaced slightly apart. (Please note: this type of mosaic work is not an "exact" art, so your squares and spacing should vary in size). Referring to photo, use squares of all 3 colors to finish the first row.
-
When you start the second row, and each row thereafter, be sure to leave a little space between rows, and try to place squares so they do not line up exactly with squares above them. Please refer to the photograph for example.
- After you have completed all rows, be sure that all edges on squares are adhered to the surface. With Leafing Pen, fill in all clear spaces on glass. From time to time you will need to press the tip of the pen down for more paint. Have a scrap piece of paper or cardboard ready to use for this purpose. Keep a lot of paint on the tip so that stroke marks aren’t visible. Let dry.