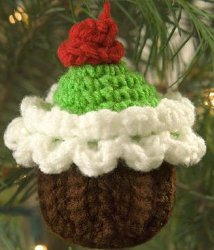
Cupcake Christmas Ornament
This simple crochet pattern looks good enough to eat! Make this Cupcake Christmas Ornament, hang it from your tree, and prepare for all the compliments you'll receive.

Materials:
- RED HEART “Super Saver”: 1 skein each 365 Coffee A, 319 Cherry Red B, 672 Spring Green C and 316 Soft White D.
- Crochet Hook: 4mm [US G-6].
- Yarn needle
- Stitch marker
- Fiberfill
-
Black embroidery floss
Instructions:
CUPCAKE
Sides
With A, ch 8.
-
Row 1: Sc in 2nd ch from hook and each ch across – 7 sc.
-
Rows 2-20: Ch 1, turn, working in back loops only, sc in each sc across.
-
Fasten off, leaving a long tail.
- Using tail, sew last row to first row to make a ring.
Bottom
With A, ch 2.
-
Round 1: Work 6 sc in 2nd ch from hook. Place marker for beginning of round.
-
Round 2: Work 2 sc in each sc around – 12 sc.
-
Round 3: [Sc in next sc, 2 sc in next sc] around – 18 sc.
-
Fasten off, leaving a long tail.
- Using tail and fitting Sides around edges of Bottom piece, sew pieces together.
Top
With C, ch 2.
-
Round 1: Work 6 sc in 2nd ch from hook. Place marker for beginning of round.
-
Round 2: Work 2 sc in each sc around – 12 sc.
-
Round 3: [Sc in next 3 sc, 2 sc in next sc] around – 15 sc.
-
Round 4: [Sc in next 4 sc, 2 sc in next sc] around – 18 sc.
-
Round 5: [Sc in next 2 sc, 2 sc in next sc] around – 24 sc.
- Round 6: Sc in each sc around.
-
Fasten off.
-
Round 7: Join D to front loop of first sc of Round 6 with sc, working in front loops only, sc in each sc around – 24 sc.
-
Round 8: [Slip st in next sc, 3 sc in next sc] around, slip st in first st to join.
-
Fasten off.
-
Round 9: Join D in back loop of Round 6 with slip st, 4 dc in next sc, [slip st in next sc, 4 dc in next sc] around, slip st in first st to join.
- Fasten off, leaving a long tail.
FINISHING
- With wrong sides together, sew pieces together, stuffing with fiberfill before sewing closed.
Red Rose
With B, ch 7.
-
Row 1: Work 3 hdc in 2nd ch from hook and in each ch across.
-
Fasten off.
-
Roll length into a rose shape and sew in place in center of Top.
-
Weave in ends.
Notes:
-
Cupcake ornament is 4½” tall.
- GAUGE: 16 sc = 4”; 14 rows = 4”. CHECK YOUR GAUGE. Use any size hook to obtain the gauge.
Abbreviations:
-
A, B, C = Color A, B, C
-
ch = chain
-
dc = double crochet
-
hdc = half double crochet
-
mm = millimeters
-
sc = single crochet
-
st(s) = stitch(es)
- [ ] = work directions in brackets the number of times specified.
Read more at http://www.favecrafts.com/Crochet-for-Christmas/Cupcake-Christmas-Ornament-Red-Heart#LDGDb0OcU98abEUf.99
This simple crochet pattern looks good enough to eat! Make this Cupcake Christmas Ornament, hang it from your tree, and prepare for all the compliments you'll receive. This cute crocheted Christmas ornament would also make a great gift for the baker in your life. Use it to embellish a gift or as a stocking stuffer, too! You could even make a whole dozen of these crafty cupcakes in all your favorite yarn colors.
Materials:
- 1 skein Red Heart Super Saver yarn in Coffee (A)
- 1 skein Red Heart Super Saver yarn in Cherry Red (B)
- 1 skein Red Heart Super Saver yarn in Spring Green (C)
- 1 skein Red Heart Super Saver yarn in Soft White (D)
- 4mm [US G-6] crochet hook
- Yarn needle
- Stitch marker
- Fiberfill
- Black embroidery floss
Gauge: 16 sc = 4”; 14 rows = 4”.
Instructions:
Cupcake ornament is 4½” tall.
Sides
-
With A, ch 8.
-
Row 1: Sc in 2nd ch from hook and each ch across – 7 sc.
-
Rows 2-20: Ch 1, turn, working in back loops only, sc in each sc across.
-
Fasten off, leaving a long tail.
- Using tail, sew last row to first row to make a ring.
Bottom
-
With A, ch 2.
-
Round 1: Work 6 sc in 2nd ch from hook. Place marker for beginning of round.
-
Round 2: Work 2 sc in each sc around – 12 sc.
-
Round 3: [Sc in next sc, 2 sc in next sc] around – 18 sc.
-
Fasten off, leaving a long tail.
- Using tail and fitting Sides around edges of Bottom piece, sew pieces together.
Top
-
With C, ch 2.
-
Round 1: Work 6 sc in 2nd ch from hook. Place marker for beginning of round.
-
Round 2: Work 2 sc in each sc around – 12 sc.
-
Round 3: [Sc in next 3 sc, 2 sc in next sc] around – 15 sc.
-
Round 4: [Sc in next 4 sc, 2 sc in next sc] around – 18 sc.
-
Round 5: [Sc in next 2 sc, 2 sc in next sc] around – 24 sc.
-
Round 6: Sc in each sc around. Fasten off.
-
Round 7: Join D to front loop of first sc of Round 6 with sc, working in front loops only, sc in each sc around – 24 sc.
-
Round 8: [Slip st in next sc, 3 sc in next sc] around, slip st in first st to join. Fasten off.
- Round 9: Join D in back loop of Round 6 with slip st, 4 dc in next sc, [slip st in next sc, 4 dc in next sc] around, slip st in first st to join. Fasten off, leaving a long tail.
Finishing
- With wrong sides together, sew pieces together, stuffing with fiberfill before sewing closed.
Red Rose
-
With B, ch 7.
-
Row 1: Work 3 hdc in 2nd ch from hook and in each ch across. Fasten off.
- Roll length into a rose shape and sew in place in center of Top. Weave in ends.
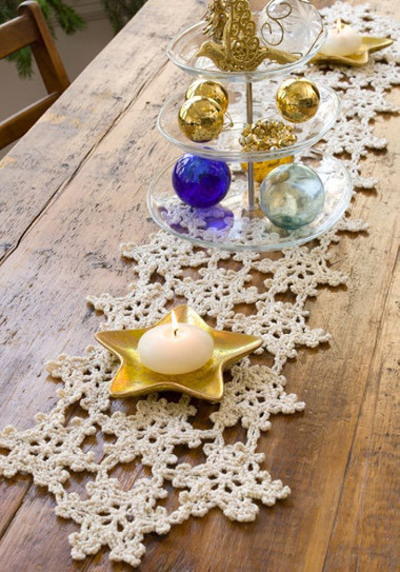
Read NextCrocheted Snowflake Table Runner
Your Recently Viewed Projects
Thanks for your comment. Don't forget to share!
granny40
Dec 18, 2010
Too stinking cute! On the cooking channels there are a few shows just about cupcakes so this is perfect! Can't wait to make several.
Report Inappropriate Comment
Are you sure you would like to report this comment? It will be flagged for our moderators to take action.
Thank you for taking the time to improve the content on our site.