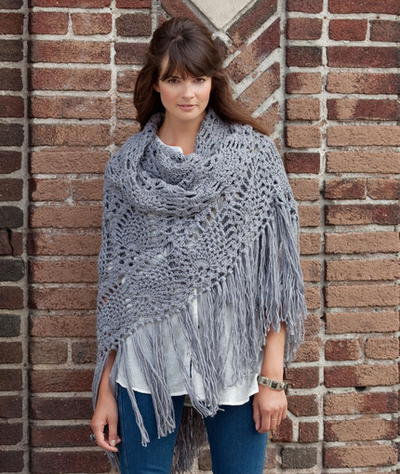
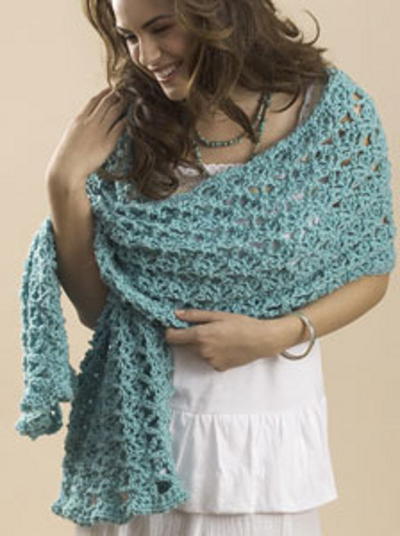
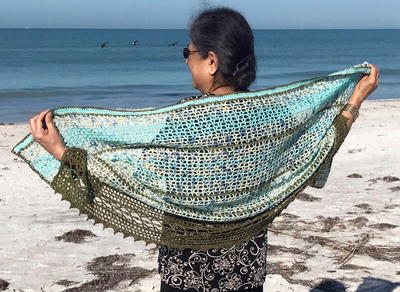
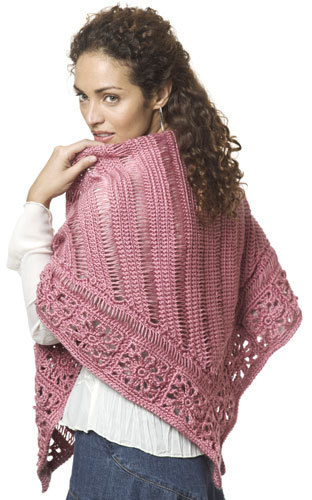
Broomstick Lace Shawl

Done in broomstick lace, this shawl crochet pattern creates a truly elegant wrap for night or day. This triangle crochet shawl pattern includes a floral motif border. Follow the diagram for easy assembly of this intermediate crochet pattern. The Broomstick Lace Shawl shows you how to crochet a beautifully delicate shawl that is lacy yet warm.
This stunning shawl is an easy way to add elegance to just about any outfit all the while keeping your shoulders warm and toasty. If you have never used a crochet shawl pattern this is a fabulous place to start.
If you are brand new to crochet patterns, check out our collection of beginner crochet projects and helpul tutorials for first-timers: 50+ Free Easy Crochet Patterns + Help for Beginners.
MATERIALS:
- Yarn: Caron International's Simply Soft (100% acrylic; 6 oz/170 g, 315 yds/288 m skein): #9722 Plum Wine, 3 skeins
- Hook: One crochet hook size US H-8 (5 mm), or size to obtain gauge
- Size 35 (19 mm) knitting needle
- Yarn needle
FINISHED MEASUREMENTS
Shawl measures approximately 61"/155 cm wide (at top edge, widest point) x 27"/68.5 cm long;
Shawl Base (without motif strip) measures approximately 53"/134.5 cm (at top edge, widest point) x 20"/51 cm long
GAUGE
In single crochet (worked in front loops only), using US H-8 (5 mm) hook, 11 sts and 8 rows = 3"/7.5 cm;
Each completed motif measures 4"/10 cm.
STITCHES USED
Chain (ch)
Double crochet (dc)
Single crochet (sc)
Treble crochet (tr)
SPECIAL TERM
sc2tog: Single crochet 2 together – Insert hook in next stitch, yarn over and pull up a loop, (two loops on hook), insert hook in next stitch, yarn over and pull up a loop, yarn over and draw through all three loops on hook.
NOTE
The shawl includes rows of Broomstick (Jiffy) lace. There are two steps in working Broomstick lace. First, loops of stitches are extended and placed on a large knitting needle (the broomstick). Next the loops are worked off the needle with single crochet.
HELPFUL
In Broomstick lace, there are many different ways to hold the large knitting needle. Experiment with different grips and placement of the large knitting needle to find a position that works for you.
SHAWL
Base
Ch 4.
Row 1: Sc in second ch from hook and in each remaining ch across, turn—3 sc.
Row 2 (RS): Ch 1, working in front loops only, sc in each st to last st, 2 sc in last st, turn—4 sc.
Row 3: Ch 2, turn, sc in second ch from hook; working in front loops only, sc in each sc across, turn—5 sc.
Rows 4 and 5: Work Rows 2 and 3—7 sc.
Row 6 (opening loops): Hold knitting needle close to work. Extend loop on hook slightly and place on knitting needle. *Working in front loops only, insert hook in next sc, yarn over and draw up a loop, extending the loop slightly place loop on the knitting needle; repeat from * to last sc; insert hook in front loop of last sc, yarn over and draw up a loop, place loop on the knitting needle, insert hook in back loop of last sc, yarn over and draw up a loop, place loop on the knitting needle, turn—8 loops on needle.
Row 7 (closing loops): Working loosely, insert hook in first loop on knitting needle, yarn over and draw up a loop; ch 1, 2 sc in same loop; remove loop from knitting needle, *sc in next loop on knitting needle, remove loop from knitting needle; repeat from * until all loops are removed from knitting needle, turn—9 sts.
Row 8 (RS): Ch 1, working in front loops only, sc in each st to last st, 2 sc in last st, turn—10 sc.
Row 9: Ch 2, turn, sc in second ch from hook; working in front loops only, sc in each sc across, turn—11 sc.
Rows 10–69: Repeat 4–9 ten times—71 sc.
Row 70: Ch 1, working in front loops only, sc in each st across to last 2 sts, sc2tog, turn—70 sts.
Row 71: Ch 1, working in front loops only, sc2tog, sc in each remaining st across, turn—69 sts.
Row 72: Hold knitting needle close to work. Extend loop on hook slightly and place on knitting needle. *Working in front loops only, insert hook in next sc, yarn over and draw up a loop, extending the loop slightly place loop on the knitting needle; repeat from * to last sc; leave last sc unworked, turn—68 loops on needle.
Row 73 (closing loops): Working loosely, insert hook into first 2 loops on knitting needle at the same time, yarn over and draw up a loop; ch 1, inserting hook into first 2 loops at the same time, work 1 sc; remove loops from knitting needle, *sc in next loop on knitting needle, remove loop from knitting needle; repeat from * until all loops are removed from knitting needle, turn—67 sts.
Row 74: Ch 1, working in front loops only, sc in each st across to last 2 sc, sc2tog, turn—66 sts.
Row 75: Ch 1, working in front loops only, sc2tog, sc in each remaining st across, turn—65 sts.
Rows 76 and 77: Repeat Rows 74 and 75—63 sts.
Rows 78–137: Repeat Rows 72–77 ten times—3 sts.
Row 138: Ch 1, working in front loops only, sc in first st, sc2tog—1 st. Fasten off.
Edging
With WS facing and point facing upwards, join yarn with slip st in lower side corner.
Row 1: Ch 1, working along lower edge of shawl base, work 133 sc evenly spaced to point of shawl, 2 sc in point, work 133 sc evenly spaced to opposite corner of shawl base—268 sc. Fasten off.
MOTIF (make 19)
Ch 4; join with slip st in first ch to form a ring.
Round 1: Ch 1, work 7 sc in ring; join with slip st in first sc.
Round 2: Ch 8, slip st in same st as join, *(slip st, ch 8, slip st) in next sc; repeat from * 6 more times; (sl st, ch 4, tr) in first sc (at base of beginning ch-8).
Round 3: Ch 1, sc in space formed by last st of previous round, ch 2, (2 dc, ch 2, 2 dc) in next ch-8 space, ch 2, *sc in next ch-8 sp, ch 2, (2 dc, ch 2, 2 dc) in next ch-8 sp, ch 2; repeat from * 2 more times; join with slip st in first sc.
Round 4: Ch 1, sc in same st as join, 2 sc in next ch-2 sp, sc in next 2 dc, (2 sc, ch 2, 2 sc) in next ch-2 sp, sc in next 2 dc, 2 sc in next ch-2 sp, *sc in next sc, 2 sc in next ch-2 sp, sc in next 2 dc, (2 sc, ch 2, 2 sc) in next ch-2 sp, sc in next 2 dc, 2 sc in next ch-2 sp; repeat from * 2 more times; join with slip st in first sc. Fasten off.
Assemble Motif Strip
Arrange motifs according to assembly diagram. Using yarn needle, whipstitch motifs together.
FINISHING
Join Base and Motif Strip
With WS facing, join yarn with slip st in inner corner of first motif of strip.
Row 1: Hold piece to work along inner v-edge of motif strip; ch 1, working along inner edge of motif strip, work 268 sc evenly spaced across inner edge to opposite corner of motif strip, turn.
Row 2 (opening loops): Hold knitting needle close to work. Extend loop on hook slightly and place on knitting needle. *Working in front loops only, insert hook in next sc, yarn over and draw up a loop, extending the loop slightly place loop on the knitting needle; repeat from * across, turn—268 loops on needle.
Row 3 (closing loops): Working loosely, insert hook in first loop on knitting needle, yarn over and draw up a loop; ch 1, sc in same loop; remove loop from knitting needle, *sc in next loop on knitting needle, remove loop from knitting needle; repeat from * until all loops are removed from knitting needle, turn—268 sts.
Fasten off. Align sts of Row 3 with sts of shawl edging. Using yarn needle, whipstitch shawl base and motif strip together, sewing through corresponding sts.
Border
Note: The shawl has two side corners and one point. The corners are located at each side and correspond to the outer corners of the first and last motifs of the motif strip. The point is located at the lowest point of the shawl and corresponds with the lowest point of the center motif of the motif strip.
With RS facing, join yarn with slip st in any st along edge of shawl.
Round 1: Ch 1, work sc evenly spaced around entire shawl, working 3 sc in each corner and point of shawl; join with slip st in first st.
Round 2: Ch 1, sc in each sc around, working 3 sc in each corner and point of shawl; join with slip st in first st. Fasten off.
Using yarn needle, weave in ends.

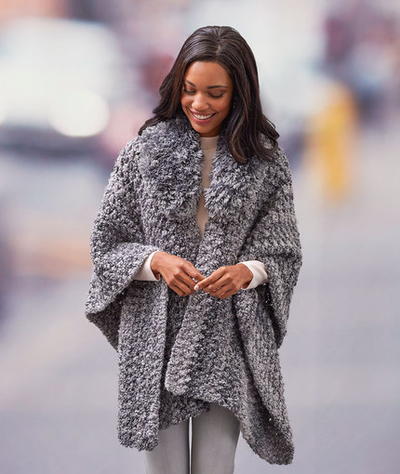
Read NextPerfectly Panache Chic Poncho
Your Recently Viewed Projects


Thanks for your comment. Don't forget to share!
Zeemer
Mar 31, 2018
Wow. This shawl in broomstick lace is so gorgeous!!. I just looove the color used, old rose. I love old rose but this color chooses its design. This project takes the shawl to another level really. It's so classy.
boudreaultclaire 4 437330
Sep 07, 2016
It is just such a beautiful shawl I had to have the pattern. Thank you so much for sharing.
admrevrac
Nov 27, 2013
I've this shawl before, working from a pattern that was on the back of a skein label. What a joy it is to find it in a print version that I don't need a microscope to read!
Kim Guzman
Apr 01, 2012
Just for clarification, this is a version of broomstick lace which I created myself. It's not hairpin.
spirit12
Jun 25, 2010
Can you do a print off had to work with a knitttng needle to form a hairpin lace. Thanks
duo80
Jun 22, 2010
This broomstick lace works with a BIG knitting needle and crochet hook. Hairpin lace uses a loom that you work with or a old hair pin if you want something delicate.
deecee
May 12, 2010
this is hairpin lace that i would love to learn. do you have printouts for this?
piddlineasy
Apr 19, 2010
Is this a Crochet pattern or Knit pattern? I am a Crocheter and would like it for Crochet. It appears to be part Crochet and part Knit. Can you explain this so I understand how it works. Thanks Betty
blmpkn 4674322
May 30, 2016
I like this shawl. But I am having a problem on getting the shawl started at the point. Do you crochet the rows across or up and down? do you have a video to show how it done. Thanks Cleano
BethRobarts
Feb 16, 2010
Just looking at this shawl I can't wait to get it done. I love crocheting and what makes this a nice project is that I know when I go to see my sister in Australia it will be a nice evening wrap and if I can do it I will be making my sister one as well in her fav colour.
craftfanatic
Feb 11, 2010
This shawl is so nice. The neat thing is that it would look great with jean or with formal wear! Not only that but because it is light enough it won't make you hot when you go indoors.
Report Inappropriate Comment
Are you sure you would like to report this comment? It will be flagged for our moderators to take action.
Thank you for taking the time to improve the content on our site.