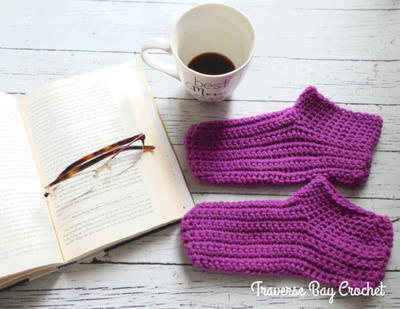
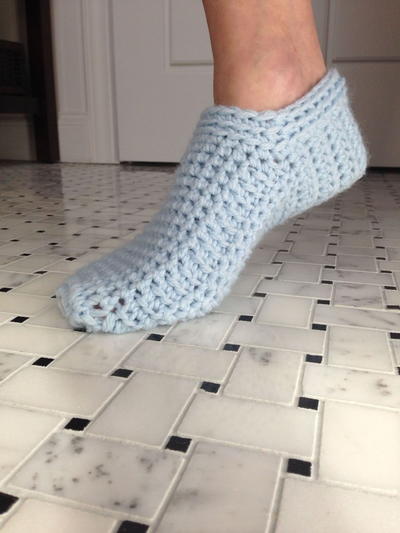
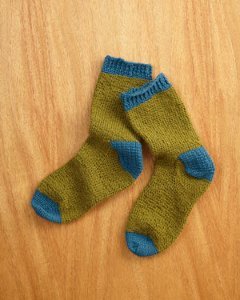
Crochet Socks for Father's Day
Make some crochet socks for Father's day with this free crochet pattern from Lion Brand Yarn. This pattern is for the more experienced crocheter, but once you learn this pattern you can make them in every color combos. Two hook sizes are used along with blunt needles and split ring stitch markers.

SIZE:
Finished Foot and Leg Circumference 8 3/4 (10, 11 1/2, 12 1/2) in. (22 (25.5, 29, 32) cm)
Note: Foot Circumference will fit foot widths Narrow (Medium, Wide, X-Wide)
Materials:
- 240-174 Sock-Ease Yarn: Green Apple (one ball) Note: A
- 240-178 Sock-Ease Yarn: Snow Cone (one ball) Note: B
- Lion Brand Split Ring Stitch Markers
- Large-Eye Blunt Needles (Set of 6)
- Crochet hook size C-2 (2.75 mm)
- Crochet hook size D-3 (3.25 mm)
GAUGE:
20 sts = 4 in. (10 cm) in extended single crochet (Esc) with larger hook. BE SURE TO CHECK YOUR GAUGE. When you match the gauge in a pattern, your project will be the size specified in the pattern and the materials specified in the pattern will be sufficient. If it takes you fewer stitches and rows to make a 4 in. [10 cm] square, try using a smaller size hook or needles; if more stitches and rows, try a larger size hook or needles.
STITCH EXPLANATION:
Esc (extended single crochet) Insert hook in indicated st and draw up a loop, yarn over and draw through one loop on hook, yarn over and draw through 2 loops on hook.
Fdc (Foundation double crochet)
1. Ch 3 (counts as first st), yarn over, insert hook in 3rd ch from hook and draw up a loop; yarn over and draw through one loop on hook (the "chain"); (yarn over and draw through 2 loops on hook) twice (the "double crochet").
2. *Yarn over, insert hook into the "chain" of the double crochet just made and draw up a loop; yarn over and draw through one loop on hook (the "chain"), (yarn over and draw through 2 loops on hook) twice (the "double crochet"); repeat from * the total number of times indicated.
FPTR (front post treble crochet) Yo twice, insert hook from front to back then to front, going around the post of st, draw up a loop, (yo and draw through 2 loops on hook) 3 times. Skip st behind the FPTR.
long-sc Insert hook into st 2 rows below (1 row below row into which you usually work). Yarn over and draw up a loop to the height of the current row. Yarn over and draw through both loops on hook. Skip the st in the row into which you usually work.
sc2tog (sc 2 sts together) Insert hook into st and draw up a loop. Insert hook into next st and draw up a loop. Yarn over, draw through all 3 loops on hook.
NOTES:
1. Socks are worked from the cuff downwards. The cuff and leg are worked in rnds down to+ the heel. The heel is then worked back and forth in rows. After the heel is complete, work resumes in the rnd to work the foot and toe. 2. Foundation double crochet (FPdc) creates a foundation ch and a double crochet all in one. It creates a more flexible first round, allowing the cuff to fit more comfortably. If you prefer to use a traditional foundation ch, beg as follows:
With smaller hook, ch 46 (50, 58, 64).
Rnd 1: Dc in 4th ch from hook (beg ch counts as first dc) and in each ch across; join with sl st in top of beg ch - 44 (48, 56, 62) dc at the end of this rnd.
3. To change color in the join of a rnd, insert hook in first st of rnd, yarn over with new color and draw through all loops on hook to complete join. Fasten off old color, proceed with new color.
SOCK (make 2)
Cuff
Rnd 1: With smaller hook and B, ch 3 (counts as first dc here and throughout) and work 43 (47, 55, 61) more Fdc; join with sl st in top of beg ch - 44 (48, 56, 62) dc at the end of this rnd.
Note: Use the beginning tail to sew the edges of the first rnd together.
Rnd 2: Ch 3, FPTR around next dc, *dc in next dc, FPTR around next dc; rep from * around; join with sl st in top of beg ch - 22 (24, 28, 31) dc and 22 (24, 28, 31) FPTR at the end of this rnd.
Rnds 3 and 4: Ch 3, FPTR around next FPTR, *dc in next dc, FPTR around next FPTR; rep from * around; join with sl st in top of beg ch.
Rnd 5: Change to larger hook, ch 1, sc in same st as join, sc in each st around; join with sl st in first sc and change to A.
Leg
Rnd 6: Ch 1, Esc in same st as join and in each sc around; DO NOT join.
Notes: Work now proceeds in continuous rnds. Do not join at the end of rnds, do not turn, and do not work a beginning ch at the beginning of rnds. Place a marker to indicate beg of rnd. Move marker up as work progresses.
Rnd 7: Esc in each st around.
Rep last rnd until piece measures 7 in. (18 cm) from beg.
Sl st in next st. Fasten off.
Heel Flap
Note: Work now proceeds back and forth in rows over about one-half of the sts to form the heel. Remove beg of rnd marker.
Row 1 (RS): Join B with sc in same st as last sl st made; sc in next 22 (24, 28, 30) sts; leave rem sts unworked for front of leg - 23 (25, 29, 31) sc at the end of this row.
Row 2: Ch 1, turn, sc in each sc across.
Row 3: Ch 1, turn, sc in next sc, *long-sc in next sc 2 rows below, sc in next sc; rep from * across.
Rep Rows 2 and 3 until heel flap measures 2 3/4 in. (7 cm); end with a WS row (Row 2). Note: End with a WS row means that the last row you work should be a WS row, and the next row that you are ready to work will be a RS row.
Turn Heel
Row 1 (RS): Ch 1, turn, sc in next sc, (sc2tog) twice, sc in each sc to last 5 sc, (sc2tog) twice, sc in last sc - 19 (21, 25, 27) sc at the end of this row.
Row 2: Ch 1, turn, sc in each st across.
Rows 3 and 4: Rep Rows 1 and 2 - 15 (17, 21, 23) sc at the end of Row 3.
Row 5: Ch 1, turn, sc in next sc, sc2tog, sc in each sc to last 3 sc, sc2tog, sc in last sc; change to A in last st - 13 (15, 19, 21) sc at the end of this row.
Gusset
Note: Sts are now worked down the side of the heel flap, across the front of leg sts, and up the opposite side of the heel flap. Markers are placed to indicate locations to decrease for gussets.
Set-Up Row (RS): Do not turn, working from RS, work 15 sc evenly spaced in ends of rows across side of heel flap, place marker in last sc made (for gusset), Esc in 21 (23, 27, 31) front leg sts (previously unworked); work 15 sc evenly spaced in ends of rows across opposite side of heel flap, place marker in first sc of last 15 sc made (for gusset) - 51 (53, 57, 61) sts worked in this row (this count does not include the sts in the last row of the heel flap/turn).
Note: Work now proceeds in continuous rnds. Do not join rnds from this point forward. Place marker for beg of rnd. Move beg of rnd marker up as each rnd is completed. Tip: Use different colored marker for beg of rnd to distinguish it from the gusset markers.
Rnd 2 (RS): Esc in each st to 2 sts before first gusset marker, sc2tog, Esc in each st to next gusset marker, Esc in marked st, sc2tog, Esc in each st to end of rnd - 62 (66, 74, 80) sts.
Rep last rnd until 44 (48, 56, 62) sts rem.
Remove gusset markers.
Foot
Rnd 1: Esc in each st around.
Rep last rnd until foot measures 2 in. (5 cm) less than distance to longest toe.
Flatten foot, making sure that the heel is centered to the back. Place a marker on each side edge.
Toe
Remove beg of rnd marker. Esc in each st to next side marker. This is now the new beg of rnd.
Rnd 1: Sc in each st around - 44 (48, 56, 62) sc.
Rnd 2: Sc in marked (beg of rnd) sc, sc2tog, sc in each sc to 2 sc before next marker, sc2tog, sc in marked sc, sc2tog, sc in each sc to 2 sc before beg of rnd marker, sc2tog - 40 (44, 52, 58) sc at the end of this rnd.
Rnd 3: Sc in each sc around.
Rep last 2 rnds until 16 (20, 28, 34) sc rem.
Sl st in next sc. Fasten off. Remove markers.
FINISHING
Turn Sock inside out, whipstitch toe closed. Weave in ends.
NOTES: To make this free craft pattern, we recommend the following materials. They are available for a discount at CutRateCrafts.com.
Materials:
- 240-174 Sock-Ease Yarn: Green Apple (one ball) Note: A
- 240-178 Sock-Ease Yarn: Snow Cone (one ball) Note: B
- Lion Brand Split Ring Stitch Markers
- Large-Eye Blunt Needles (Set of 6)
- Crochet hook size C-2 (2.75 mm)
- Crochet hook size D-3 (3.25 mm)
Read NextFireside Slippers


Thanks for your comment. Don't forget to share!
Report Inappropriate Comment
Are you sure you would like to report this comment? It will be flagged for our moderators to take action.
Thank you for taking the time to improve the content on our site.