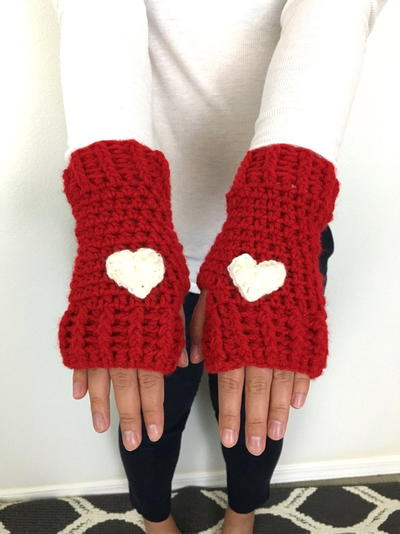
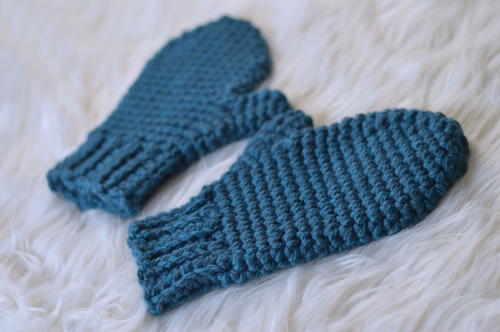
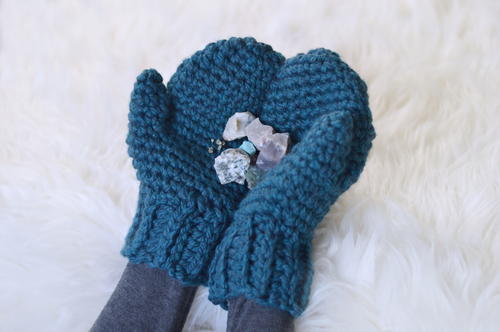
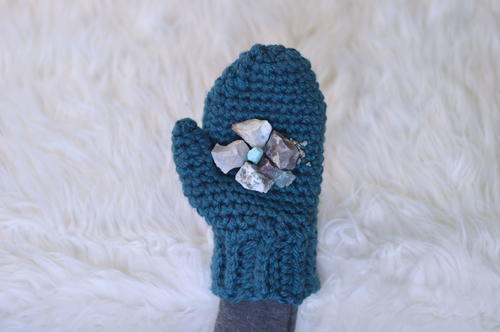
Warm Up Chunky Crochet Mittens
This is a perfect easy crochet mittens pattern to make!

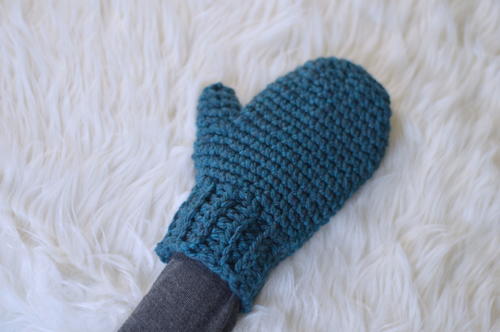
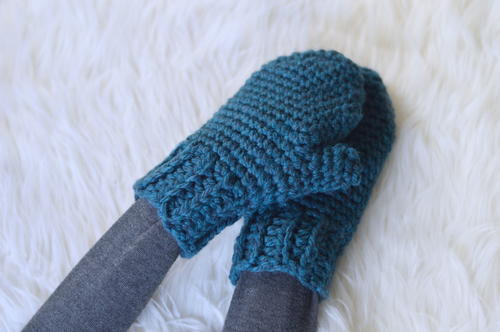
This chunky crochet mittens free pattern is perfect for beginners. It uses super bulky yarn so the pattern works up quickly, and the step-by-step photo instructions make this pattern perfect for visual learners. These adorable mittens are deliciously cozy! Keep those hands warm while the weather outside is frightful and have these mittens ready to go.
Follow this crochet mittens pattern and give them as gifts or donate them to a charitable cause. Warm Up America! is collecting gloves and mittens for the FaveCrafts Anniversary Charity Drive May 1-June 30, 2019. Missed the deadline? No worries! Warm Up America! is always looking for donations. Consider working up this pattern for those in need today.
NotesThe cuff is worked flat in rows. The body of the mitten and the thumb are worked in the round, in a continuous spiral. Mark the first stitch of each round with a stitch marker.
Abbreviations are in US Terminology and are listed beneath the pattern.

Crochet HookL/11 or 8 mm hook
Yarn Weight(6) Super Bulky/Super Chunky (4-11 stitches for 4 inches)
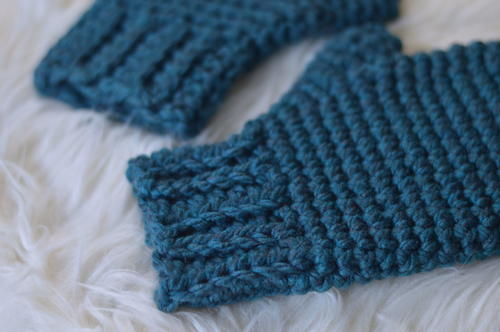
Crochet GaugeCuff: 3 rows and 5 sts = 2 inches; Mitten: 6 rows and 5 sts = 2 inches
Finished SizeAdult (cuff width: 3.5 inches, mitten length: 10.5 inches)
Materials List
- Size L (8.00 mm) crochet hook or whatever size for correct gauge
- 5 or 6 Weight Yarn (I used Bernat Softee Chunky, but Charisma Big is a good alternate) (approximately 150 grams)
- 2 stitch markers or scrap yarn
- Scissors
- Darning needle
- Measuring tape
Instructions
Video Tutorials:
hdc front loop
BLO
Please read all notes before beginning this pattern.
Right and Left Mitten Cuff
The cuff is worked flat in rows.
-
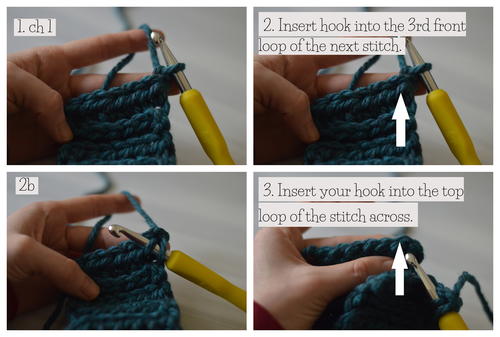
R1: ch 8, put a hdc into the 3rd ch from the hook, hdc into the next 5 chs. =6
Should measure approximately 3 inches. -
R2: ch 2 (does not count as a stitch here and throughout the pattern), turn your work, hdc into the 3rd front loop into the next 6 sts. ==6
-
R3: ch 2, turn your work, hdc into the BLO in the next 6 sts. =6
-
R4-R10: repeat R2 and R3
Should measure approximately 6.5 inches in length. -
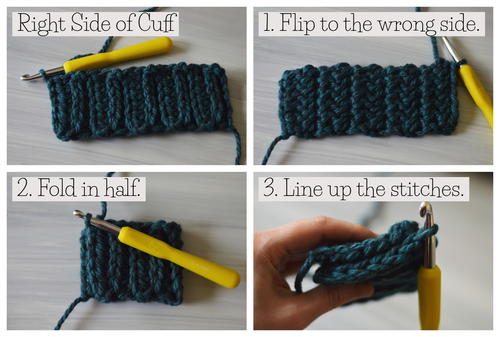
Do not cut the yarn. Fold in half and line up the stitches.
Note: click on any image for a larger version. -
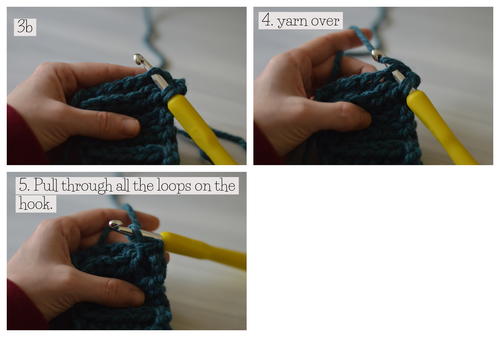
ch 1, sl st through the next st through the 3rd front loop, and across through the top loop.
-
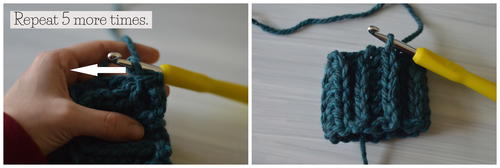
Repeat 5 more times. =6
-
Do not cut the yarn.
-
The rest of the mitten is worked in the round, in a continuous spiral. Do not join with a slip stitch, mark the first stitch of each round with a stitch marker.
Left Mitten
-
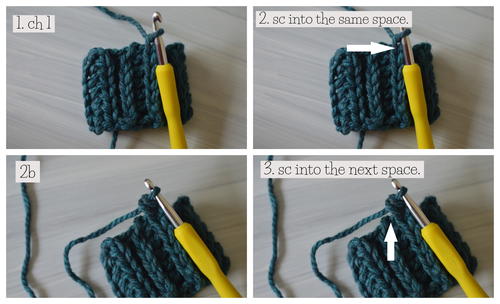
R1: ch 1, (does not count as a st here and throughout the pattern), sc into the same row, and sc evenly around 19 more times. =20
-
This is how I like to work into the rows:
-
continue with the round. =20
-
R2: sc into the next 4 sts, 2sc into the next 2 sts, sc into the next 14 sts. =22
-
R3: sc into the next 5 sts, 2sc into the next 2 sts, sc into the next 15 sts. =24
-
R4: sc into the next 6 sts, 2sc into the next 2 sts, sc into the next 16 sts. =26
-
R5: sc around. =26
-
R6: sc into the next 6 sts (mark the 6th st with a st marker around the post of the st), ch 3 and sk 4, sc into the next 16 sts. =25
-
R7: sc into the next 6 sts, sc into the next 3 chs, sc into the next 16 sts. =25
-
R8- R13: sc around. =25
-
R14: sc into the next 8 sts, sc2tog, sc into the next 10 sts, sc2tog, sc into the next 3 sts. =23
-
R15: sc into the next 7 sts, sc2tog, sc into the next 9 sts, sc2tog, sc into the next 3 sts. =21
-
R16: sc into the next 6 sts, sc2tog, sc into the next 8 sts, sc2tog, sc into the next 3 sts. =19
-
R17: sc into the next 5 sts, 2sc2tog, sc into the next 5 sts, 2sc2tog, sc into the last st. =15
-
R18: sc into the next 5 sts, sc2tog, sc into the next 6 sts, sc2tog. =13
-
R19: sc into the next 5 sts, sc2tog, sc into the next 4 sts, sc2tog. =11
-
R20: sc2tog, sc into the next st, 2sc2tog, sc into the next 2 sts, sc2tog. =7
-
Cut the yarn, leaving the tail end long enough to whip stitch the top closed. Pull through the last stitch.
-
Whip stitch the top closed and pull tight to close the hole.
-
Continue around and pull tight to close the hole. Weave in the end.

Right Mitten
-
R1: ch 1, does not count as a st here and throughout the pattern), sc into the same row, and sc evenly around 19 more times. =20
-
See photo tutorial above on how I like to work into the rows.
-
R2: sc into the next 14 sts, 2sc into the next 2 sts, sc into the next 4 sts. =22
-
R3: sc into the next 15 sts, 2sc into the next 2 sts, sc into the next 5 sts. =24
-
R4: sc into the next 16 sts, 2sc into the next 2 sts, sc into the next 6 sts. =26
-
R5: sc around. =26
-
R6: sc into the next 16 sts (mark the 16th st with a st marker around the post of the st), ch 3 and sk 4, sc into the next 6 sts. =25
-
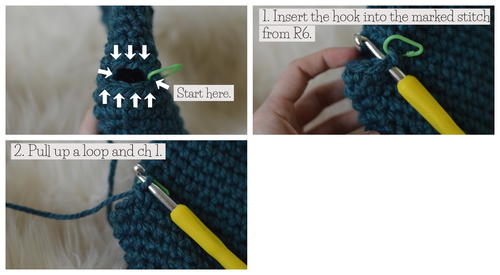
See photo above on how to mark the post of the stitch with a stitch marker.
-
R7: sc into the next 16 sts, sc into the next 3 chs, sc into the next 6 sts. =25
-
R8-R13: sc around. =25
-
R14: sc into the next 3 sts, sc2tog, sc into the next 10 sts, sc2tog, sc into the next 8 sts. =23
-
R15: sc into the next 3 sts, sc2tog, sc into the next 9 sts, sc2tog, sc into the next 7 sts. =21
-
R16: sc into the next 3 sts, sc2tog, sc into the next 8 sts, sc2tog, sc into the next 6 sts. =19
-
R17: sc into the next st, 2sc2tog, sc into the next 5 sts, 2sc2tog, sc into the next 5 sts. =15
-
R18: sc2tog, sc into the next 6 sts, sc2tog, sc into the next 5 sts. =13
-
R19: sc2tog, sc into the next 4 sts, sc2tog, sc into the next 5 sts. =11
-
R20: sc2tog, sc into the next 2 sts, 2sc2tog, sc into the next st, sc2tog. =7
-
Cut the yarn, leaving the tail end long enough to whip stitch the top closed. Pull through the last stitch.
-
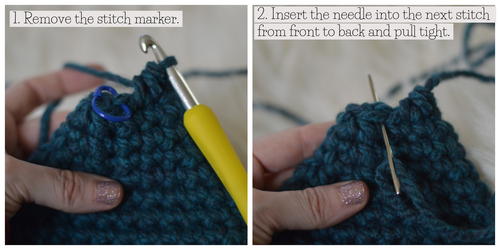
Whip stitch the top closed, pull tight to close the hole, and weave in the end. See above photo on how to whip stitch.
The Thumb (Left and Right Mitten)
The thumb is worked in the round, in a continuous spiral. Mark the first stitch of each round with a stitch marker.
-
R1: Insert the hook where the marked stitch from R6 is, pull up a loop and ch 1,
-
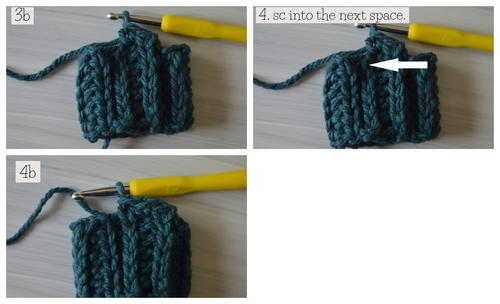
sc into the next 4 sts, sc into the next space (between the 4th st and the 3 sts across), sc into the next 3 sts (though the bottom of the chs),
-
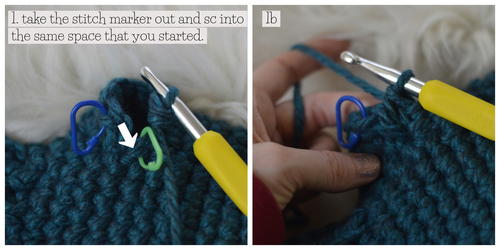
sc into the same place as you started the round. =9
-
R2-R3: sc around. =9
-
R4: sc2tog, sc into the next 3 sts, sc2tog, sc into the next 2 sts. =7
-
R5: sc2tog, sc into the next 2 sts, sc2tog, sc into the last st. =5
-
Cut the yarn, leaving the tail end long enough to whip stitch the top closed. Pull through the last stitch.
-
Whip stitch the top closed, pull tight to close the hole, and weave in the end. See above photo on how to whip stitch.
-
The End!


View more of Alex's beautiful patterns at her blog, with-alex.blogspot.com.
Abbreviations (US Terminology)
- ch
- chain
- sc
- single crochet
- 2sc
- single crochet increase
- sc2tog
- single crochet decrease
- 2sc2tog
- single crochet decrease 2 times
- hdc
- half double crochet
- hdc front loop
- half double crochet into the 3rd front loop
- BLO
- back loop only
- st
- stitch
Have you ever crocheted anything for charity? What did you make?
Read NextColorful Texting Gloves