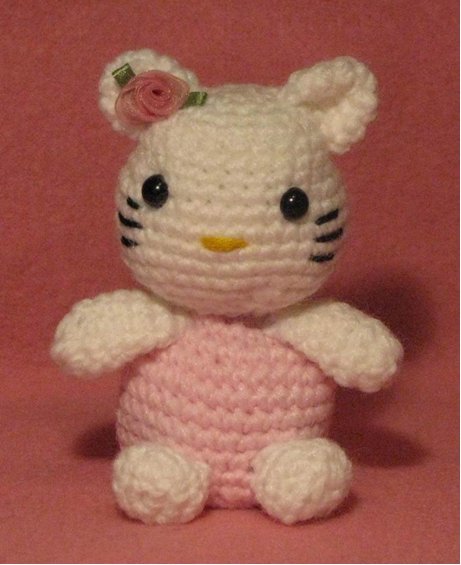
Hello Kitty
Make a tiny crochet hello kitty with this amigurumi crochet pattern designed by Armina Parnagian. A group of four crochet kitties in coordinating baby soft yarns is just about the cutest thing you can imagine.

Materials:
- Size US-C/2.5mm Crochet Hook
- Lion Brand Baby Soft – White
- Lion Brand Baby Soft - Pink
- 6mm Safety Eyes
- Black Embroidery Floss (For Whiskers)
- Yellow Embroidery Floss (For Nose)
- Sewing Needle
- Sewing Thread
- Blunt Needle
- Polyester Fiberfill
- Satin Rosette (For Ear)
Notes:
- Worked in continuous rounds; do not join and do not turn unless specified.
- Use stitch marker to indicate beginning of rounds.
- Lion Brand Baby Soft is a light worsted weight yarn.
- Yarn listed is what I used – Size may vary with other yarns.
Abbreviations:
SC = Single Crochet
HDC = Half Double Crochet
Ch = Chain
Rnd(s) = Round(s)
Beg = Beginning
SL ST = Slip Stitch
Sts = Stitches
2tog = Crochet 2 stitches together (decrease)
* = Repeat stitches from * to end of *
2nd = Second
Approx = Approximately
Head:
Ch 2
Rnd 1: Work 5 sc in 2nd ch from hook = 5 sc
Rnd 2: Work 2 sc in each sc = 10 sc
Rnd 3: *Sc in first sc, 2 sc in 2nd sc*, repeat from * around = 15 sc
Rnd 4: *Sc in next 2 sc, 2 sc in next sc*, repeat from * around = 20 sc
Rnd 5: *Sc in next 3 sc, 2 sc in next sc*, repeat from * around = 25 sc
Rnds 6-8: Sc in each sc around
Rnd 9: *Sc in next 4 sc, 2 sc in next sc*, repeat from * around = 30 sc
Rnd 10: *Sc in next 5 sc, 2 sc in next sc*, repeat from * around = 35 sc
Rnds 11-13: Sc in each sc around
Rnd 14: *Sc in next 5 sc, sc 2tog*, repeat from * around = 30 sc
Rnd 15: *Sc in next 4 sc, sc 2tog*, repeat from * around = 25 sc
Rnd 16: *Sc in next 3 sc, sc 2tog*, repeat from * around = 20 sc
Rnd 17: *Sc in next 2 sc, sc 2tog*, repeat from * around = 15 sc
Fasten off, leaving a tail long enough for sewing. Insert safety eyes. Stuff head. Do not sew opening closed.
Ears: (Make 2)
Ch 2
Rnd 1: Work 5 sc in 2nd ch from hook = 5 sc
Rnd 2: Work 2 sc in each sc around = 10 sc
Rnd 3-4: Sc in each sc around
Fasten off, leaving a tail long enough for sewing. Do not stuff ears. Sew ears on head.
Finishing the Head:
- Thread sewing needle with yellow embroidery floss and sew the nose.
- Now thread the sewing needle with black embroidery floss and sew the whiskers, three whiskers on each side.
- Thread needle with sewing thread and sew the rosette on one ear.
The head is done – now work on the body, arms and legs.
Body:
With Pastel Pink Yarn, Ch 2
Rnd 1: Work 5 sc in 2nd ch from hook = 5 sc
Rnd 2: Work 2 sc in each sc = 10 sc
Rnd 3: *Sc in first sc, 2 sc in 2nd sc*, repeat from * around = 15 sc
Rnd 4: *Sc in next 2 sc, 2 sc in next sc*, repeat from * around = 20 sc
Rnd 5: *Sc in next 3 sc, 2 sc in next sc*, repeat from * around = 25 sc
Rnd 6: *Sc in next 4 sc, 2 sc in next sc*, repeat from * around = 30 sc
Rnds 7-11: Sc in each sc around
Rnd 12: *Sc in next 4 sc, sc 2tog*, repeat from * around = 25 sc
Rnd 13: *Sc in next 3 sc, sc 2tog*, repeat from * around = 20 sc
Rnd 14: *Sc in next 2 sc, sc 2tog*, repeat from * around = 15 sc
Rnd 15: *Sc in next sc, sc 2tog*, repeat from * around = 10 sc
Fasten off, leaving a tail long enough for sewing. Stuff body and sew opening closed. (This will be the bottom of the body). Flatten bottom and shape body into an oval.
Arms: (Make 2)
Ch 2
Rnd 1: Work 5 sc in 2nd ch from hook = 5 sc
Rnd 2: Work 2 sc in each sc around = 10 sc
Rnds 3-7: Sc in each sc around
Fasten off, leaving a tail long enough for sewing. Do not stuff arms. Flatten arms slightly and sew on body in front.
Legs (Make 4)
Ch 2
Rnd 1: Work 5 sc in 2nd ch from hook = 5 sc
Rnd 2: Work 2 sc in each sc around = 10 sc
Rnds 3-5: Sc in each sc around
Fasten off, leaving a tail long enough for sewing. Do not stuff legs. Sew the legs on body. Flatten the bottom of the body so the Kitty can sit. After the legs are sewn, gently push the legs inward toward the body to shape.
Your Tiny Hello Kitty is done! Tiny HK measures 3” tall.

Tiny Hello Kitty Parade
All crocheted with Lion Brand Baby Soft –
- Pastel Pink
- Pastel Yellow
- Bubble Gum
- Lavender
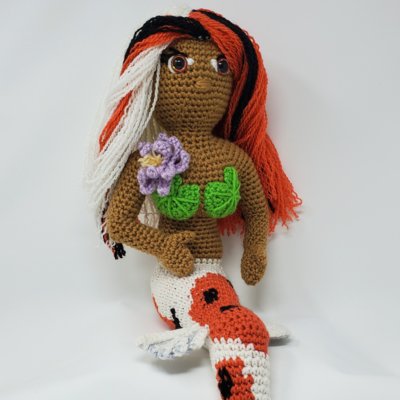
Read NextKoi Mermaid
Your Recently Viewed Projects
Thanks for your comment. Don't forget to share!
mulberrygalprinces s
Jan 29, 2018
OH my! I just saved this one for my next crochet project. I can't believe I found it here for free. My grand daughter is a big fan of hello kitty. She also loves kittens and puppies. She has said since she was five that she will be a Vet. Thank you for sharing this!
JennyBee1
Oct 06, 2011
@Bobbieb2, Our sister site www.cutratecrafts.com sells a complete line and we discount too! With over 70,000 items including supplies for crafting, knitting, crochet, sewing, and more, www.cutratecrafts.com is your one-stop shop. Here is a link to the rosettes on CutRateCrafts: http://www.cutratecrafts.com/search.php?task=run_search&search_term=rosette Also, here is a link to the DIY rosettes on FaveCrafts: http://www.favecrafts.com/?task=search&search_term=rosette I hope this helps! --Editor of FaveCrafts
Bobbieb2
Oct 04, 2011
Adorable. Where can I purchase the rosette or, be yet, can I crochet it?
Madd Tatter
Jan 17, 2011
I am in the process of making this out of crochet cotton. Have found that no where does it say to close the opening on the head or to sew it to the body. I can tell from the picture that the opening is closed before sewing it to the head as it would be attached differently if it weren't. This might be helpful to a crocheter that hasn't done a stuffed animal before. I will measure the kitty when it is done and post what the finished size is out of size 10 crochet cotton. I am using black beads for the eyes as the safety eyes seem too big.
Member 0212215
Apr 17, 2010
It's darling and looks easy. My daughter loves "Hello Kitty". I'm planning to make them for Christmas.
Report Inappropriate Comment
Are you sure you would like to report this comment? It will be flagged for our moderators to take action.
Thank you for taking the time to improve the content on our site.