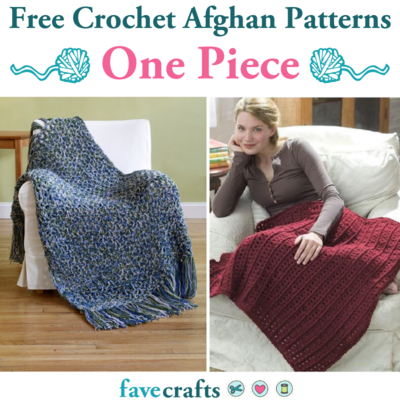
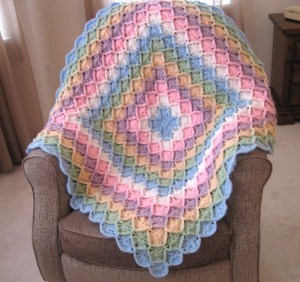
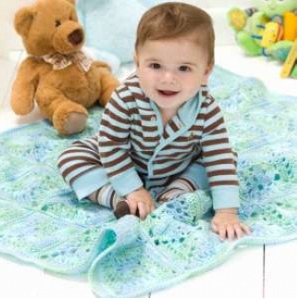
Bright Posies Crochet Throw
Crochet your own flower garden with the bright posies crochet throw pattern from Red Heart Yarns. If you're looking for bright and cheerful free crochet afghan patterns, the bright posies pattern is sure to lift your spirits and make you think of spring!
Throw measures 48” wide x 54” tall.

MATERIALS:
- Red Heart® “Super Saver®” (Art. E300) Solid 7 oz (198 g), 364 yd (333 m); Multi, Fleck and Print 5 oz (141 g), 244 yd (223 m) skeins: 1 skein 656 Real Teal A, 2 skeins 512 Turqua B, 2 skeins 316 Soft While C, 1 skein each 579 Pale Plum D, 356 Amethyst E, 373 Petal Pink F, 718 Shocking Pink G, 668 Honeydew H, 624 Tea Leaf I, 885 Delft Blue J, 381 Light Blue K, 322 Pale Yellow L
- Crochet Hook: 5mm [US H-8]
- Yarn needle
-
Stitch marker
GAUGE: Rounds 1–4 (flower center) = 2½”; 7 petal rows = 3”. CHECK YOUR GAUGE. Use any size hook to obtain the gauge.
Special Stitch
hdc2tog = [Yarn over, insert hook in next stitch, yarn over and pull up loop] twice, yarn over and draw through all 5 loops on hook
Special Technique
Adjustable ring: Holding the yarn a few inches from the end, wrap around your finger. Do not remove wrap from finger, insert hook into the wrap and draw up a loop of working yarn. Chain one to secure the loop, and remove ring from finger. Work stitches of first round in the ring. Pull gently, but firmly, on tail to tighten ring.
NOTES
1. Throw is made from 20 flower motifs, 2 each in color combinations #1, #2, #3 and #4, and 3 each in combinations #5, #6, #7, and #8.
2. Arrange motifs as shown in Assembly Diagram on page 51 and single crochet them together.
Color Combinations
Work flower center with L for all flower motifs.
Color Combination #1 (make 2): Work petals with G, work center trim with F.
Color Combination #2 (make 2): Work petals with J, work center trim with K.
Color Combination #3 (make 2): Work petals with D, work center trim with E.
Color Combination #4 (make 2): Work petals with H, work center trim with I.
Color Combination #5 (make 3): Work petals with I, work center trim with H.
Color Combination #6 (make 3): Work petals with E, work center trim with D.
Color Combination #7 (make 3): Work petals with K, work center trim with J.
Color Combination #8 (make 3): Work petals with F, work center trim with G.
INSTRUCTIONS:
Flower Motif (make 20 as indicated in color
combinations)
Center
With L, make an adjustable ring.
Round 1 (Right Side): Work 6 sc in ring; do not join, work in continuous rounds—6 sc. Place marker for beginning of round, move marker up as work progresses.
Round 2: 2 sc in each sc around—12 sc.
Round 3: [Sc in next sc, 2 sc in next sc] 6 times— 18 sc.
Round 4: [Sc in next 2 sc, 2 sc in next sc] 6 times—24 sc—24 sc. Fasten off.
First Petal
Row 1 (Right Side): With Right Side facing and working in back loops only, join petal color with slip st in first sc of last round of flower center, ch 2 (counts as hdc), hdc in same sc as join, 2 hdc in each of next 3 sc, turn—8 hdc.
Row 2: Ch 2 (counts as hdc), hdc in first hdc, hdc in each hdc across, 2 hdc in top of turning ch, turn—10 hdc.
Note: In remaining rows of petal, begin each row by working into the first hdc, and do not work into the turning ch at the end of the row. This reduces the gap that can appear at the beginning of a row when the ch-2 turning ch is counted as a stitch.
Rows 3 and 4: Ch 2, hdc in first hdc, hdc in each hdc across, turn.
Rows 5 and 6: Ch 2, hdc2tog, hdc in each hdc across to last 2 hdc, hdc2tog, turn—6 hdc.
Row 7: Repeat Row 5, but do not turn at the end of the row—4 hdc.
Side Edging: Working across side of petal, [ch 2, sc between next 2 rows] 6 times, ch 2, sc in same back loop as last hdc of Row 1. Do not fasten off.
Second–Sixth Petal
Row 1 (Right Side): Working in back loops of flower center, slip st in next sc, ch 2 (counts as hdc), hdc in same sc, 2 hdc in each of next 3 sc, turn—8 hdc.
Rows 2–7: Work same as Rows 2–7 of first petal.
Side Edging: Work same as side edging of first petal. Fasten off at the end of sixth petal.
Center Trim
With Right Side facing, and working in front loops of last round of flower center, join center trim color with sc in first sc, ch 3, *sc in next sc, ch 3; repeat from * around; join with slip st in first sc. Fasten off.
Edging
Round 1 (Right Side): With Right Side facing, join C with sc in first hdc2tog of Row 7 of any petal, 3 sc in next hdc, sc in next hdc, [ch 7, dc in side of Row 3 of same petal, dc in side of Row 3 of next petal, ch 7, sc in first hdc2tog of Row 7 of same petal, 3 sc in next hdc, sc in next hdc] 5 times, ch 7, dc in side of Row 3 of same petal, dc in side of Row 3 of next petal, ch 7; join with slip st in first sc—30 sc, 12 dc, and 12 ch-7 spaces.
Round 2: Ch 2, hdc in next sc, *(hdc, ch 2, hdc) in next sc, hdc in next 2 sc; 7 hdc in next ch-7 space, hdc2tog, 7 hdc in next ch-7 space **, hdc in next 2 sc; repeat from * around ending last repeat at **; join with slip st in top of beginning ch-2—126 hdc and 6 ch-2 spaces (at tips of petals). Fasten off.
Round 3: With Right Side facing, join A with slip st in same st as join, ch 2, hdc in next 2 hdc, (hdc, ch 2, hdc) in next ch-2 space, hdc in next 10 hdc, hdc2tog, *hdc in next 9 hdc, (hdc, ch 2, hdc) in next ch-2 space, hdc in next 10 hdc, hdc2tog; repeat from * around to last 6 hdc, hdc in last 6 hdc; join with slip st in top of beginning ch-2. Fasten off.
Round 4: With Right Side facing, join B with slip st in same st as join, ch 2, hdc in next 3 hdc, (hdc, ch 2, hdc) in next ch-2 space, hdc in next 11 hdc, hdc2tog, *hdc in next 9 hdc, (hdc, ch 2, hdc) in next ch-space, hdc in next 11 hdc, hdc2tog; repeat from * around to last 5 hdc, hdc in last 5 hdc; join with slip st in top of beginning ch-2. Fasten off.
FINISHING
Arrange flower motifs as shown in Assembly Diagram. Sc edges of flower motifs together as follows: Working through both thicknesses, join B with sc in corner ch-2 space, working in back loops of last row, sc across to next ch-2 space, sc in ch-2 space. Fasten off. Note: Designer recommends joining motifs together into strips, 4 motifs long, then joining the strips together, matching corner stitches as you go.

Border
Round 1 (Right Side): With Right Side facing, join C with slip st in any corner ch-2 space, ch 2 (counts as hdc), 2 hdc in same corner ch-2 space, hdc in each st around, working 3 hdc in each corner ch-2 space, and hdc2tog over 2 ch-2 spaces where two motifs are joined; join with slip st in top of beginning ch-2. Fasten off.
Round 2: With Right Side facing, join A with slip st in same st as join, ch 2 (counts as hdc), 3 hdc in next hdc (corner), hdc in each hdc around, working 3 hdc in each corner st; join with slip st in top of beginning ch. Fasten off.
Round 3: With Right Side facing, join B with slip st in same st as join, ch 2 (counts as hdc), hdc in next hdc, 3 hdc in next hdc, hdc in each hdc around, working 3 hdc in each corner st; join with slip st in top of beginning ch.
Round 4: Ch 1, work reverse sc in each hdc around; join with slip st in beginning ch. Fasten off.
Weave in ends. Block lightly, if desired.

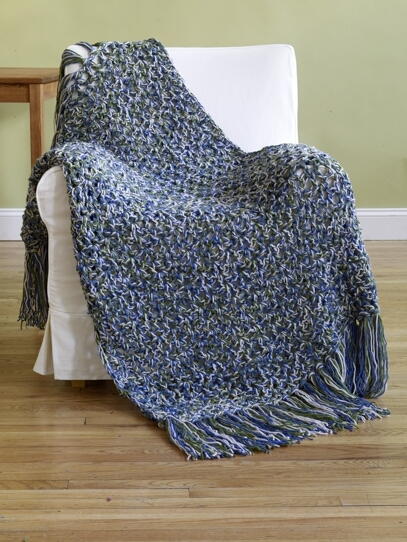
Read NextArrow Stitch Crochet Afghan


Thanks for your comment. Don't forget to share!
gracielafuentes30 9480202
Feb 06, 2012
I like the colors around the flowers. The white and dark outlines make the flowers pop. Plus, it could go nice with any room. Very pretty!
bedfordshire14
Feb 06, 2012
I like them both. The floral pattern wins out for me. It almost has a 3D effect to it. Looking at the closer pictures the flower is just so pretty and well shaped. I love it and I am sure it would be the perfect gift for girls and teens...Great work...
nanam
Feb 05, 2012
Now that I see this one more closely, I have to change my vote to the posies. The design features are gorgeous and there's a very ambitious amount of work put into it.
Simchas Jewels
Feb 02, 2012
Both throws are beautiful, but I'm drawn to the bright colors in this one.
rdenomie 8400281
Feb 02, 2012
I always prefer flowers to stripes. Someday I would like to makes this.
Trinsgma1
Feb 02, 2012
What a lovey idea for a young girls room, I can't wait to show my granddaughter this!
emmergenecastle 25 82379
Feb 02, 2012
this is beautiful. id like to use the motifs otherwise though.
sdsemail 4622725
Feb 02, 2012
Since I do not like to cart around a very large project, and this one I can do a little here and a little there, I love this one. Also, the variations in the flowers make it very interesting and colorful.
Sweet Linda
Feb 01, 2012
Alltho this is a gorgeous aghan, I simply hate having to sew things together after I've "finished' crocheting whatever I'm working on. Seems like I can never get ti completely finished. So I vote for the other one.
crafter8
Feb 01, 2012
I like both of them, but this one is more colorful and you don't see too many patterns like this on an afghan, so I pick this one!
gdaughter4me 24132 04
Feb 01, 2012
I like both, but this one is more cheerful. I love the bright flowers and it will be a joy to make this for each one of my 5 grand daughters
CheryleAllene
Feb 01, 2012
I love this one. When you see all those beautiful colours, you can't help but to feel happy. It definitely lifts your spirits.
Ralph S
Feb 01, 2012
This one is great. I do like both - this one for spring - happy, cheery. The other for winter, by the fireplace. The garden is my favorite tho. It seems a bit more challenging than the other, and would keep my interest when I make it.
cattytaurus
Feb 01, 2012
This one is by far the better one! So much easier to plug in your favorite colors and your own unique flare! I love this, absolutely the better pattern!
grannie nyari
Feb 01, 2012
I think this is the hands down winner. It is bright and cheers you up and is very portable.
luvmyferretz
Feb 01, 2012
Bright, cheery and beautiful. And who doesn't love flowers!?!?! This one is clearly the best, hands down!
coffeelizard 54047 19
Feb 01, 2012
This pattern looks far cheerier than the other afghan did. If I had to chose one, it'd be this one! ...Thanks for asking :-)
Report Inappropriate Comment
Are you sure you would like to report this comment? It will be flagged for our moderators to take action.
Thank you for taking the time to improve the content on our site.