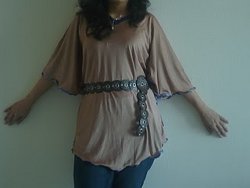
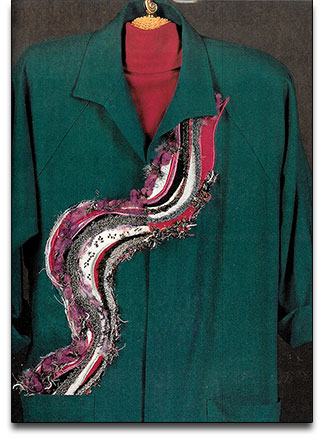
Fiber Embellished Shirt
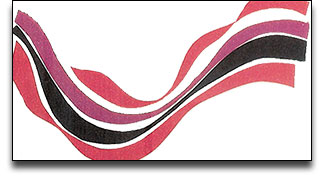
Embellish a plain shirt with a wave of various fabrics, fibers, threads, crystals and more. Stabilizer helps you to stitch the various layers together onto just about any fabric with this pattern from Sulky of America.
Materials:
- A ready-made jacket or vest, or make your own from a favorite pattern
- 1 yard each of several fabrics including interfaced lamé that will contrast or coordinate with the jacket fabric
- 2 yds. Natural fibers like wool and mohair
- Iron-on crystals, Glass Beads and Delta Jewel Glue
- 2 yds. Totally Stable Iron-on tear-away stabilizer
- 1 yd. Fusible Web for each fabric choice
- An array of Sulky Rayon and Metallic Threads
- Fine Sulky bobbin Thread or matching fabric color 40 wt. Sulky Rayon for bobbin
- Zig-Zag Sewing Machine that has a fringe foot and open-toe appliqué foot
- Size 14/90 top-stitching machine needles
- Sulky Iron-on Transfer Pens in various colors to code placement of appliqué fabrics
- Sharpie Extra-Fine Black Permanent Ink Pen
- Large Sheet of tracing paper
- Iron & Press Cloth
- General Sewing Supplies - seam ripper, pin, etc.
- Pattern 1
- Pattern 2
- Pattern 3
Prepare Your Appliqué Pattern
- From the pattern sheet, use entire appliqué design or only part depending on the size of your appliqué area. In order to make a transfer that will match the design on the pattern sheet, first use a Sharpie permanent ink pen to trace the appliqué design onto a large sheet of tracing paper. Repeat on another sheet of tracing paper.
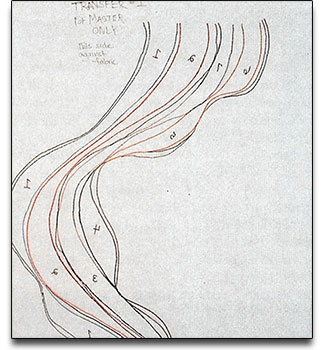
- For Transfer #1, turn your tracing over and ink the pattern from this side with the Sulky Iron-on Heat Transfer Pen. (Using different color pens for different sections will help you with placement later.) When this transfer is placed on fabric to transfer the design, the design will transfer in the same direction as the original drawing on the pattern sheet. Use a Sharpie Marker to label this transfer "Transfer #1 for Master Only." You will use it to transfer a master to your garment or base fabric in order to build the appliqué. For Transfer #2, ink directly over the Sharpie Marker lines with the Sulky Heat Transfer Pen. This transfer will be used on all your appliqué fabrics.
Prepare Your Appliqué Fabrics
- Cut Fabric choices into rectangles that measure a lttle larger than the appliqué design area.
- Fuse Fusible Web onto the wrong side of all the fabric rectangles.
Transfer Your Appliqué Pieces
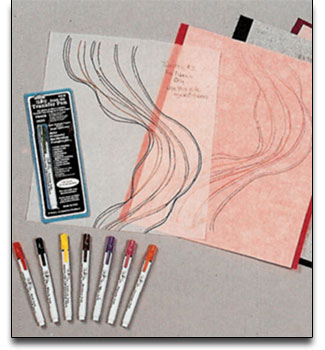
- Since the Sulky Transfer Pen can produce multiple transfers from one inking, we will use the traced Transfer Design #2 for all of our appliqué fabrics. I prefer to have choices when designing, so I transfer the entire design to a series of fabrics I wish to have in the finished appliqué; that way I have the option of placing colors at will in an area of the design. Be sure to label each piece so you won't become confused later as to where it should be placed.
- Once the transfers are make, carefully cut along the transfer lines, keeping the release sheet paper on each appliqué piece until you are ready to place it on the Master.
Place Chosen Appliqué Design Pieces In Place Over The Master
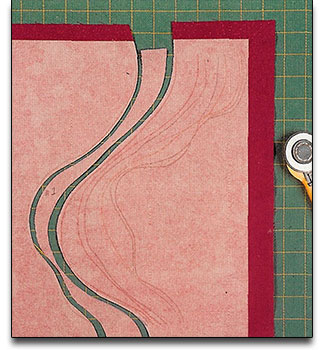
- Transfer the #1 Master Design directly onto your garment, or onto a base fabric on which an appliqué will be first assembled and stitched, then placed on a garment.
- Now arrange the appliqué pieces until you obtain the best color placement. Keep in mind that some areas could be filled in with natural fibers, fringe or beads. Once you have made your final choices, remove the release sheet from the back of those pieces and iron them in place; put a blank sheet of paper between the iron and the transfer paper to prevent the Master Transfer from transferring back onto your iron.
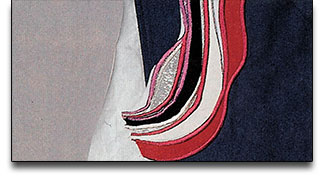
First - Satin Stitch
- Iron 1 to 2 layers of totally Stable Iron-on Tearaway to the under side of fabric in appliqué area. If applying appliqué directly onto your jacket, extend the stabilizer off the jacket front edge so it can be turned back when finished.
- Thread top of machine with Sulky Decorative Thread and, in the bobbin, use matching 40 wt. Sulky or Sulky Bobbin Thread. Place an open-toe appliqué foot on the machine. On a practice piece of fabric which is set up like our Master Appliqué, run some satin stitches in various widths to see which one produces the desired effect. Adjust the width while sewing to see the effect. Once satisfied, satin stitch appliqué edges of the Master Appliqué. Taper to finish off the pattern section ends.
Second - Add Rows of Sulky Fringe To Fill In Areas
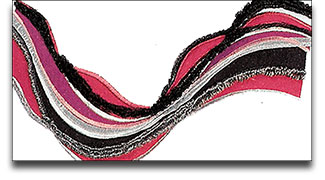
Thread top with one or two Sulky Threads through the same needle (16/100 Needle for two threads). Use all Sulky Rayon or all Sulky Metallic, or combine the two. Loosen top tension to almost zero, attach fringe foot, set width so needle just clears the raised metal divider on the foot, set switch length for a satin stitch, and run a test row on your practice piece. Choose a place to put a row on your master appliqué, then pack additional rows close to this row. To taper fringe, gradually shorten the length of each row.
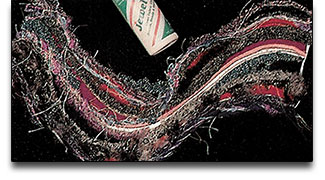
Third - Couch Natural Fibers For Added Dimension
Sew with a Sulky Rayon or Sulky Metallic that best contrasts or blends with the yarn you wish to couch. Use a cording foot, if available, or set the machine for free-motion and use a darning foot. Try twisting a few strands of Sulky Metallic with a dyed wool or nubby decorative yarn. If the fiber is too large to couch, simply glue it in place using a fabric glue. Gently remove stabilizer backing from outside edge of overall appliqué. Leave the inside, stitched-over stabilizer in place.
Fourth - Iron-on Crystals Or Glue On Beads, Sequins, Etc.
Place iron-on crystals where you desire them. Place a press cloth over the crystals, then press with an iron for 15-20 seconds or until stones adhere. You can add beads and/or sequins by sewing them, or glue them in place with Delta's Jewel Glue. Make an interesting pattern that flows with the design, not necessarily just a solid group of beads or rhinestones. You can add as many or as few crystals, beads and sequins to the make the appliqué suit you.
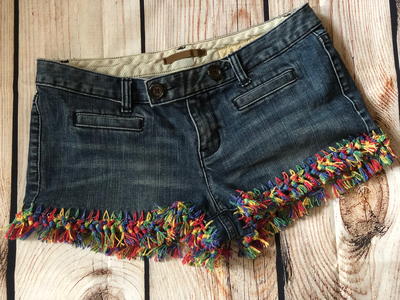
Read NextDIY Upcycled Crochet Jean Shorts
Your Recently Viewed Projects

Thanks for your comment. Don't forget to share!
The Thread Lady
Jun 27, 2011
Wonderful! This is my kind of clothing. I am called "The Thread Lady" because I do stuff like this and teach it. You have just made my day!
Report Inappropriate Comment
Are you sure you would like to report this comment? It will be flagged for our moderators to take action.
Thank you for taking the time to improve the content on our site.