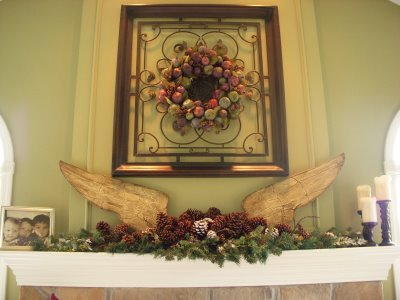
Wooden Angel Wings
Christmas decorating ideas like this one are sure to get your home an overwhelming amount of compliments. Use Jennifer Neill's (a.k.a. Jennifer Juniper) tutorial to create beautiful Wooden Angel Wings for your mantel top.

Materials:
- Two 20x32 inch boards
- Paper for pattern
- Jigsaw
- Dremel style tool
- Sandpaper
- Acrylic Paint
- Brown stain
Instructions:
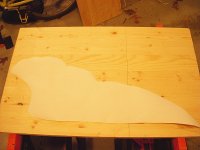
- Create a template on a piece of paper (if you can't draw this free hand, don't fret! Print out a shape you like from the internet, then take it to your local copy shop to enlarge it to your desired size. You can find many angels wing shapes on Google).
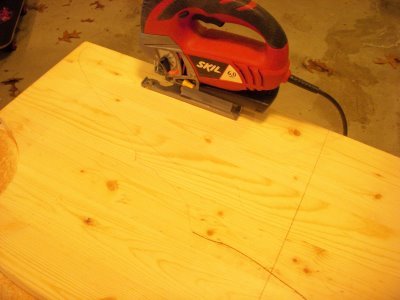
- You will use the same template for both wings, but to make a set you will have to flip the template once for a left and a right wing. Trace around the template onto your wood, I used a 20x32 inch length of pine from Lowe's. I could fit two wings onto it.
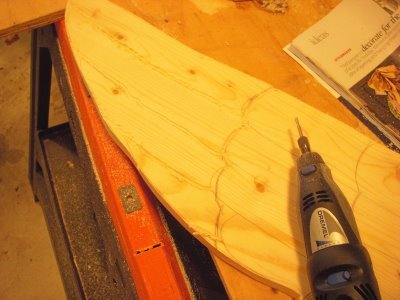
- Cut out your wing shape. I used my pretty red Skil jigsaw/scroll saw combo. Don't be afraid of power tools! You can do it! Just be careful and wear eye protection. This doesn't have to be perfect! You will be sanding later! (That was my pep talk)
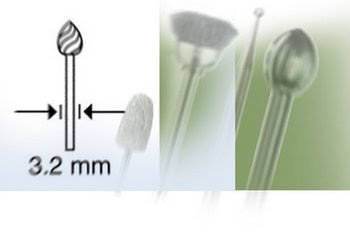
- Next, I penciled in the rough shapes of feathers along the surface of the wing (just a bunch of half circles over the whole surface) then went over the lines with my Dremel. Using the attachment on the far left of this photo:
- If you don’t have a Dremel tool, try using a u-shaped chisel dig out the grooves.
- The grooves will be rough, but that is the beauty of this project. You want it to look hand carved. And you will be sanding later.
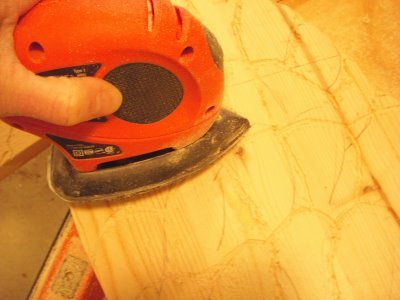
- Now, I sanded everything really well with a palm sander, this mouse sander was perfect for getting into all the grooves. Stick the point down into the grooves.
- To get the distressed, antique look I painted the wings with an antique white acrylic paint, about 4 thick coats. Sand in between coats with a fine grit sandpaper to get a nice smooth surface.
- Next, brush a medium stain over the whole wing and wipe off. Make sure to get stain down into the grooves to accentuate the feathers. Try to rub a bit of extra stain into the edges using your fingers, to give an authentic antique look.
Read NextTipped Hat Snowman
Your Recently Viewed Projects
Thanks for your comment. Don't forget to share!
kitten1943
Aug 01, 2011
Neat idea - but I personally would not use wood. I would get corregated white board (Michaels) or even use thick postor board. I would think wood is too bulky to pack away. So go for it - and use your choice of materials.
Report Inappropriate Comment
Are you sure you would like to report this comment? It will be flagged for our moderators to take action.
Thank you for taking the time to improve the content on our site.