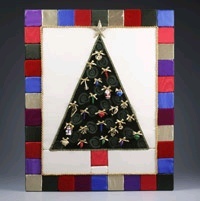
Christmas Jewels Wall Quilt
Use a variety of colorful, luxurious fabric such as velvet and lamé to mimic a vintage Christmas quilt with no sewing required. This no-sew project makes for a treasured holiday gift.

Materials:
- 2 Sheet of 36" x 12" x 1" STYROFOAM Brand Foam
- Fabrics, 45" wide: cream and green satin, 5/8 yd. each; green rayon-acetate velvet, 1/2 yd.;
- eight assorted specialty fabrics, including velvet, satin, taffeta, moiré, and lamé, 1/8 yd. each
- Ribbons: green grosgrain, 7/8" x 2-1/4 yds.; wire-edged gold metallic, 3/16" x 4 yds.
- Gold trims: flat braid, 1/4" x 1-1/4 yds.; twisted cord, 3/16" x 1-7/8 yds.
- Gold/iridescent ultra-fine glitter
- Swirl-design foam stamp
- Mini holiday ornaments, 24
- Star tree topper, wire removed, 2" (sometimes included in mini ornament collections)
- Serrated knife
- Candle stub or paraffin
- Fine-line black permanent marker
- Pencil
- Yardstick
- Tracing paper
- Waxed paper
- Round wooden toothpicks, six
- Scissors
- Putty knife, 1"
- Sawtooth hanger and nails
- Iron
- Spray bottle with water
- Low-temp glue gun and glue sticks
- Thick, white craft glue
For pattern, click here.
Steps:
- Wax serrated knife with candle stub or paraffin. Cut each foam sheet to measure 9" x 22". Refer to first diagram to join foam sheets along one 22" edge. Use glue gun to glue half of each toothpick into side of foam sheet as shown. Apply glue to foam edges and protruding toothpick ends; join sheets. Let dry.
- Using yardstick and marker, draw pattern lines onto 18" x 22" foam sheet as shown in second diagram; do not transfer measurements or letters. Border should be 2" wide all around; divide border into thirty-six 2" squares. Use yardstick and sharp pencil to score pattern lines.
- Trace sections A, B, C, D, and E onto tracing paper and cut out. Trace patterns onto fabrics as follows, adding 1/2" seam allowance all around: A, C, and E onto cream satin; reversed A and C onto cream satin; B onto green velvet; D onto red moiré, or fabric of choice. Cut out pattern pieces; remember seam allowance. Cut remaining fabrics into 3" squares for border.
- To emboss pattern B (tree), first test technique on scrap velvet. Place stamp on hard surface, not ironing board, image side up. Place velvet right side down on stamp. Mist fabric with water. Being careful not to move fabric and avoiding iron steam vents, press with hot iron for 20–30 seconds. Adjust heat level if velvet sticks. Emboss tree fabric as desired.
- Beginning with tree section, center fabric over corresponding area on foam. Use putty knife to tuck seam allowance into pattern lines. Repeat with trunk and all cream satin sections. Fabric should be smooth and taut. For border squares, tuck three sides into foam and glue fourth side down outside edge.
- Cut 19" x 23" piece from green satin for backing. Center and glue foam to wrong side of backing. Fold and glue fabric edges to foam edges. Overlapping ends 1/2", center and glue grosgrain ribbon around edge of foam, hiding raw fabric edges.
- Center and glue sawtooth hanger to center back of wall quilt, 1" below top edge. Glue nails into holes in hanger. Let dry.
- Place wall quilt flat on work surface. Beginning and ending at tree tip, glue flat braid trim around tree. In same way, glue gold cord around outside edge of cream background.
- Place star topper on waxed paper. Apply thin layer of glue to star and sprinkle with glitter; let dry. Glue star to tree tip and ornaments to tree as desired. Cut twenty-four 6" lengths from gold metallic ribbon; tie bows. Glue bows to ornament tops. Let dry flat.
®™ Trademark of The Dow Chemical Company ("Dow") or an affiliated company of Dow. For more project ideas, please see styrofoamstyle.com.
If you like this project, we also suggest:
Mini Quilt Christmas Decor
Crayon Stained Quilt Art
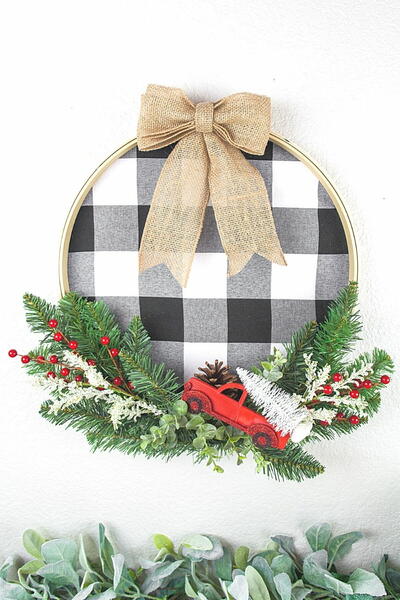
Read NextBuffalo Plaid Christmas Hoop Wreath

Thanks for your comment. Don't forget to share!
The Designing Peng uin
Oct 24, 2016
Looks terrific - I wonder though if it might look more quilt-like if it were made without the stiff backing? Agree with jaye ll5 that it would be great for children to make out of felt -- thanks for the ideas
jayell5
Mar 30, 2013
Love the quilt but not sure I would use styrofoam backing. The instructions for embossing velvet are brilliant and definitely a technique I will use, and experiment with other materials, especially felt. A simplified, pre-prepared version of this quilt would make an ideal craft for children in felt or paper. Many thanks for great inspiration. Another project to ad to my rapidly expanding list. If I don't find any others I might finish them all in a year, maybe!
Report Inappropriate Comment
Are you sure you would like to report this comment? It will be flagged for our moderators to take action.
Thank you for taking the time to improve the content on our site.