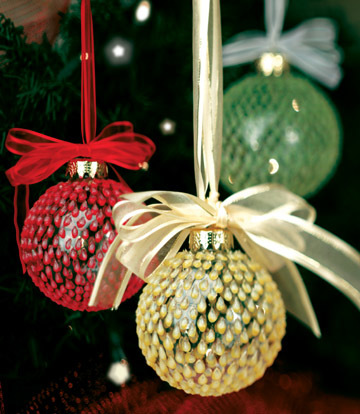
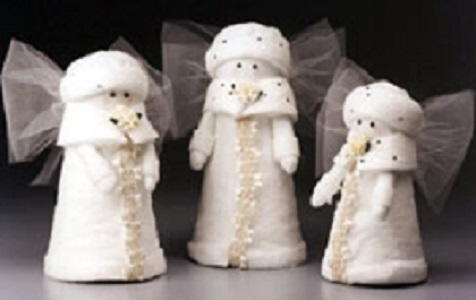
Angelic Snow Angels
Let the angels watch over you. With Styrofoam balls, fiberfill, glitter and some more materials these angels will be there around the Christmas season or all year if you want. Learn how to make this Christmas craft in 12 easy steps.

Materials:
- STYROFOAM* Brand Products:
- Cones, three 12" x 5"
- Balls, three 3"
- Tulle ribbon, 6" x 3 yds., white
- Ribbon Roses, cream
- Bonded quilt batting
- Tights, white
- Toothpicks
- Braid, 1-1/2" x 1 yd., cream
- Eyes, six 3-4mm half-round, black
- Fiberfil
- Micro glitter, white
- Silver star confetti
- Powder blush
- White thread
- Straight pins
- Serrated knife
- Old candle
- Gel craft glue, clear-drying
- Low temperature glue gun and glue sticks
Pattern
Steps:
- To cut foam, wax the knife blade with an old candle for smoother cuts. Cut cones as follows:
a. Small angel: Slice 1/2" from base and 5" from top
b. Medium angel: Slice 1/2" from base and 4-1/2" from top
c. Large angel: Slice 4-1/2" from top
- Tightly stretch a 4" x 4" piece of white stocking around each ball; bind ends tightly with thread and trim off excess fabric. Push toothpick into top of cone, add glue, position ball with tied end down and push ball onto toothpick.
- Wrap each cone in quilt batting, overlapping ends slightly in front; trim excess batting at bottom and top of cone.
- Cut twelve 1-1/2" x 3-1/2" pieces of white stocking; following diagram, pair fabric pieces together and sew six arms. Trim close to seam and turn right side out. Stuff with fiberfill; glue end closed. Attach to body with pins and low temperature glue.
- Fold in half lengthwise three 13" x 4" strips of quilt batting; cut ends to point, forming collar. If ends pull apart, re-glue with gel glue and pin with clothespins till dry. Glue collars over arms around tops of cones.
(NOTE: For Steps 6 - 8, separate quilt batting into two layers and use only one thin layer.)
- Hats: Sew a gathering stitch 3/8" from edge of 6" circle of quilt batting; pull thread, fitting circle around top of head. Glue hat in place. Repeat for other two angels.
- Fold 12" x 4" strip to create a 12" x 1" strip; place around hat, covering gathers, and gluing ends to the back.
- Glue 1/2" wide strips around sleeves and base of cone.
- Glue ribbon trim down center front of coat. Glue ribbon rose on collar.
- Spread thin layer of glue gel over angels; sprinkle with micro glitter. Randomly glue silver star confetti to collar and hat.
- Glue on beads for eyes. Blush cheeks.
- Wings: Tie 2/3 - 1 yd. tulle ribbon in large bow; glue to back of angel. Repeat for remaining angels.
®™ Trademark of The Dow Chemical Company ("Dow") or an affiliated company of Dow. For more project ideas, please see styrofoamstyle.com.
If you like this project, we also suggest:
Gold Accent Angel
Antique Angel Ornament
Read NextCrochet Gnome Earrings
Your Recently Viewed Projects
Thanks for your comment. Don't forget to share!
cactusann 6310485
Jan 15, 2011
These angels are precious. They give me other ideas of what to do with them. For example, cover them with color fabric and have 3 carolers. Love the idea.
Report Inappropriate Comment
Are you sure you would like to report this comment? It will be flagged for our moderators to take action.
Thank you for taking the time to improve the content on our site.