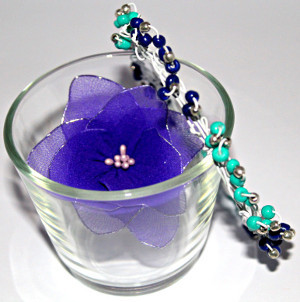
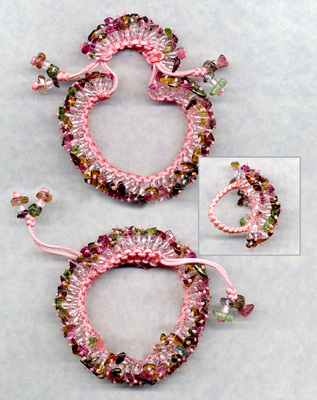
Macrame Meteor Bracelet
Use the macrame tutorial from Rings & Things with step-by-step photos for help creating this colorful beaded macrame bracelet. You can also create a ring with the same technique. Choose a color cording to match your favorite gemstone beads or chips.
Materials:
- 110" #61-571 Chinese knotting cord (about 10 meters)
- Spool #61-319 Silk bead cord (you'll use about 1/2 of a 200-yard spool)
- Various 3mm or 4mm round gemstone or glass Beads
- Various Center-drilled gemstone or glass star beads, bead caps or chips work well for the end/top beads for each meteor strand.
Instructions:
-
Cut cord into the following pieces:
One 40" piece — it will become the stationary center strands labeled "B"
One 70" piece, folded in half — it will become strands "A" and "C" -
Anchor the project. Macramé projects often utilize tape or a clipboard to hold the work in place, but I found that the loop of my belt worked very well. Just don't run to answer the phone before untying yourself!
-
Fold the 40" piece in half; tie the loose ends to your belt loop, and tape the other (looped end) to a table directly in front of you. (My craft table had a knob on it, which was perfect.)
-
Fold the 70" piece in half and tie it to strand B, about 5 inches down from the place you anchored your B strands.
-
-
Knotting: This bracelet uses one basic knot: the half-knot. This is how you will attach the A and C strands to the B strands. The B strands do not actually do anything yet… just keep them pulled tight.
-
Start with cord A and bring behind cords B, forming a loop with the A cord (about the size of a 50 cent piece) out to the right side.
-
Now bring cord C behind the long length of A (now on the left side) and over cords B. Pull through the loop of cord A.
-
Pull somewhat tight; the tighter the cord is pulled, the smaller the knot will be. Find the desired size and, for consistency, pull at that tightness throughout the whole project.
-
Repeat step 3, but start on the left side instead of the right.
Now, if you were making a macramé bracelet without the addition of the meteor strands, you would just keep repeating steps 3a-3d over and over again until you reached the end, but for a meteor bracelet, you need to add some steps and short strands in between. Go back to step 3b...
-
-
Threading: Cut 60 to 100 separate lengths of bead cord about 5 inches long and able to fit through all of your beads. These will be the meteor strands. We used silk cord in a color that complemented the Chinese knotting cord.
-
On a 5" string, thread beads so that the pattern is the same on each end with a space in the middle, and a knot at each end. The end result should be about 1.5 inches long after the ends have been tied.
-
Go back to step 3b, but before you pull each knot tight, lay your beaded strands inside the loops of the A and C strands. You can also lay an additional strand behind B, but above A and C. The more meteor strands you tuck in this way, the bigger and brighter your bracelet will be! Then pull the loops tight.
-
Go to step 3d, and lay more meteor strands inside the loops before pulling tight. Repeat this process until you have completed a 5.5" (140mm) beaded bracelet section. Don't cut anything yet!
-
-
Make the sliding clasp of the bracelet (illustration courtesy of Rings & Things) Make the sliding clasp of the bracelet.
-
Untie the bracelet from your belt loop and the table. Cut strands B, leaving 5 inches on each end of the bracelet, embellishing the ends with beads if you desire.
-
Now begin the sliding clasp by folding the B strands over one another. Continue step 3 again, making half-knots and adding meteor strands before pulling tight. Only now you have four stationary "B" strands instead of two.
-
Continue on for about two inches.
-
To finish, cut the ends of the last half-knot, and secure the ends with glue, or carefully melt them.
-
When the ends of the B strands are pulled, the bracelet will tighten, allowing it to slide on and off the wrist easily.
-
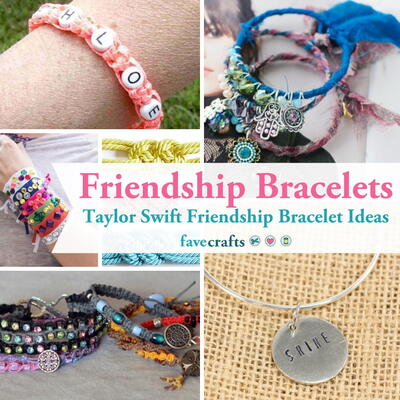
Read Next27 Friendship Bracelet Patterns
Your Recently Viewed Projects

Thanks for your comment. Don't forget to share!
mulberrygalprinces s
Jul 05, 2016
It took me a couple tries but I finally got it. I love a challenge and this truly was one. It turned out very nice but really not one I want to make every day. I don't think I will show my friends because they will then want one and that's just not happening.
bhfineartist 61746 38
Jul 20, 2013
Would be nice if there was a pdf to download instead of waiting for all this clutter to load on my slow computer and then only having very small instructions.
AmyBaby
May 16, 2011
I like it! I think i am going to make this for the neck line of a tank top. Maybe some dangly earing to match.
Report Inappropriate Comment
Are you sure you would like to report this comment? It will be flagged for our moderators to take action.
Thank you for taking the time to improve the content on our site.