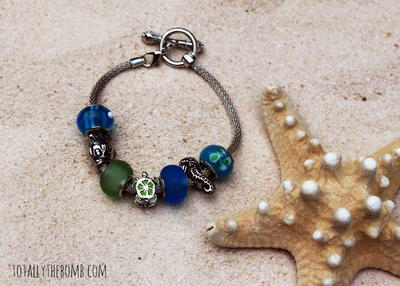
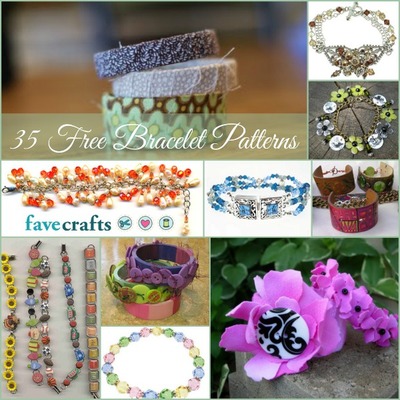
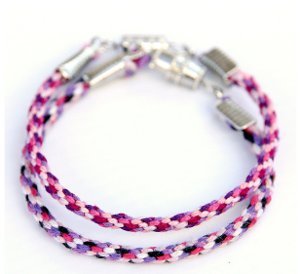
Super Easy Kumihimo Bracelets

Your kids will have a blast making these Super Easy Kumihimo Bracelets. Using the very popular kumihimo braiding technique, these DIY friendship bracelets create a cool and colorful accessory. This is an easy kids crafts that's super budget-friendly. Creating the template from a cardboard box using some embroidery floss. This is the perfect creative activity for a plane ride or long road trip. This DIY friendship bracelet will keep your kids occupied and help them create colorful designs that they can wear or share with their friends.
These stunning free bracelet patterns are made by weaving strands of embroidery floss together to make a stunning design that will shine on anyone’s wrist. Whether you are looking for a boredom-buster on a rainy afternoon or need a great summer camp activity, kumihimo bracelets are a time-honored summer tradition that you are going to love.

Find even more chic and trendy craft project ideas to adore in our collection of crafty DIY ideas that we think you should make ASAP. The ideas in 53 DIY Crafts Everyone Should Try are all pretty, easy, fabulous, and unique.
How to Make Kumihimo Bracelets
Materials:
- Light cardboard box that you can cut up (cereal, oatmeal or pasta boxes for example)
- Free Template
- Paper
- Embroidery floss – up to 7 colours
- Glue
- Scissors
- Any jewelery findings if you want to make it removable, otherwise just tie the bracelet right on your wrist
Instructions:
- Download the printable template and print onto a piece of paper
- Cut out one of the circles from the paper and glue onto a piece of your cardboard (make sure to get the edges of the circle covered really well with glue). Let the glue dry completely. (If you aren’t patient enough to do the whole glue thing, you could just copy the template design directly onto the cardboard with a pen).
- Now cut the cardboard with the paper glued onto it around the edge of the circle to where the tips of the arrow heads are. Cut a slit in each line that has the arrow head, about the same distance as the line itself. Use the sharp end of your scissors to poke a hole in the middle, approximately the size of the circle.
- Now grab your embroidery floss and cut either 7 or 14 pieces (2 of each colour) all 18″ long for adults or about 14″ for smaller kids. I find that doubling up the floss (using 14 pieces) is thicker and goes a bit faster.
- Knot together all the embroidery thread at one end so that there is still a little tail of ends.
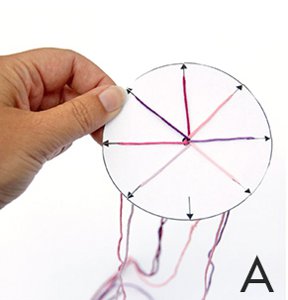
- Careful thread the ends of all the thread through the hole so that the knot is on the back side of your template/cardboard. Put one piece of each thread (2 pieces per slit if you’re using 14 pieces of floss) into each slit so that it’s snug into place – see Photo A.
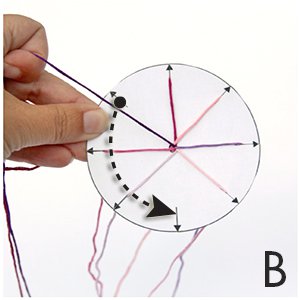
- Now, turn the template so that the empty space is pointing to your chest. Count 3 slit spaces to the left from there (approx. the 10:00 pm position if it were a clock). Take that piece(s) out of the slit and place into the empty space that is facing your chest – see Photos B and C.
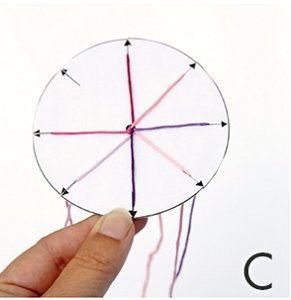
- Turn the template counterclockwise so that the empty space is again pointing to your chest and repeat step 7.
- Keep your thumb gently over the hole in the middle to make sure that the bracelet remains in position while you’re moving the threads around. You’ll also want to run your fingers through the threads underneath the template from time to time to prevent the threads from getting tangled.
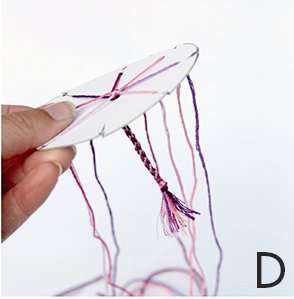
- Eventually you’ll start seeing the bracelet appear underneath once you get going - see Photo D. Keep going until you’ve reached your desired length. Tie off the end and finish off as you please (I added some clasps so my daughter’s bracelets so she could take hers on and off but you can keep things
simple and just tie the two ends of your bracelet together).

If you like this DIY friendship bracelet, you'll love these 20 Bracelet Patterns: Macrame Bracelets, Friendship Bracelets, Hemp Bracelets, and More. There are so many creative ideas in this free eBook, you might not know which project to work on first. If you've never tried a certain technique for free jewelry patterns, now is the time to test your skills.
Read Next27 Friendship Bracelet Patterns
Your Recently Viewed Projects
Thanks for your comment. Don't forget to share!
flowergirl
May 30, 2017
So this is how they make these bracelets. It's super easy once you print the card. I wish you could use thicker yarn to make the bracelets. This is so fun though.
mulberrygalprinces s
Sep 29, 2016
I have never heard of these before but you can bet I will be M aking a few of them. My grand daughter would love making them with me. She is 8 and really getting into DIY crafts. I think I got her hooked.the first thing she says when she gets here is, grandma gave you found something to make at that place on your computer?
Cheryl Y
Sep 16, 2016
I love this Super Easy Kumihimo Bracelets pattern. I need to find a printer to make this one, Unless someone knows just how big the template is? I see that suzu2 below posted to enlarge the template to fit a full sheet of paper, but that doesn't help if you don't have a printer. With that being said, this would be a great idea for my Grand children when they come visit and it's too cold out or raining. They love doing crafts and this would be great.. I saved it here and hope to use it soon. Thank you so much for this free how to..
cowgirlnow12 13723 77
Dec 08, 2013
It would be nice if there was a way to download the pattern instead of just saving it in favecraft. I would rather have it in my pdf file than have to go online just to use the pattern.
Tarni
Dec 09, 2013
To save the file, just right click and save image to your computer. This looks like something that will be an awesome kids craft for those long Christmas family drives :)
arnts1ta
Mar 04, 2016
I am actually making a charm bracelet for a coworker right now and have been searching for an easy, yet interesting way to work the string I'm using. I didn't want to go with a plain old braid, wanted something new and interesting. I love that you can customize this with whatever colors you like. Were there any difficulties making this bracelet, or was it pretty straight forward?
mulberrygalprinces s
Sep 29, 2016
I know you posted this a long time ago but incase anyone else has the same question, you can print it out. Look up at the left hand corner of the page where the first finished picture is shown. There are button so I really average, notes and print. Just print it out and you are all set. I hope this helps someone else too.
Report Inappropriate Comment
Are you sure you would like to report this comment? It will be flagged for our moderators to take action.
Thank you for taking the time to improve the content on our site.