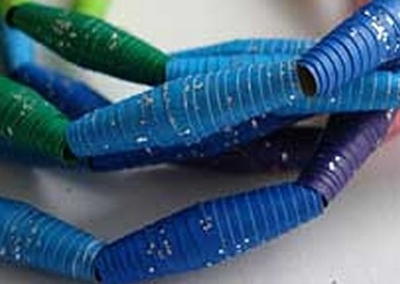
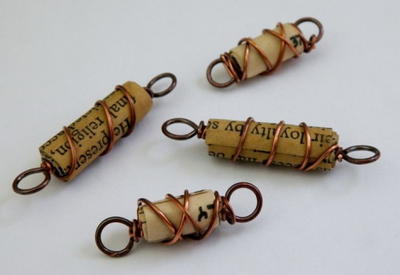
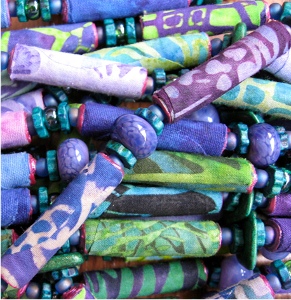
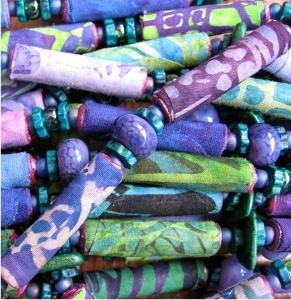
Painted Fabric Beads
Turn fabric scraps in to painted fabric beads to use in jewelry, embellishment, or whatever you can think of! These jewelry beading patterns from Hilary Frye are so much fun to try.
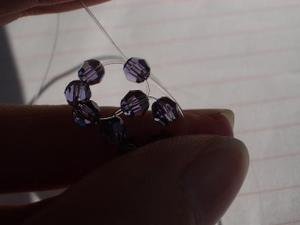
Love these beads, but not sure what to do with them? Check out How to Make an Anklet: 7 Jewelry Patterns for some inspiration.
Materials:
- 1 pkg. Hoffman Bali Pops® pre-cut batik strips
- Rotary cutter
- Rotary cutter mat
- Quilting ruler
- Embroidery scissors
- GOLDEN Soft Gel Matte Medium
- Ranger Adirondack® Dimensional Pearls
- 1/2” nylon paintbrush
- Round wooden toothpicks (pointed on both ends)
- Paint shirt
- Rubber gloves
- Wax paper
- Slab of Styrofoam™ (purchased or recycled to be used as a drying board
- Plastic drop cloth
Instructions:
-
Using your rotary cutter, ruler, and mat; divide each pre-cut batik strip into 8, 1-1/4” x 10” strips. (If you cut the entire package, you will end up with 320 strips/beads.)
-
On each strip, determine which end you like best visually. This is the end you will fussy cut for a rounded-tip finishing edge. (This rounded edge prevents fraying and looks more visually interesting than a straight edge finish.) Fold the fabric in half length-wise at one end. Hold the creased side in your left hand. Starting 1” from the top and on the open edge side, cut a curve. The end of the curve (point) will be at the top of the strip. (When you open the strip up you will have an evenly cut rounded edge strip on one end.)
-
Set-up a plastic drop cloth workstation. Set your Styrofoam™ slab to one side. On the other side have a stack of wax paper sheets ready, toothpicks, your GOLDEN soft gel matte medium and your brush.
-
Lay one bead strip face down on the wax paper. Hold it down at the blunt end and then paint the gel medium half way down the strip. Then paint the blunt edge. (Do not be overly generous with the gel medium. If you see glops on your strip, you’ve used way too much. Make sure to paint evenly out to the side edges.)
-
Fold over the blunt edge 1/4” to 3/8” onto the wrong side of the strip. This is to form the core. (Otherwise, the bead rolled onto the toothpick will be permanently stuck.)
- Carefully and tightly roll the folded edge around the middle of the toothpick towards you with both hands. (If it’s not even and tight, unroll and begin again. This takes practice. It is important to form a solid core.)
-
Now, after the core is established, I turn the bead around, and continue to roll. I feel that I can see the edges better this way as I roll. Roll slowly with even pressure, and turning of your fingers on both hands, to keep your edges even. (If it rolls off wonky to one side, unroll, and re-roll again.)
-
Once you reach the second half, set the unit down and paint the remainder of the strip with the gel medium. Make sure to get good coverage on the rounded tip portion for sealing the bead. (We don’t want it to unroll from wear and tear.)
-
Continue rolling to the end. Press the rounded point firmly on the bead. Set the toothpick on point on your workstation, and with both thumbs, press down on the top end of the bead to remove it from the toothpick. (This is a true test, if it doesn’t come off, it will never come off. FYI - Sticky fingers, too much matte medium, and stray threads wrapped and stuck to the toothpick will also prevent it from coming off cleanly. Keep it tidy.)
-
Take a look at your bead. Does it need any finessing? If yes, even out the cylinder shape by patting it into place. Stick back on the edge of the toothpick and stick into the Styrofoam™ slab to dry. Repeat this process with all the beads you are going to make. (For efficiency, it’s best to work “production style” and do one step at a time to all beads made in a row, sticking them into the slab from left to right.)
-
Starting from the left, or first bead made, trim any stray threads on each edge of the bead with your embroidery scissors. Clean-up all the beads that need “hair-cuts”.
-
Open, but do not shake the Adirondack® Dimensional Pearl bottle. (Shaking causes air bubbles.) Again starting from the left, paint the one end of all the beads with the fine tip nozzle of the squeeze bottle. (Enough to cover the end without it dripping down the sides of the bead, unless you want that look. If the hole gets filled in, take an extra toothpick and poke the paint out so your hole doesn’t become sealed.)
-
By the time you finish with the last bead on the right, your first bead on the left should be dry enough to flip over and paint the other end. Repeat this step for all the beads. Allow 6-8 hours for everything (gel medium and paint) to cure (dry thoroughly) before you string or attach the beads.
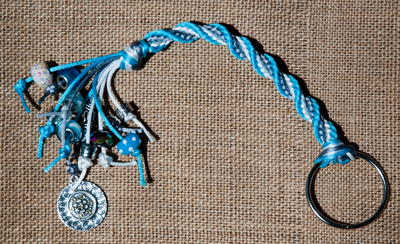
- These beads can be used in jewelry, art quilts, art journals, home decorating, etc... If you make jewelry, properly store the finished piece in a drawer in acid free tissue paper. Do not wear it while swimming or in the shower. To extend the life and beauty of the beads, you must take good care of them, just like any of your handmade art.
Read Next101+ Free Beading Patterns
Your Recently Viewed Projects
Thanks for your comment. Don't forget to share!
Mixed Kreations
Sep 22, 2012
Very pretty! Love the colors. Thanks for the tutorial. Pinning and sharing.
Report Inappropriate Comment
Are you sure you would like to report this comment? It will be flagged for our moderators to take action.
Thank you for taking the time to improve the content on our site.