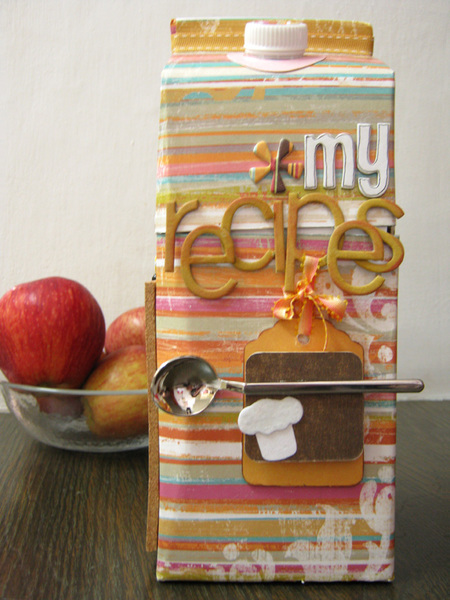
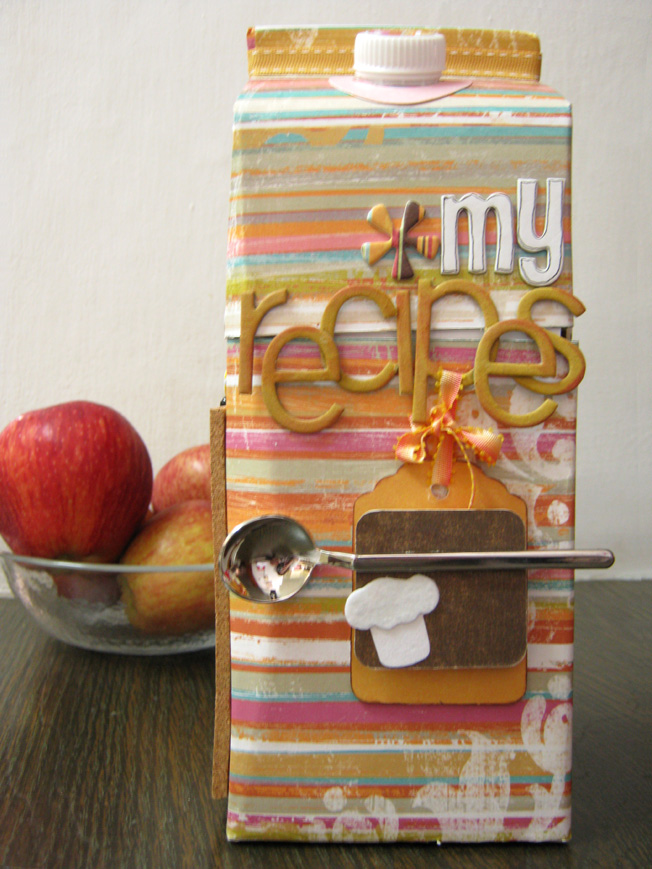
Altered Art Milk Carton
I always wanted to do something with the milk carton. Every time it found its way to the trash, until one day I had an idea: why not make it into a recipes box?
Materials:
- Large milk carton
- 1 patterned paper
- Chipboard embellishments (We R Memory keepers)
- Chipboard letters (Basic Gray, American Crafts)
- Stickers (fantasy stickers)
- Ribbon
- Cork board 3"X5"
- Mod Podge
- Teaspoon
Instructions:
- Wash and dry the milk carton.
- Wrap the carton with patterned paper. Use Mod Podge to seal the paper.
- Slit around 3 sides of the carton about 3" from the top. Leave the back intact as a hinge. This will create the opening of the recipe box.
- Front side: glue title on the carton. If you add the letters overlapping the slit, make sure to glue them only on the top or bottom, but not both. Otherwise you will glue the opening of the box. Use two chipboard tags as an embellishment on the front and glue a teaspoon to it.
- Right side: add chipboard embellishments in a row from top to bottom. Make sure to glue the embellishment overlapping the slit only on top.
- Left side: glue the cork board on the part under the slit. Add title above the slit.
- Make recipes card 8"X3.5". write your favorite recipes on the cards and put them in the box.
- Now you can start cooking – put your recipe on the cork board and you are all set.


Read NextAltered Book Tips and Inspiration