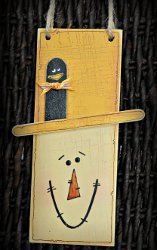
Wooden Slat Scarecrow
You can make your own fall festive door decorations Wooden Slat Scarecrow from Meggan Maravich. Autumn door decorations like this look great with the falling leaves on your lawn, and though this handpainted sign is easy to make out of a simple wood slat, it makes for a professional-looking addition to your homemade wooden yard decorations.

Materials:
- Loew-Cornell(TM) Woodsies(TM) Wood Slat (sold in packages of six)
- Woodsies(TM) Craft Stick
- Woodsies(TM) Jumbo Craft Stick
- hatch-mark background stamp
- acrylic paints: antique gold, antique white, black, white, jack-o-lantern orange, honey brown
- Sparkle Glaze
- Multi-Purpose Sealer
- sponge roller 1" wash brush
- 1/2" flat brush
- script liner brush
- brown ink pad
- scrap of ribbon
- glue gun and glue sticks
- pink powder blush and sponge dauber
- 12" length of jute for hanging
- Crop-o-Dile, hand drill, or drill press for drilling holes
- permanent black marker
Instructions:
- Use sponge roller to base coat top half of wood slat antique gold; also paint the craft stick antique gold. Base coat the bottom half of the wood slat antique white.


- Use the hatch-mark stamp to make the cross-hatch pattern on the scarecrow: rub the stamp pad over the stamp, and stamp the craft stick (hat brim), the top half of the scarecrow (hat), and the bottom half (the face), each separately.


- Next, shade around the edges of the rectangles and the top half of the craft stick. To do this, dip a 1/2" wash brush into water, then dip one corner into a small puddle of honey brown paint. Drag the brush back and forth on the palette to distribute the paint gradually.

- Secure the hat brim to the hat with the glue gun.

- Paint his face! Blush cheeks with sponge dauber and pink powder blush. Use a stylus or the end of a paintbrush handle to dot the eyes. Thin the black paint with water to an inky consistency, and use the liner brush to paint a mouth on the scarecrow. Use the liner brush and jack-o-lantern orange to add a triangle nose to the scarecrow.

- To make the cute black crow poking up out of the hat brim, paint the jumbo craft stick black. Don't forget to paint the sides. Use the sanding block to sand around the edges of the craft stick.

- Then trim off the end of the craft stick. Dip dot the eyes with white paint, and add smaller black dots over the white dots. Paint the beak with antique gold and a script liner brush. When completely dry, brush on a coat of Sparkle Glaze. Secure the crow to the hat with the glue gun.


- Make two holes in the top corners of the slat scarecrow.Thread one end of the jute through the hole and knot the ends. Thread the other end of the jute through the second hole, creating a hanger.

- Tie a knot with the ribbon scrap and attach to the crow's neck. Use the permanent black marker to outline the hat, hat brim, and face. Outline the crow's beak. Use thinned black paint to make eyebrows and stitch marks on the nose and mouth.

Up Next:
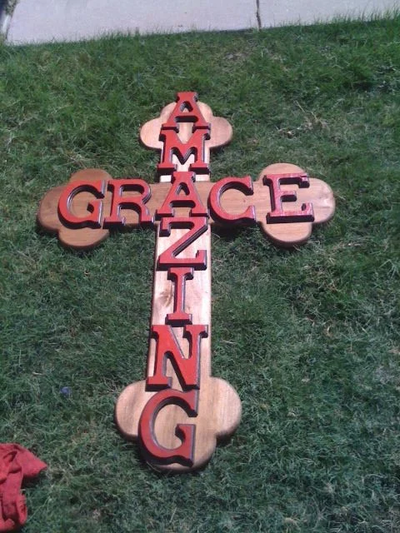
Read NextAmazing Grace DIY Wooden Cross
Your Recently Viewed Projects
Thanks for your comment. Don't forget to share!
Marilyn B
Nov 03, 2017
Nice project and a good source for inspiration! I could see using wood pieces you might have in hand, and following the basic design with whatever you like. You could even cur fabric prices or use ribbon trim, twine, buttons and makers to recreate this look! This would be a fun project to do with kids! Make several and tie together for a banner garland! .
mulberrygalprinces s
Jul 13, 2016
This is really very cute but to be honest it's a bit more than I want to spend or get into making. I look for simple, inexpensive things to make and after adding up the cost to make this I can buy four times the amount in ready made decorations.its very nice, just not for me.
Report Inappropriate Comment
Are you sure you would like to report this comment? It will be flagged for our moderators to take action.
Thank you for taking the time to improve the content on our site.