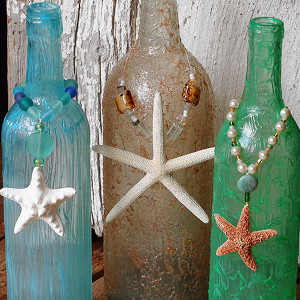
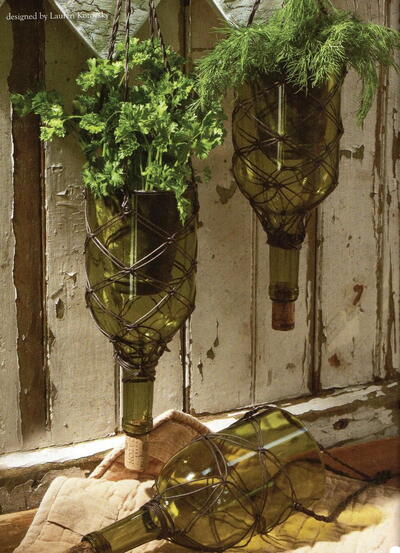
Wine Bottle Herb Garden
Transform old wine bottles into cute herb gardens. This Wine Bottle Herb Garden is a great project for all you green crafters out there, and is a fun and clever way to add some decor and style to your back yard. Plant one herb per wine bottle to prevent overcrowding and give your herbs plenty of room to grow. This upcycled wine bottle craft also makes a wonderful gift for a housewarming or garden party.
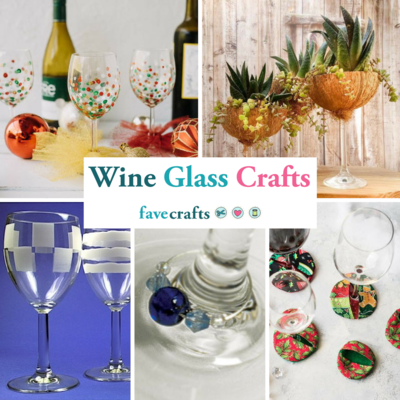
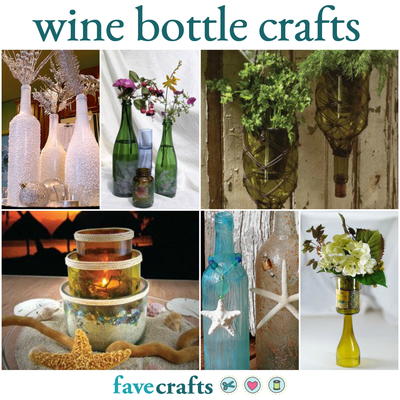
Love wine bottle crafts? So do we! For more projects like this one, check out our collection of 10 Things to Do With Old Wine Bottles + 16 New Craft Tutorials.

Materials:
- Generation Green™ (g2) Bottle Cutter
- 3 - 1.5 Liter Wine Bottles and corks
- 33 yards of jute
- Liquid Adhesives
- Marker
- Craft or Newspaper
- Rubber Mallet
- Figure 1
- Figure 2
- Figure 3
Instructions:
Read and carefully following the instructions contained within the Generation Green™ (g2) bottle cutter manual. Instructions for use will not be repeated in these instructions.
- Cover the work area with craft or newspaper.
- Choose three 1.5 liter bottles, remove labels and glue residue from the surface of the bottle. Measure, then mark with a Sharpie® 9 ½” down from the top of the bottle.
- Using the bottle cutter, score and separate where indicated.
- Smooth the rough edges as instructed in the bottle cutter manual.
- Place the bottles on your work surface with the necks facing up.
- Cut jute into twenty-two 1 ½ yard segments.
- For each planter, fold two of the 1 ½ yard segments in half and wrap them around the bottle’s neck; secure with a standard double knot. Repeat this process three times, so that you have a total of four groups of strands around the neck. Space them equally around the bottle. Tie a single square knot (FIG. 1) at the top of each cluster.
- Next, using two strands from adjacent clusters of jute, form a square knot about 1 ½” down from the original knot. Repeat this process around the bottle until you have four knots. (FIG. 2)
- Repeat step 8, until you reach the rim of your bottle; you will be making a diamond pattern down the surface of the bottle. Your last row of knots should sit at, or just above the cut rim of the bottle.
- Tie an overhand knot (FIG. 3) at the end of each cluster of jute to secure in place, then braid the remaining strands together, forming 4 braids 4 ½” – 5” long. Place a small piece of tape around the edge to keep from unraveling while you braid the adjacent strands. Using an overhand knot, join two adjacent braids to create what will resemble shopping bag handle. Repeat on the other two segments. Trim the remaining jute and secure with a small drop of glue. Allow to dry before hanging.
- Repeat steps 7-10 on one other bottle.
- For last bottle tie three loops instead of four from the 1 ½ yards of jute around the neck and repeat the process found in steps 7-10. For this bottle you will have three knots per row and you will tie the three braids together.
- To finish planter, insert the wine cork back into the bottle. If cork is stubborn, tap gently with a rubber mallet.
Your Recently Viewed Projects

Thanks for your comment. Don't forget to share!
mo
Feb 27, 2017
I love this and cant wait to start! I found plastic wine bottles at Walgreens today (90% off from Valentines) that were full of candy. To get the candy out, the bottom unscrews. I am just now removing the labels but so far they have been easy to remove. There is only a little adhesive left and the first ones have only been soaking about 30 minutes. If this continues to look like it will work well, I might be hitting all my area Walgreens tomorrow to get more for gifts. Thank you so much for this idea.
JMitchell
Jan 22, 2019
I'd expect the plastic wine bottles to deteriorate in the sunlight - probably VERY fast. If you want the craft to last more than about one season, I'd go with glass bottles and the glass cutter recommended. Yes, it costs more but may be worthwhile.
Weberme
Feb 17, 2017
I LOVE LOVE this great wine herb bottle garden. It is so super CUTE. So different then anything I have seen done in gardens and so clever. I do not drink wine so I am going to have to as people to save me their bottles and check the thrift store and yard sales and maybe the flea market. I need to collect all I can because this will make a cute gift and believe me when your friends see yours they will want some. Super easy idea and if you do not want to grow herbs put cactus or a vine in them.
mulberrygalprinces s
Jul 12, 2016
Regardless of what a prior comment or said, I think it's a great idea and what other people think when seeing a lot of wine bottles being used is none of their business. I don't drink but I have friends who do and I beg bottles from them. If my friends were that judgemental, they aren't my friends.
Sleepyshoe
Feb 27, 2016
This is such a cute idea for spring! From the pic it looks like the plants are actually placed in smaller planters that fit inside the bottle. I wonder if they would do well planted directly inside the bottle? It seems like the cork would be a good drainage channel for the water, and it would give the roots more room to grow. Just an idea!
Kaylee
Feb 29, 2016
Hi Sleepyshoe! That certainly might be an option. I would worry, however, that the cork might hold too much water and get a little funky/moldy. It'd be a cute idea for fake flowers though. Thanks for the suggestion! -Kaylee, Editor of FaveCrafts
mo
Feb 27, 2017
Hi! Again, thank you so much for this project idea. A few of questions--1) how are these supposed to be planted, 2) are these "stacked" or is there only one bottle per juke planter and 3) Is there anyway to get a photo of a planter from top to bottom? Obviously from these questions you can tell that I have not started assembly yet. Thank you so much!
Editor Dana
Mar 01, 2017
Hi Mo! It looks like in the photo, little planters are tucked inside the wine bottles rather than planting in the wine bottles directly. This is the only photo we have of the planter but I hope that helps! Let me know if I can help with anything else. -Dana from FaveCrafts
AFC Editor Annalis a
Jan 29, 2016
I love this idea! The planters are beautiful and would give any garden a rustic and homey vibe.
Lex Erin
Jun 08, 2015
Lots of root space! I always hate it when pots are too small for plants.
edperkins 2068590
Feb 26, 2014
Copy and paste all the instructions in an email to yourself and you can save that as a PDF file on your computer for future reference.
marykayser 5527737
Feb 26, 2014
Actually I don't like wine bottle crafts because they look like there's so many empty wine bottles laying around that you finally did something with them. It just makes me feel like a wino to see all those empty bottles.
tlynn574
Sep 23, 2013
Copy and paste Figure 1-3 onto a word document! Then you can see it and print it out! I haven't tried it yet but I saved the instructions. I need a bottle cutter first.
dmania74 8780245
Aug 14, 2013
This looks like a really cool idea, but the figures are not done well. There needs to be a better explanation of how to do the knot work. For this I give it a 2
Anne Hartmann
Aug 03, 2013
What are the herbs planted in - what medium? In the photo it doesn't look like there is soil in the bottles.
kcamp1 1589440
Jul 28, 2013
I couldn't print Figures 1 thru 3 so I could understand the knots. My rating is a 3
Report Inappropriate Comment
Are you sure you would like to report this comment? It will be flagged for our moderators to take action.
Thank you for taking the time to improve the content on our site.