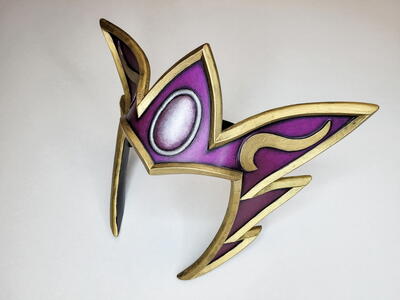
Simply Charming Embellished Fascinator
 Visit Maria at Keep Calm and Craft On.
If you're feeling regal, make your own Simply Charming Embellished Fascinator. This is a great way to add some fun to a boring outfit. Throw together your own DIY feather fascinator using charms, fabric and even outrageous feathers. There's no way any other person will have a similar outfit, that's for sure. Gather up your favorite embellishments and be sure to show off your unique personality.
You can find this project, as well as many other fabulous blogger projects, in our new eBook, The Best Blogger Craft Ideas 2014: Decoupage, Sewing, Jewelry Making, and More free eBook. Download your own free copy today!

Materials:
- Coats & Clark Tim Holtz Elements Fabric
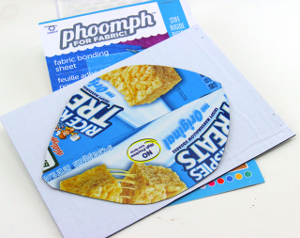
- Coats & Clark Phoomph For Fabric
- Lion Brand Bon Bons
- Plaid Mod Podge
- Plaid Podgeable Papers
- Plaid Podgeable Shapes
- Simplicity Fabric Flowers
- Elmer's Craft Bond
- Feathers
- 1mm Elastic Cord
- Crochet Hook - 3-3.25mm
- Two grommets
- Grommet tool
- Two small buttons
Instructions:
- Charm Directions: Using the Plaid Podgeables, choose your favorite shape and cut the paper to fit. Apply a coat of Mod Podge gloss to the image side of the paper and gently press onto the plastic shape. Gently press out any air bubbles. Apply a coat of the Mod Podge gloss over the backside of image to seal it. Place aside and allow to dry.
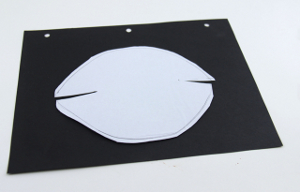
- Cardboard Pattern Directions: You will need a piece of cardboard to create your fascinator pattern. I found that a cereal box is perfect to use for a pattern piece. Draw an oval with a radius of 8. You can add or subtract from that size in accordance to your own head size. Cut a narrow pie slit (1 in length by in width) on each end of the oval. Line up the edges of the pie cuts together and tape them to create a slight cone shape. Try on to see if it fits, adjust as necessary. Then remove tape.
- Hat Trim Directions: Measure the radius of the oval. Chain enough stitches to wrap around the base once. Row 1 sc in 2nd ch from hook, sc in each of the next stitches. When you get to the stitch, cut off 1 inches of yarn. Pull the cut end of the yarn through the final stitch and pull closed. Weave the remainder yarn back through the trim.

- Fascinator Base Directions: Place the pattern on the Phoomph Fabric Base, trace and cut. Use the same pattern to trace 2 ovals onto the Tim Holtz Fabric. Cut out 1 leaving at least a seam allowance. Then cut the 2nd without the extra seem allowance.
- Once the edges are dry, take the grommet and punch a hole on each side of the fascinator (at least from edge). Add the trim by using the Elmers Glue pen to run a fine line of glue around the rim of the hat. Gently press the trim onto the glue and allow it to dry. Dont use too much glue or it will make the fabric stiff.
- Once the trim is dry, adhere the feathers, the fabric flowers and the charm. To finish the fascinator, thread the elastic cord through the grommet holes. Then weave the elastic through a button and back down into the grommet and tie a knot. Do this for both sides.
Read NextBleach Tie Dye Shirt