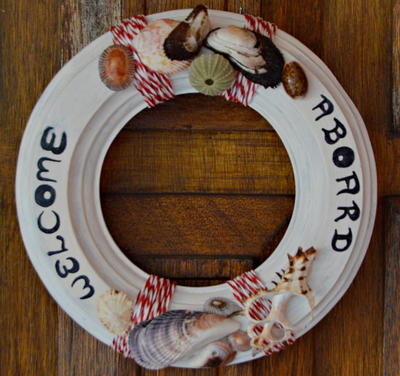
Welcome Aboard Beach Craft
Bring the beach to your home with summer craft ideas like this.

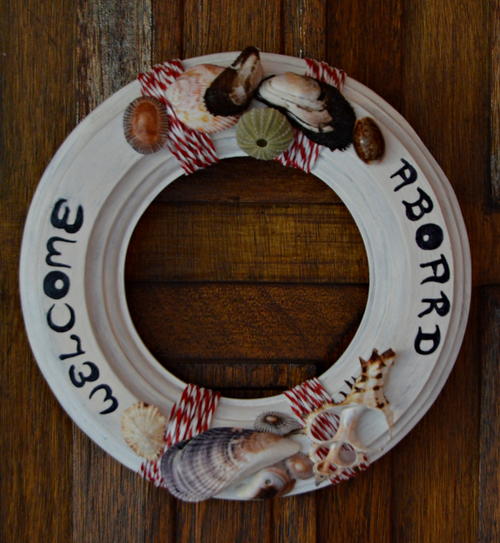
Turn an old vintage frame into an anchored buoy for the wall of your beach house or cottage this summer. Hang the Welcome Aboard Beach Craft on your front door to welcome guests to your home or place it inside as a bright piece of DIY home decor.
You can add personal memories to this project by taking shells that you've collected from time spent near the water and gluing them to this beach craft to give it a natural look. Your kids would probably love to help with this fun project, too. Spend some quality time with them by making this project together and talking about your favorite family memories from the beach.
Estimated Cost$11-$20
Time to CompleteWeekend project
Primary TechniqueDIY Craft

SeasonSummer
Project TypeMake a Project
Materials List
- Round vintage wooden photo frame
- Red-and-white twine
- A selection of small sea shells
- White acrylic paint
- Artline 210 Fineliner black pen
- Hot glue gun and glue sticks
- Quick-drying gloss spray varnish
- Fine-grit sand paper
- 25mm-thick paintbrush
- Standard scissors
- Long-nose pliers
- Old cloth
Instructions
-
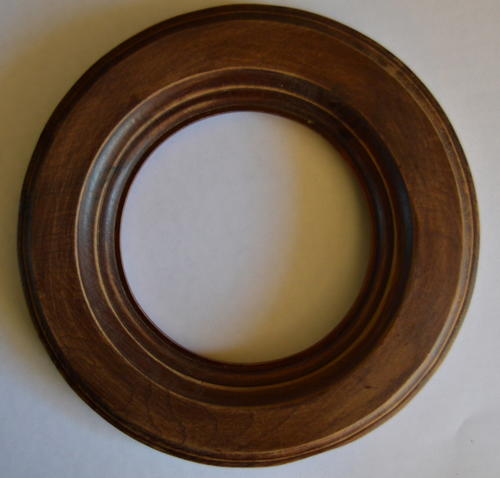
Use the pliers to pull out any nails at the back of the frame that holds the glass in place and remove the glass. Do not remove the hook for hanging the frame though.
-
Use the sand paper to sand the frame to remove any old varnish. Clean the frame with the cloth before continuing with the next step.
-
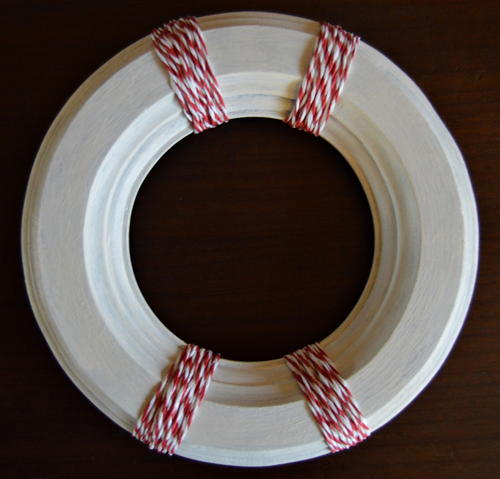
Use the white acrylic paint to add an uneven wash to the frame and allow it to dry thoroughly.
-
Repeat Step 3 once more.
-
Now turn the frame into a buoy. Add four sections with the red-and-white twine. For the first one, secure the thread with a knot at the back of the frame and add a drop of Super Glue to the knot. Twist the thread a few times around the frame. Add another drop of Super Glue to secure it at the back again and cut off the remaining thread. Repeat three more times to complete the four sections of the buoy.
-
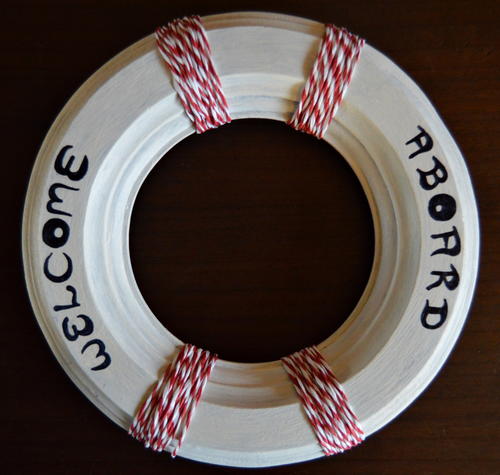
Use the black pen to add the words “Welcome” and “Aboard” to the left and right sides of the buoy. Let it dry.
-
Hot glue the shells to the top and bottom of the buoy.
-
Spray the buoy with the varnish and allow it to dry thoroughly.
Let us know:
What is your favorite thing about the beach?