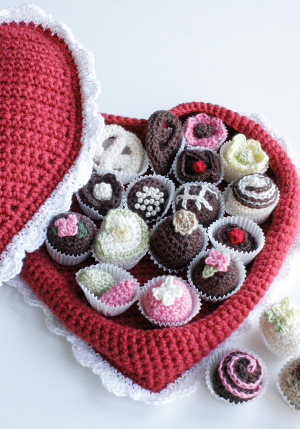
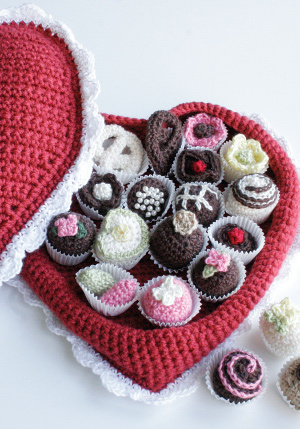
Valentine Chocolates
These adorable Valentine Chocolates are sweet to look at and will not wreck your diet. This is a great idea if you need Valentine's Day presents for boyfriend. Use this intermediate pattern for the chocolates and the box. Valentine's Day is so sweet, and your Valentine's Day gift ideas should reflect this sentiment. Now you can make something that lasts forever and looks adorable. People won't believe that you create the chocolates yourself and will love the effort you put into this free crochet pattern. Start working on this craft now so you have a box full of handmade chocolates for Valentine's Day.
Materials:
- 1 skein Red Heart Super Saver Yarn in Ranch Red (A)
- 1 skein Red Heart Luster Sheen Yarn in White (B)
- 3.5mm [US E-4] and 3.75mm [US F-5] crochet hooks
- Yarn needle
- Small amount of Polyfil stuffing
- 2 8" x 11" pieces of cardboard
- 1 skein Red Heart Luster Sheen Yarn in Chocolate (CA)
- 1 skein Red Heart Luster Sheen Yarn in Vanilla (CB)
- 1 skein Red Heart Luster Sheen Yarn in Tealeaf (CC)
- 1 skein Red Heart Luster Sheen Yarn in Tan (CD)
- 1 skein Red Heart Luster Sheen Yarn in Buttercup (CE)
- 1 skein Red Heart Luster Sheen Yarn in Think Pink (CF)
- 1 skein Red Heart Luster Sheen Yarn in Cherry Red (CG)
- 3.5mm [US E-4] crochet hook
- Yarn needle
- Polyfil stuffing
- 20 white paper candy cups
- 20 tiny pearls
Gauge for the Box: 16 sts = 4”; 16 rows = 3 1/2” in sc with CA and larger hook. CHECK YOUR GAUGE. Use any size hook to obtain the gauge.
Gauge for the Chocolates: 6 sts = 1”; 5 rows = 3/4” in sc. CHECK YOUR GAUGE. Use any size hook to obtain the gauge.
Special Abbreviations:
- Dec = draw up a lp in each of next 2 sc, yarn over and draw through all 3 lps on hook.
- Double dec = draw up a lp in each of next 3 sc, yarn over and draw through all 4 lps on hook.

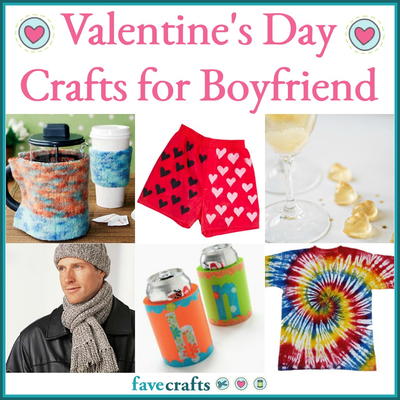
If you're looking for more Valentine's Day gifts for boyfriend, you've come to the right place. Check out 72 Valentine's Day Ideas for Boyfriend and get inspired. He'll love your creative ideas, especially when they perfectly fit his personality. Whether your guy is a tree hugger or a chocoholic, you'll find something to make him for Valentine's Day.
Instructions:
Box
Box measures approximately 9” across and 8” from “V” to bottom point. Candies measure approximately 1 1/4” across.
Bottom of Box, Top Section
** With larger hook and A, ch 2.
Row 1 (Right Side): 3 Sc in 2nd ch from hook; turn – 3 sc.
Row 2: Ch 1, 2 sc in first sc, sc in next sc, 2 sc in last sc; turn – 5 sc.
Row 3: Ch 1, 2 sc in first sc, sc in each sc to last sc, 2 sc in last sc; turn – 7 sc.
Row 4: Ch 1, sc in each sc across; turn.
Rows 5 and 6: Rep Row 3 – 11 sc at end of Row 6.
Rows 7-21: Rep Rows 4-6 five times – 31 sc at end of Row 21.
Rows 22-28: Ch 1, sc in each sc across; turn.
Row 29: Ch 1, dec over first 2 sc, sc to last 2 sc, dec; turn – 29 sc.
Divide for Heart Shape-Row 30: Ch 1, sc in first 14 sc; turn and leave rem sts unworked.
Rows 31 and 32: Ch 1, sc in each sc across; turn.
Row 33: Ch 1, dec over first 2 sc, sc to end; turn – 13 sc.
Row 34: Rep Row 29 – 11 sc.
Row 35: Rep Row 22.
Row 36: Rep Row 29 – 9 sc.
Row 37: Rep Row 22.
Row 38: Rep Row 29 – 7 sc. Fasten off.
With wrong side facing, skip next st of last long row, join yarn in next st; ch 1, sc in same sc and in each sc across; turn – 14 sc. Complete to correspond to first side, reversing shaping of Row 33.
Edging and Side: With right side facing and larger hook, join A and work 1 rnd sc evenly around entire heart, working 3 sc in point; join with a sl st in first sc. Do not fasten off. **
Place heart over cardboard and trace around heart. Cut 2 hearts from cardboard slightly smaller than crocheted heart, set aside.
Next Rnd: Ch 1, sc in front lps only of each sc around; join.
Next 6 Rnds: Ch 1, sc in both lps of each sc around.
Fasten off.
Bottom of Box, Lower Section
Work same as Top Section from ** to **.
Join Sections: Holding pieces wrong sides tog and matching st for st, sc through both lps of sc on Lower Section and through rem back lps on Top Section around AND INSERT ONE CARDBOARD piece before closing the rnd; join. Fasten off.
Lace Edging-Rnd 1: With smaller hook, join B to any sc of joining rnd; ch 1, 2 sc in each sc around; join.
Rnd 2: Ch 1, sc in same sc as joining, * skip next 2 sc, 5 dc in next sc, skip next 2 sc, sc in next sc, ch 3, skip next sc **, sc in next sc; rep from * around, end at ** adjusting as necessary; join. Fasten off. Weave in ends.
Top of Box, Lower Section
Work same as Bottom of Box-Top Section from ** to **.
Next Rnd: Ch 1, working in front lps only, * sc in next sc **, skip next 2 sc, 5 dc in next sc, skip next 2 sc; rep from * around, end at **, adjusting as necessary; join. Fasten off.
Top Section
Make another heart in the same manner through the first sc rnd. Join the 2 top pieces same as joining the bottom pieces except add a little stuffing between the cardboard and Top Section of box. Rep Lace Edging on top of box.
Flower
With smaller hook and CB, ch 6; join with a sl st in first ch to form a ring.
Rnd 1: Ch 3, 17 dc in ring; join with a sl st in back lp of top of ch-3 – 18 sts.
Rnd 2: Work all in front lps, [ch 1, hdc in same lp as last sl st, 3 dc in next lp, hdc in next lp, ch 1, sl st in next lp] 6 times. Rnd 3: Ch 1, holding petals toward you, sl st in first back lp of Rnd 1, ch 1, sc in same lp, * 2 sc in next back lp **, sc in next lp, rep from * around, end at **; join with a sl st in first sc – 27 sc.
Rnd 4: [Ch 2, dc in same sc as last sl st, 3 tr in next sc, dc in next sc, ch 2, sl st in next sc] 9 times. Fasten off. Sew to top center of box.
From bags to cards, we've got you covered this Valentine's Day. In 32 Valentines Crafts for Adults, you'll find everything from stylish shirts to pretty picture frames. Even if you don't have a special someone in your life, you won't want to miss out on the delightful Valentine's Day craft ideas in this handy collection.
Chocolates
Round Chocolates
(Make 2 CA with CF flower and CC leaves; 1 CF with CB flower; 1 CA with CB chain st tic tac toe embroidery)
With main color, ch 2.
Rnd 1: 6 Sc in 2nd ch from hook; do not join but work in continuous rnds.
Rnd 2: 2 Sc in each sc around – 12 sc.
Rnd 3: [Sc in next sc, 2 sc in next sc] 6 times – 18 sc.
Rnd 4: Sc in back lps only of each sc around.
Rnds 5-7: Sc in both lps of each sc around.
Rnd 8: [Sc in next sc, dec over next 2 sc] 6 times – 12 sc.
Rnd 9: Sc in each sc around. Stuff lightly.
Rnd 10: [Dec over next 2 sc] 6 times – 6 times. Fasten off leaving a 6” end. Weave end through rem sc and draw up firmly; fasten securely.
Bottom Edge: Join main color to rem lps of Rnd 4; sl st in each lp around. Fasten off. Weave in ends.
Flower
With flower color, ch 3, sc in 2nd ch from hook, sl st in last ch, [ch 2, sc in 2nd ch from hook, sl st in same ch as last sl st] 3 times – 4 petals. Fasten off.
Leaves
With CC, [ch 4, sl st in 2nd ch from hook, sc in next ch, sl st in last ch] twice. Fasten off. Sew leaves to top of candy; sew flower on top of leaves.
Chocolate Swirls
(Make 1 CA with CF swirl and 1 CB with CA swirl)
With main color, ch 2.
Rnds 1-7: Work same as Round Chocolate. Stuff lightly.
Rnd 8: Working in back lps only [sc in next sc, dec over next 2 sc] 6 times – 12 sc.
Rnd 9: Working in back lps only [dec over next 2 sc] 6 times. Fasten off leaving a 6” end. Weave end through rem sc and draw up firmly; fasten securely.
Join swirl color in first unworked lp on Rnd 7 with a sl st; sl st in each free lp through Rnd 9. Fasten off. Weave in ends.
Bottom Edge
Work same as Bottom Edge of Round Chocolate.
Square Chocolate
(Make 1 CA with CD topping and 1 CD with CA topping).
With main color, ch 2.
Rnd 1: 8 sc in 2nd ch from hook; do not join but work in continuous rnds.
Rnd 2: [Sc in next sc, 3 sc in next sc] 4 times – 16 sc.
Rnd 3: Sc in next 2 sc, 3 sc in next sc, [sc in next 3 sc, 3 sc in next sc] 3 times, sc in last sc – 24 sc.
Rnd 4: Working in back lps only sc in each sc around.
Rnds 5-7: Sc in both lps of each sc around.
Rnd 8: Sc in next 2 sc, double dec over next 3 sc, [sc in next 3 sc, double dec] 3 times, sc in last sc – 16 sc. Stuff lightly.
Rnd 9: [Sc in next sc, double dec] 4 times – 8 sc. Fasten off leaving a 6” end. Weave end through rem sc and draw up firmly; fasten securely.
Bottom Edge
Work same as Bottom Edge of Round Chocolate.
Topping
With topping color, ch 13; 2 sc in 2nd ch from hook and in each ch across. Fasten off. Roll into flower shape and sew to top.
Chocolate Covered Pretzel
(Make 1 CA and 1 CB)
Ch 31.
Row 1: Sc in 2nd ch from hook and in each ch across; turn – 30 sc.
Rows 2 and 3: Ch 1, sc in each sc across; turn. Fasten off at end of Row 3.
Fold in half lengthwise and sew tog. Fold into pretzel shape and sew tog.
Chocolate Ruffle
(Make 2 CA with CG centers)
With CA, ch 18.
Row 1: 2 Dc in 4th ch from hook, 3 dc in each rem ch across; turn – 48 sts.
Row 2: Ch 1, sc in each dc across and in top of beg ch.
Fasten off.
Roll up and sew bottom tog keeping it flat enough to sit alone.
Center-Rnd 1: With CG, ch 2; 6 sc in 2nd ch from hook; do not join but work in continuous rnds.
Rnd 2: Sc in each sc around. Fasten off.
Draw sts tog and sew to top of candy.
White Chocolate Heart
(Make 1)
Rnd 1: Beginning at top of candy, with CB, ch 2; 6 sc in 2nd ch from hook; do not join but work in continuous rnds.
Rnd 2: 2 Sc in each sc around – 12 sc.
Rnd 3: (Hdc, dc, tr) all in next sc, (dc, hdc) all in next sc, sl st in next sc, (hdc, dc) all in next sc, (tr, dc, hdc) all in next sc, sc in next 3 sc, 3 sc in next sc, sc in last 3 sc – 20 sts.
Rnd 4: Working in back lps only, sc in next 5 sts, sl st in next st, sc in last 14 sts.
Rnds 5 and 6: Sc in both lps of each sc around.
Rnd 7: Double dec over next 3 sts, dec over next 2 sts, sl st in next st, dec over next 2 sts, double dec over next 3 sts, sc in next 3 sts, double dec over next 3 sts, sc in last 3 sts – 12 sts. Stuff lightly.
8: [Dec over next 2 sts] 6 times. Fasten off leaving a 6” end. Weave end through rem sc and draw up firmly; fasten securely.
Top Edging
Join CC in any unworked lp on Rnd 4 with a sl st; * ch 1, sl st in next lp, rep from * around. Fasten off.
Flower
With CE, ch 2; 6 sc in 2nd ch from hook; join with a sl st to first sc. Fasten off. Sew to top center.
Flower Chocolate
(Make 1 each CB with CA center; CA with CB center; CE with CC center; CF with CA center)
With main color, ch 2.
Rnd 1: 6 sc in 2nd ch from hook; do not join but work in continuous rnds.
Rnd 2: 2 Sc in each sc around – 12 sc.
Rnd 3: Working in front lps only, [(sl st, ch 1, dc) all in next sc, dc in next sc, ch 1] 6 times, sl st in first sl st – 6 petals.
Rnd 4: Ch 1, holding petals toward you, sc in each rem back lp around – 12 sc.
Rnds 5 and 6: Sc in each sc around. Stuff lightly.
Rnd 7: Working in back lps only, [dec over next 2 sc] 6 times. Fasten off. Draw rem sts tog tightly.
Bottom Edge
Join main color to rem lps of Rnd 7; sl st in each lp around. Fasten off. Weave in ends.
Center
Make same as center of Chocolate Ruffle. Sew to center of flower.
Jordan Almond
(Make 1 CC and 1 CF)
Rnd 1: Ch 2; 6 sc in 2nd ch from hook; do not join but work in continuous rnds.
Rnds 2-4: 2 Sc in next sc, sc in each sc around – 9 sc at end of Rnd 4.
Rnds 5 and 6: Dec over next 2 sc, sc in each sc around –7 sc at end of Rnd 6. Stuff lightly.
Rnd 7: Rep Rnd 5. Fasten off. Draw rem sts tog.
Polka Dot Chocolate
(Make 1 CA)
Top-Rnds 1-3: Work same as Rnds 1-3 of Round Chocolate. Fasten off. Sew tiny pearls on top of this piece.
Bottom
Rep Rnds 1-3 of top; do NOT end off; with wrong sides tog, sl st the 2 pieces tog through back lps. Do not stuff.
Notes:
To make this free crochet pattern, we recommend the following materials. They can all be found at a discount at CutRateCrafts.com!
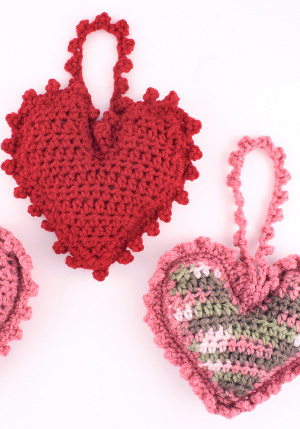
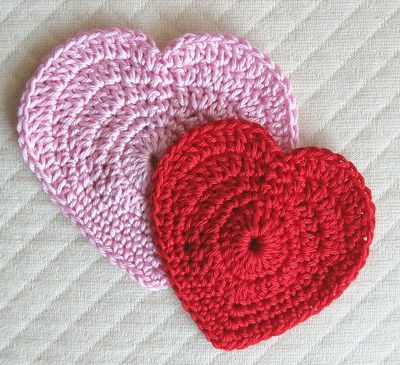
Read NextPink and Red Crochet Hearts Pattern
Your Recently Viewed Projects
Thanks for your comment. Don't forget to share!
mulberrygalprinces s
Jul 12, 2016
What a darling idea. It looks so real. I hope I don't try to eat any of them. The instructions seem easy, and I should be able to make a box up quickly. And I know everyone I give one too will love them. Thank you for sharing this great pattern.
alittlejoy
Jun 08, 2013
I made this and thought it was a great pattern! However, I noticed there was not an oval chocolate so I wrote a pattern for one. You can get the pattern from my blog: http://alittlejoyeveryday.blogspot.com/2013/06/pinished-projects-chocolate-valentines.html
ashleycris 4501432
Feb 03, 2012
Could you upload a video or instructions for a beginner? I would appreciate it!
leo02 6800394
Mar 02, 2011
Greetings all. I made 6 sets of chocolates & heart boxes for friends and family. All were amazed at how real the chocolates looked. Instead of using the crochet box pattern, which I was not fond of upon completion, I fabric covered papper mache heart boxes and embellished the tops with a crocheted rose Exceptional. Thank you for the pattern. leo02 6800394
PugNotes
Feb 13, 2011
What a wonderful project! I just finished 3 candies that were fast, fun and easy to make! They turned out so rich and fancy! My pug, Emmitt is very impressed and excited about his Valentine's Treats with extra fiber. :) http://pugnotes.blogspot.com/2011/02/emmitts-sweet-sunday.html
chouxqltr
Feb 05, 2011
No, problem here with seeing the pattern for the Chocolate box. It is right after the "abbreviations"
kobuu
Feb 01, 2011
not sure what the problem is but the pattern for the box is CLEARLY before the chocolates.
leo02 6800394
Jan 09, 2011
Great idea. They look very yummy! Just wondering where the pattern for the heart shaped box can be located? If you could email it to me that would be fantastic, super fantastic. e-mail leo02@zoominternet.net Thanks again Andrea
Member 5959057
Jan 01, 2011
I would like the pattern for the valentine box sent to me as when I try to fine it I get nothing. please send to:normasil123@embarqmail.com Thank you
markayecarlson 948 4911
Dec 22, 2010
Where is the heart box pattern???? I have tried to find it and it just pops up with a blank page. Please email it to me at markayecarlson@yahoo.com. Thank you, MarKaye Carlson
purplelady10usyaho ocom
Feb 18, 2010
This looks great! I will be makeing a few of these for next year. thank you for this pattern.
Report Inappropriate Comment
Are you sure you would like to report this comment? It will be flagged for our moderators to take action.
Thank you for taking the time to improve the content on our site.